
We bought a house last December. I haven't shared anything about the house yet besides a few little snaps on my Instagram here and there. This is our first home and it's been so fun and rewarding to get to see the changes we've made in it. I am pretty sure my husband knew going into this house that a lot of the design elements were going to be up to me, he really let me bring my visions to life. I remember drawing each room out on paper first, with measurements and colors all labeled, and room by room and I put down my vision. I got a lot of questionable responses on some of my decisions- like why I would paint perfectly good cabinets, why I would get rid of perfectly good cabinets, wouldn't doing half of the bathroom tile in one color look weird, are you sure you really want to go WHITE everywhere? This was just one of those projects that I have a vision for though so YES, I am sure. LUCKILY, we had A TON of help from both a local contractor and both of our dads who are both incredibly handy when it comes to work in houses (again first time home owners, we had no idea how to do about anything)
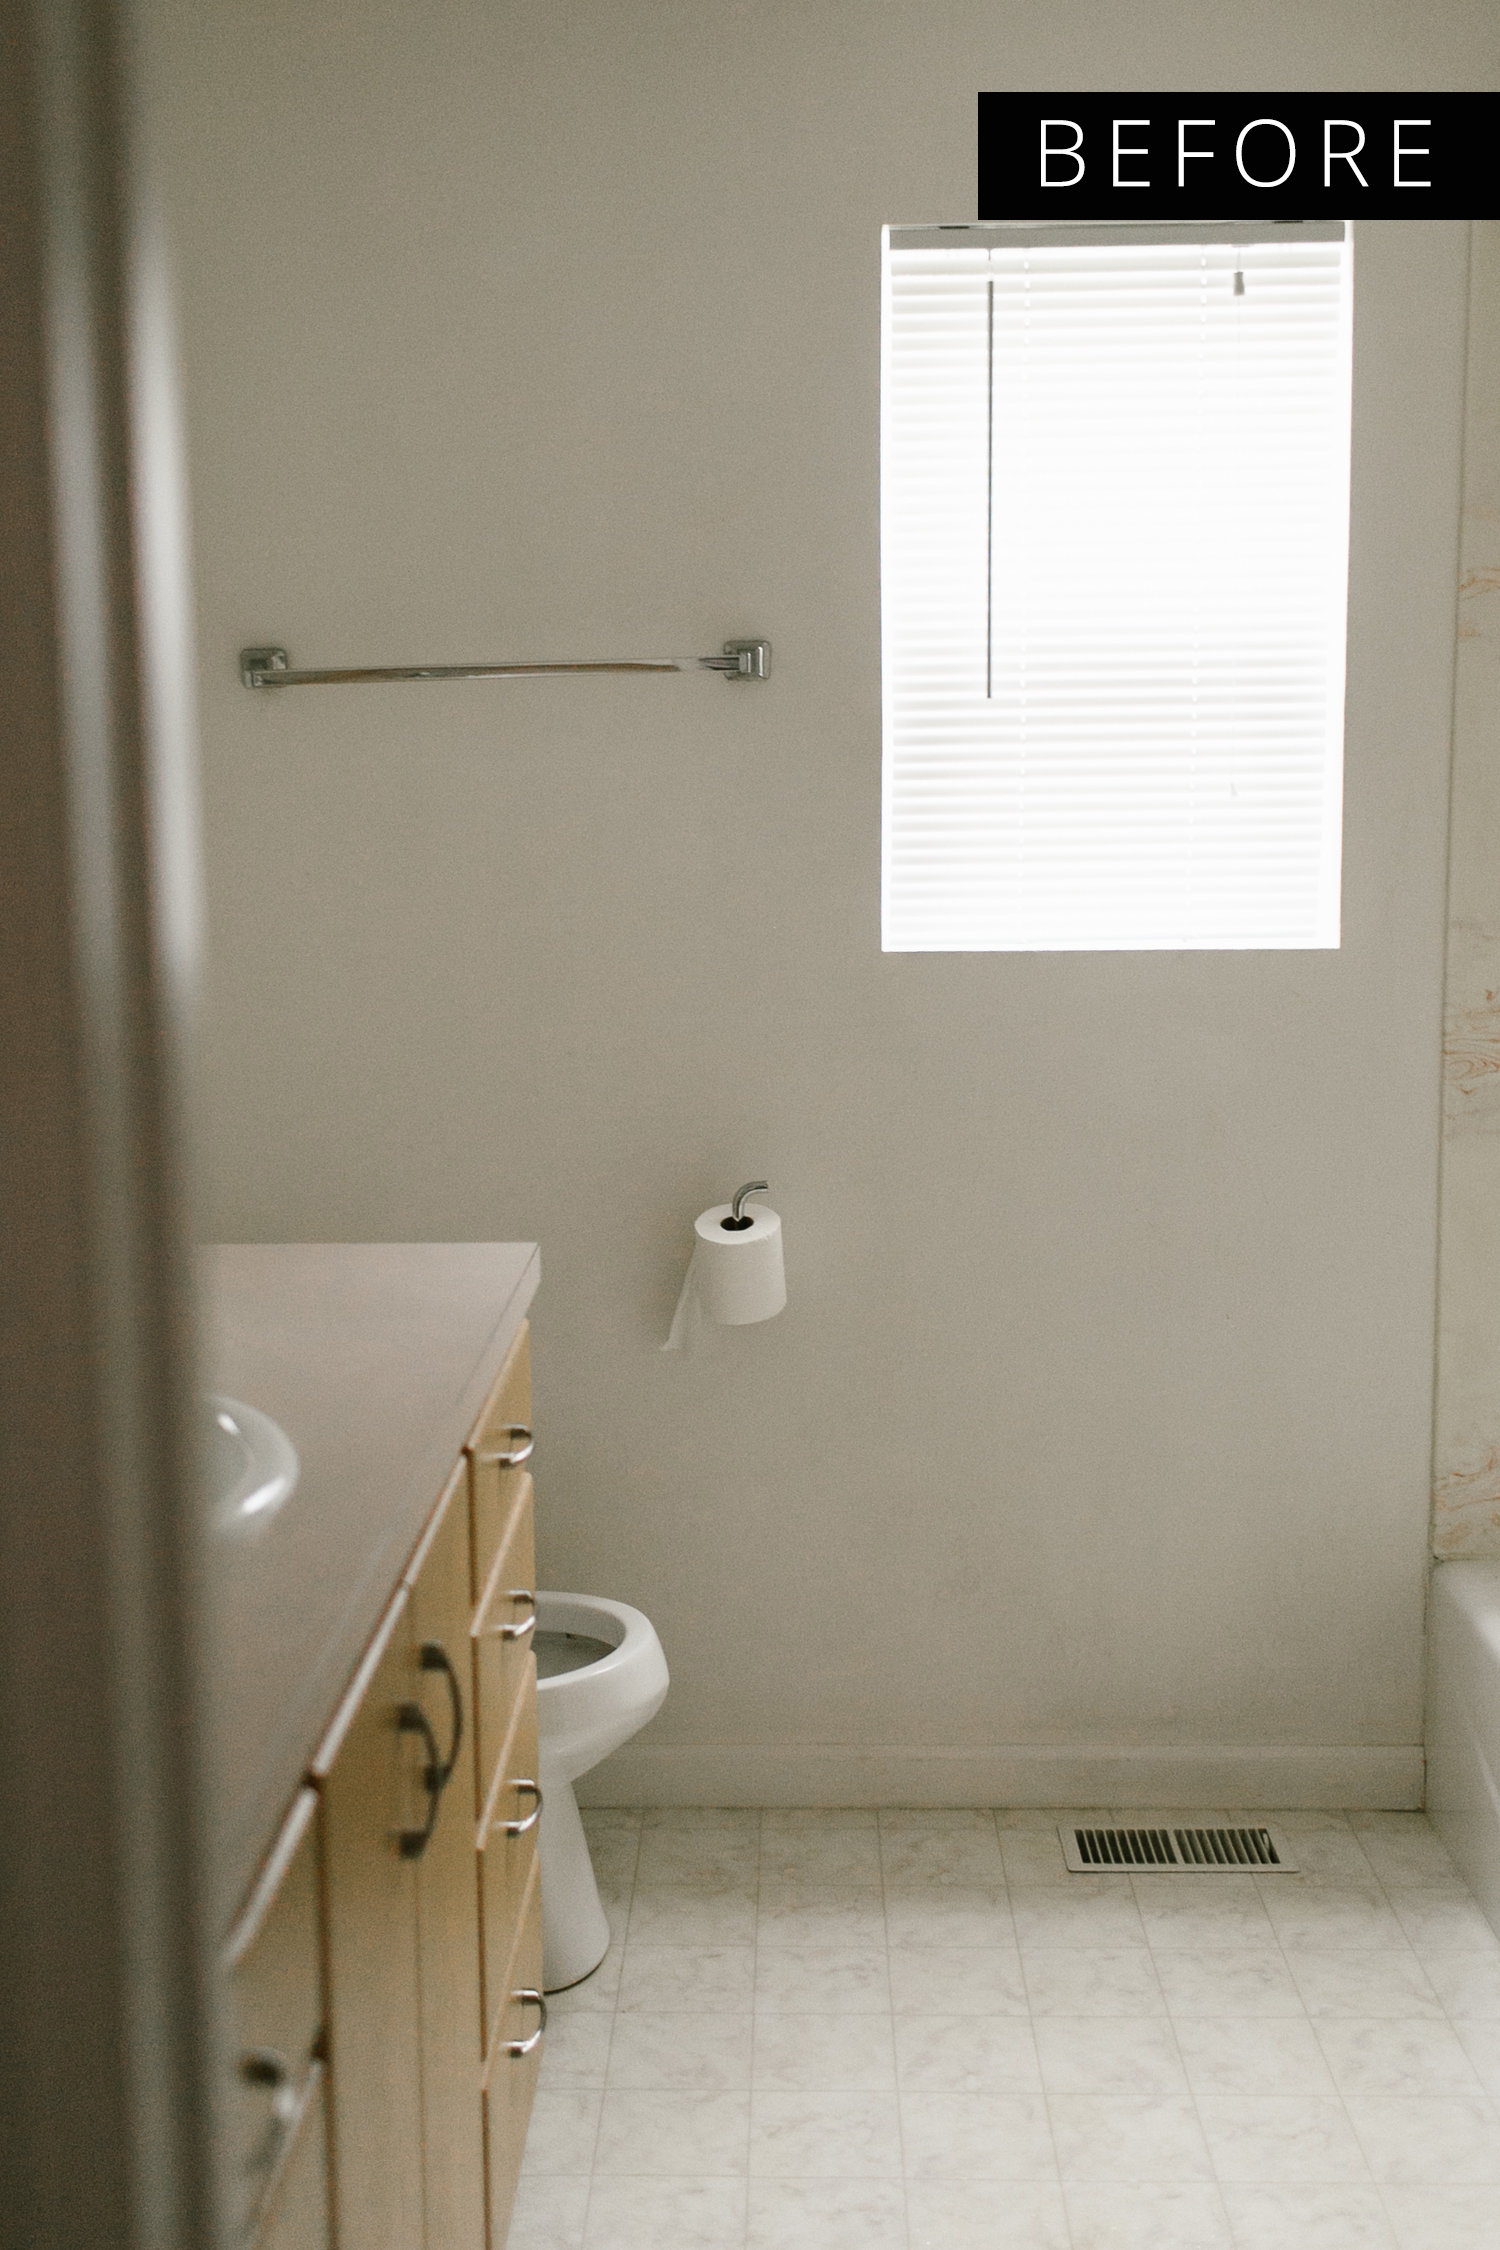
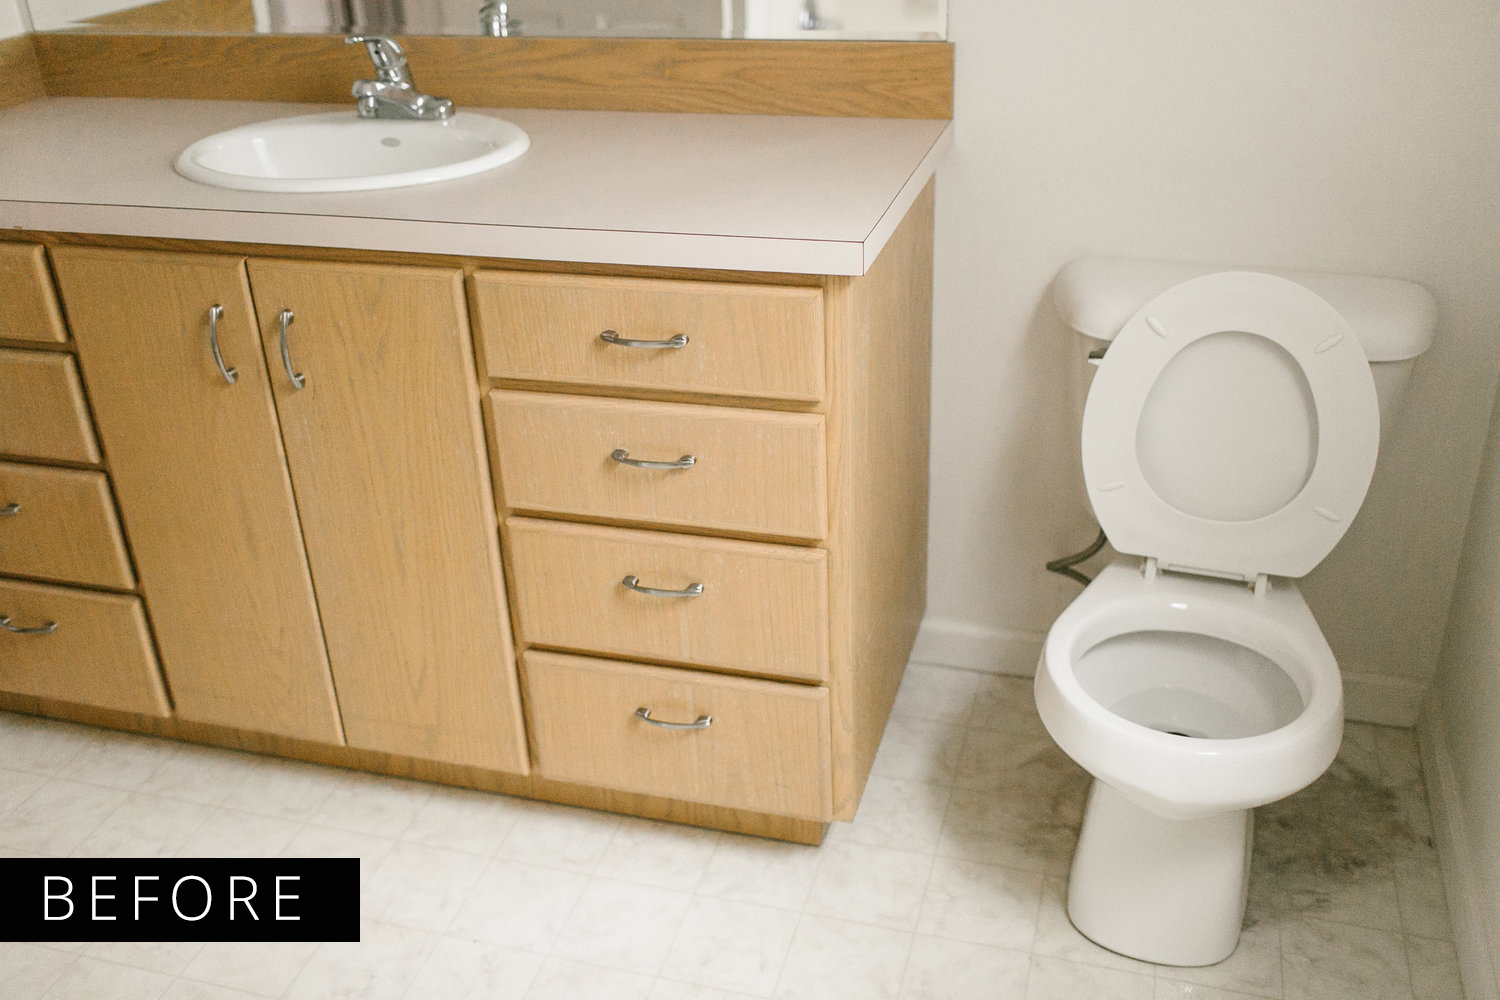
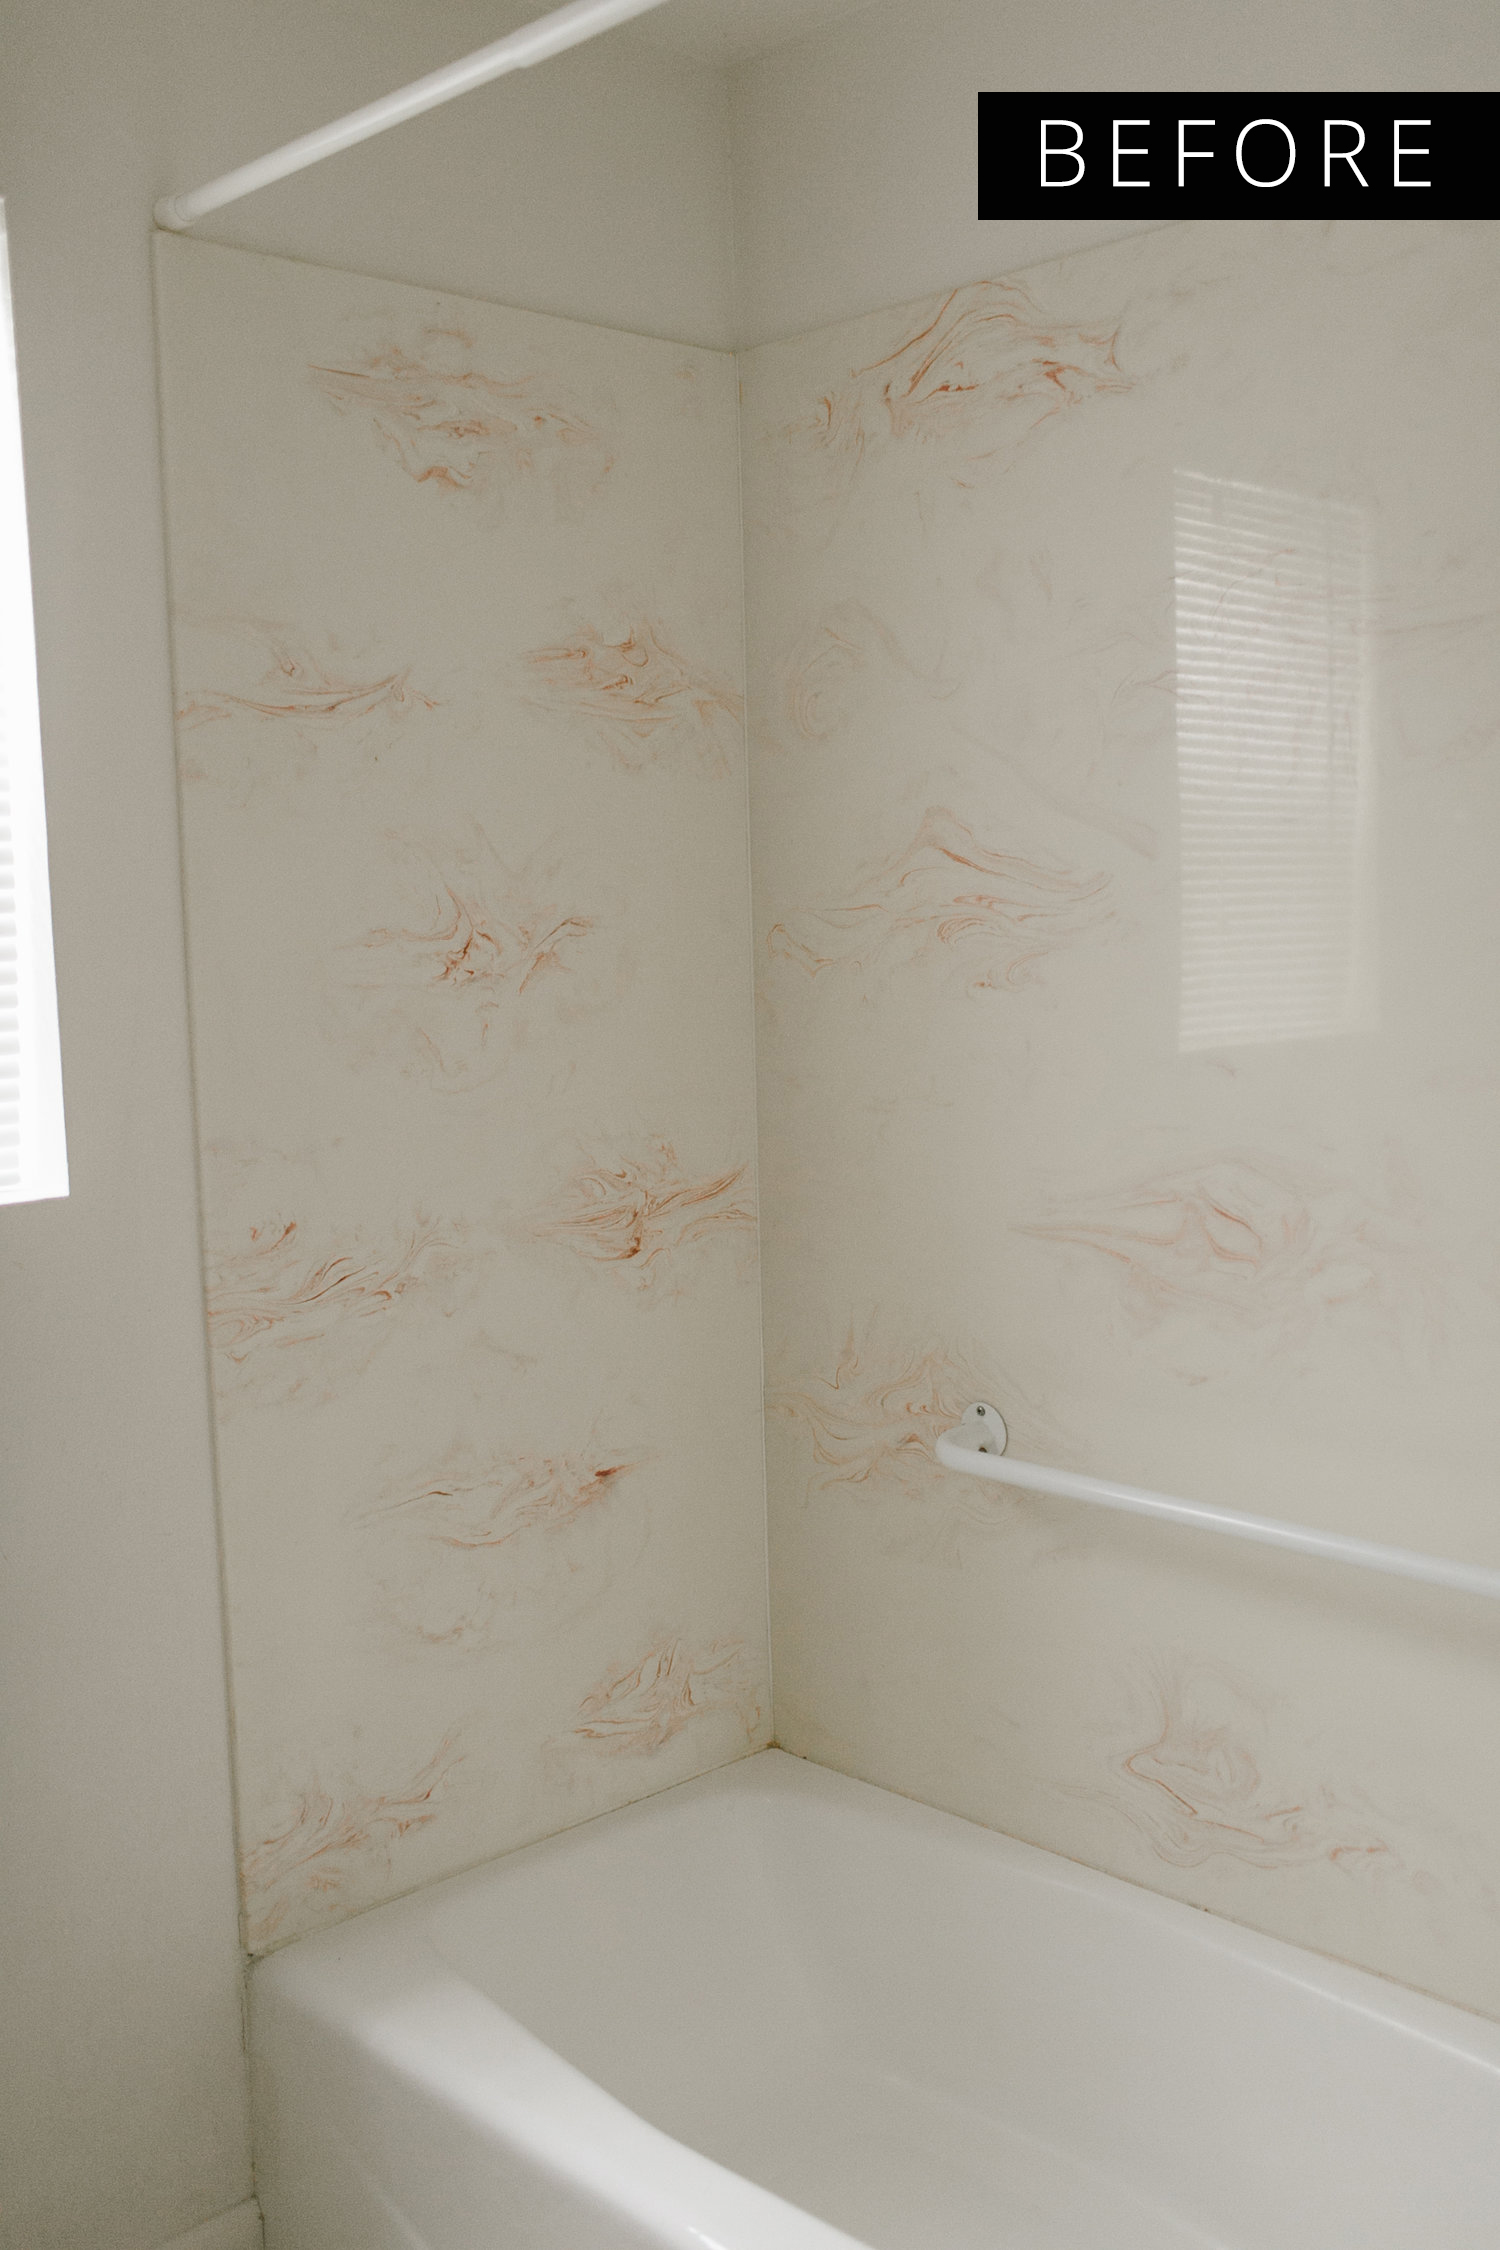
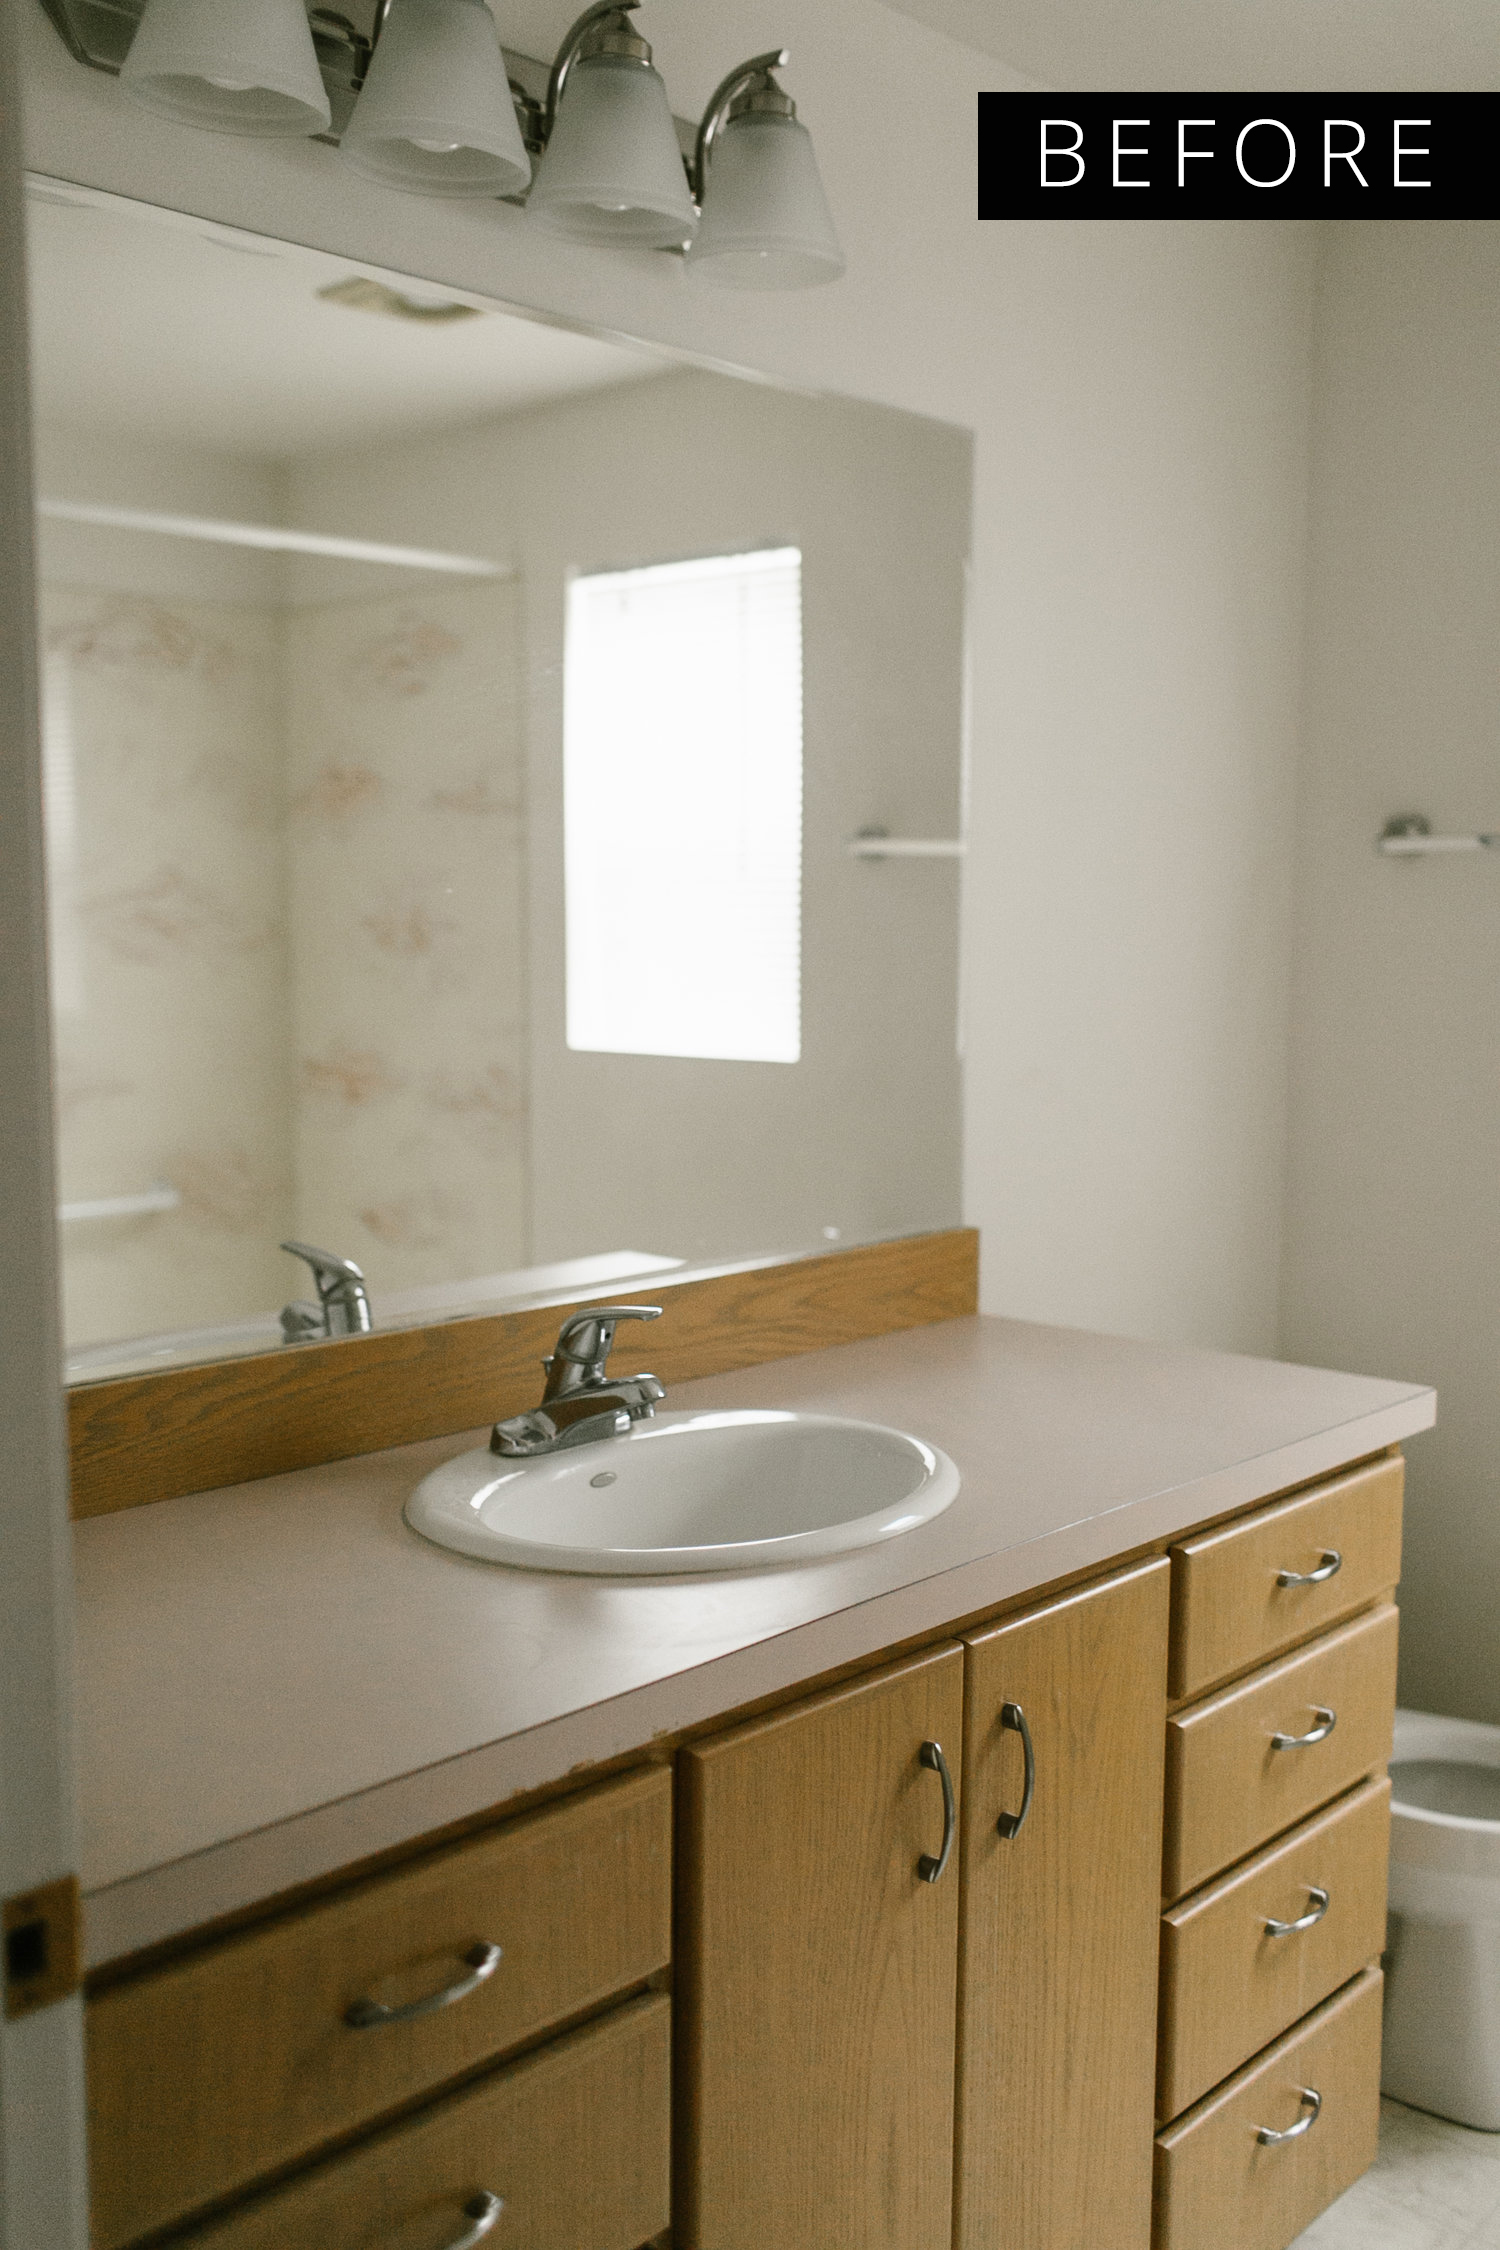
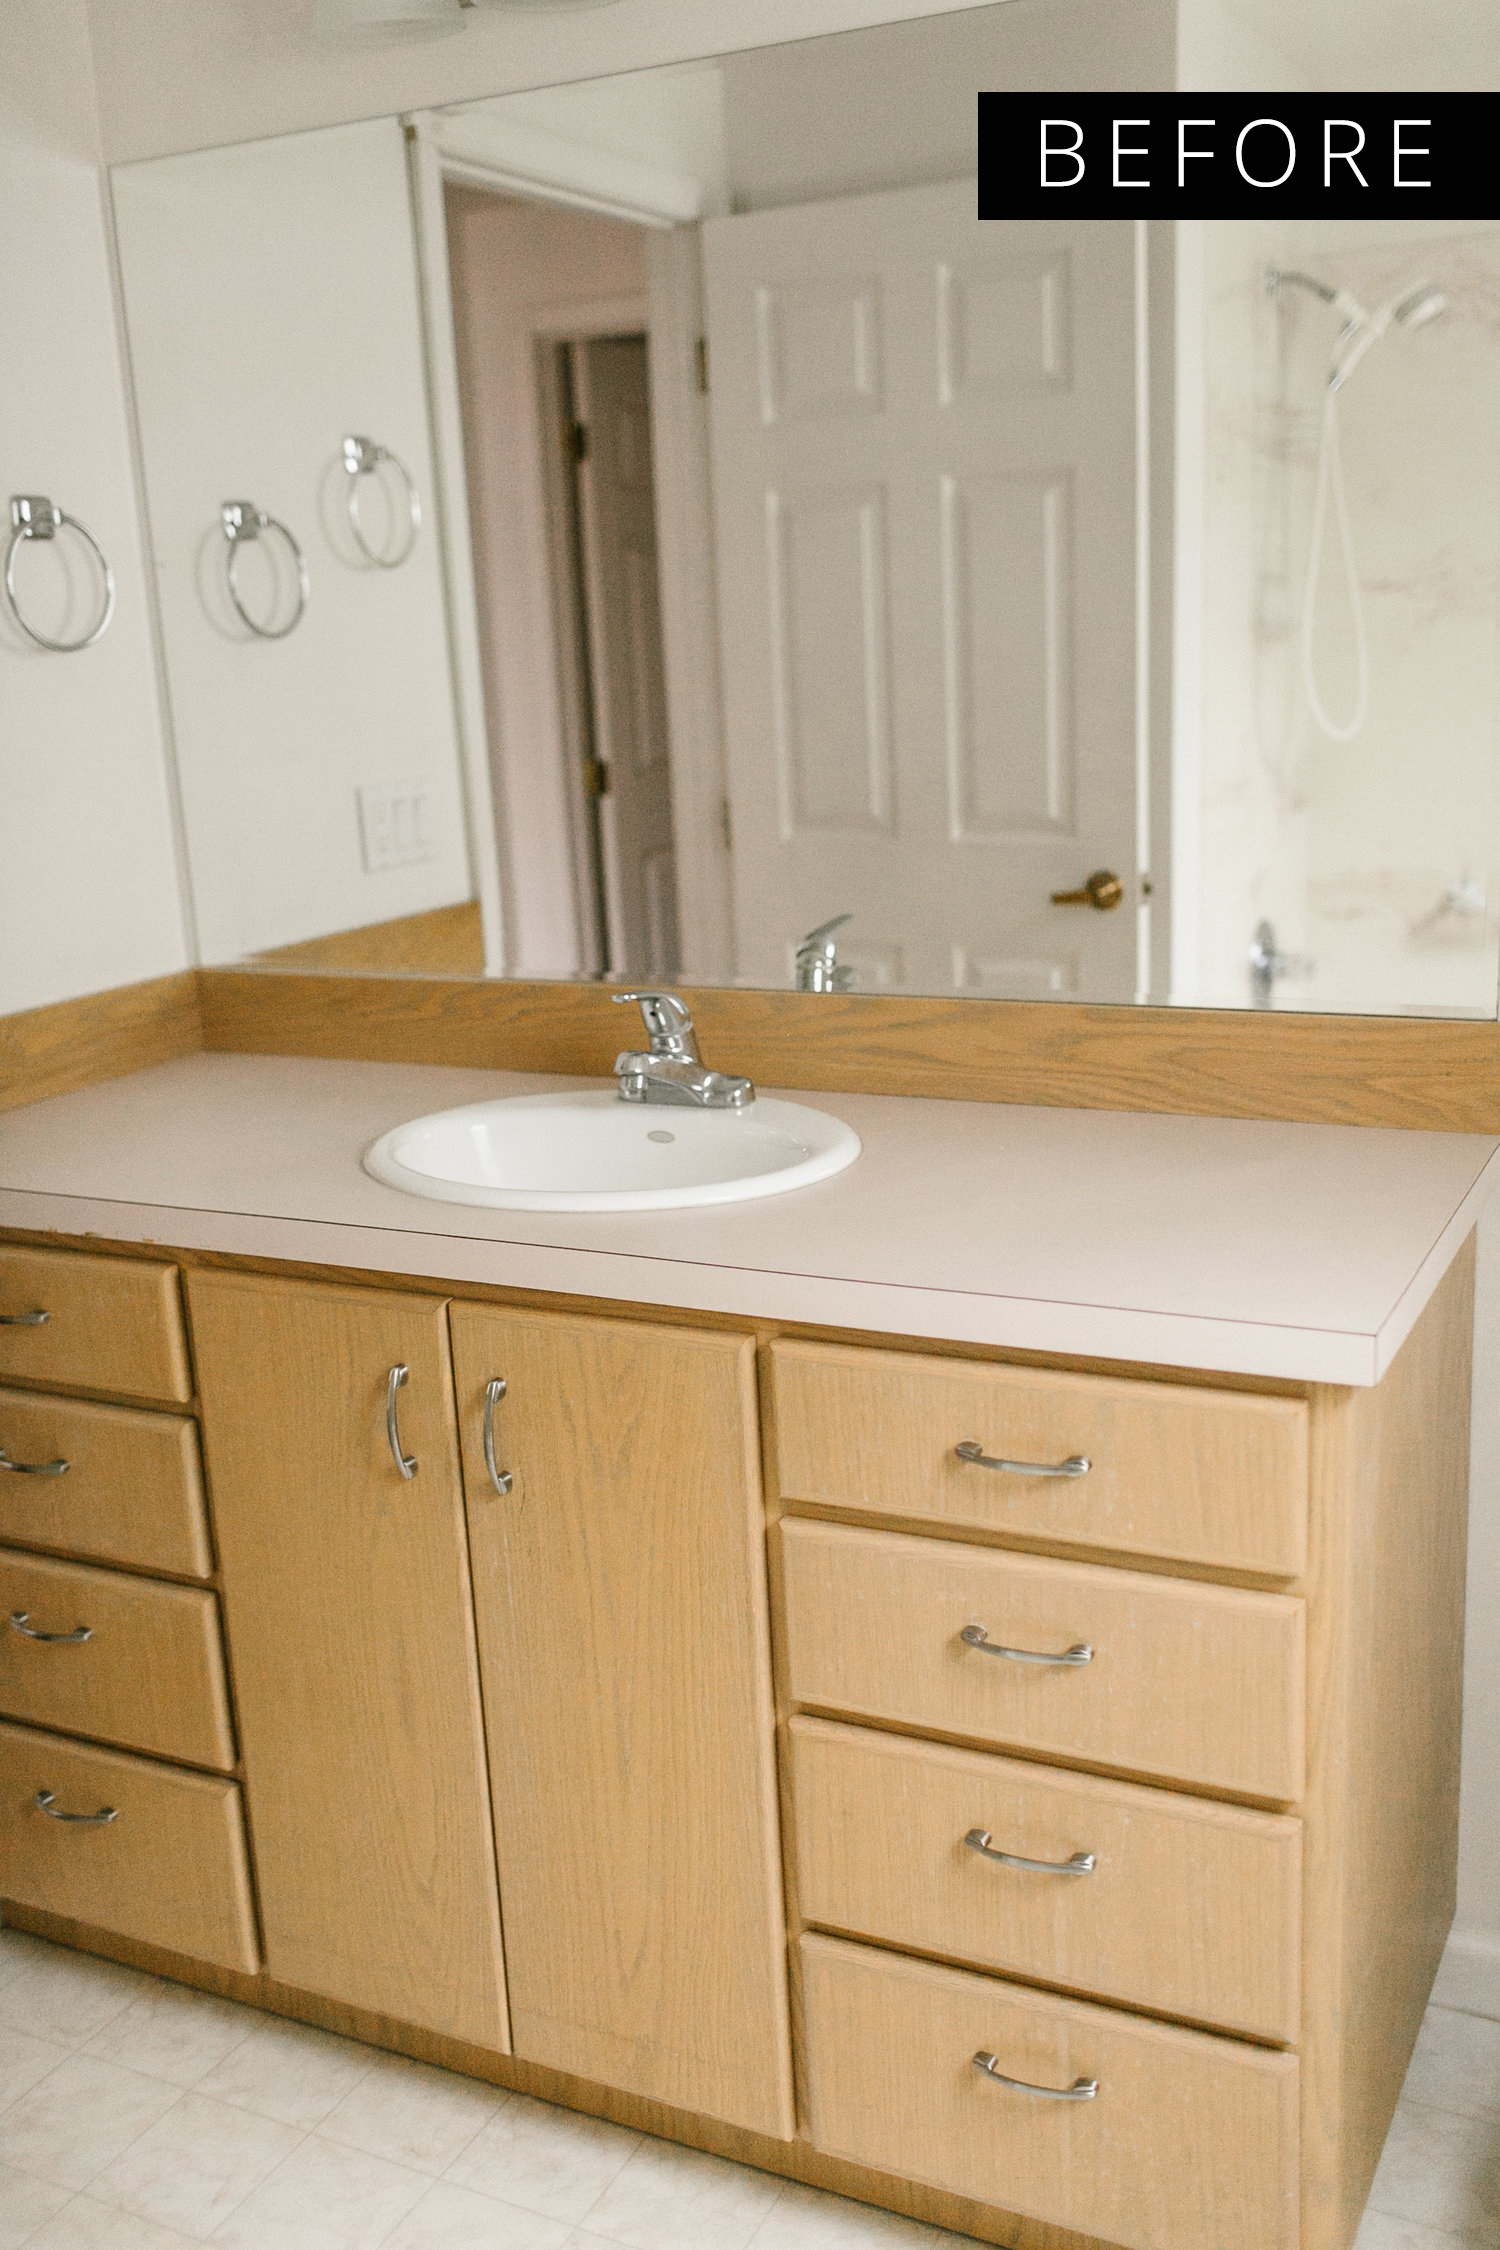
Our home came with some pretty rad purple shag carpet with a theme of pink-ish countertops, bath tub and walls. Everything was well kept though, so aside from removing one wall, for the most part it was cosmetic upgrades. Today I'm sharing our bathroom. It's nothing big or elaborate and if we're both getting ready in the morning it's a bit tight- but I have to say the changes do make the space feel bigger when you're in it.
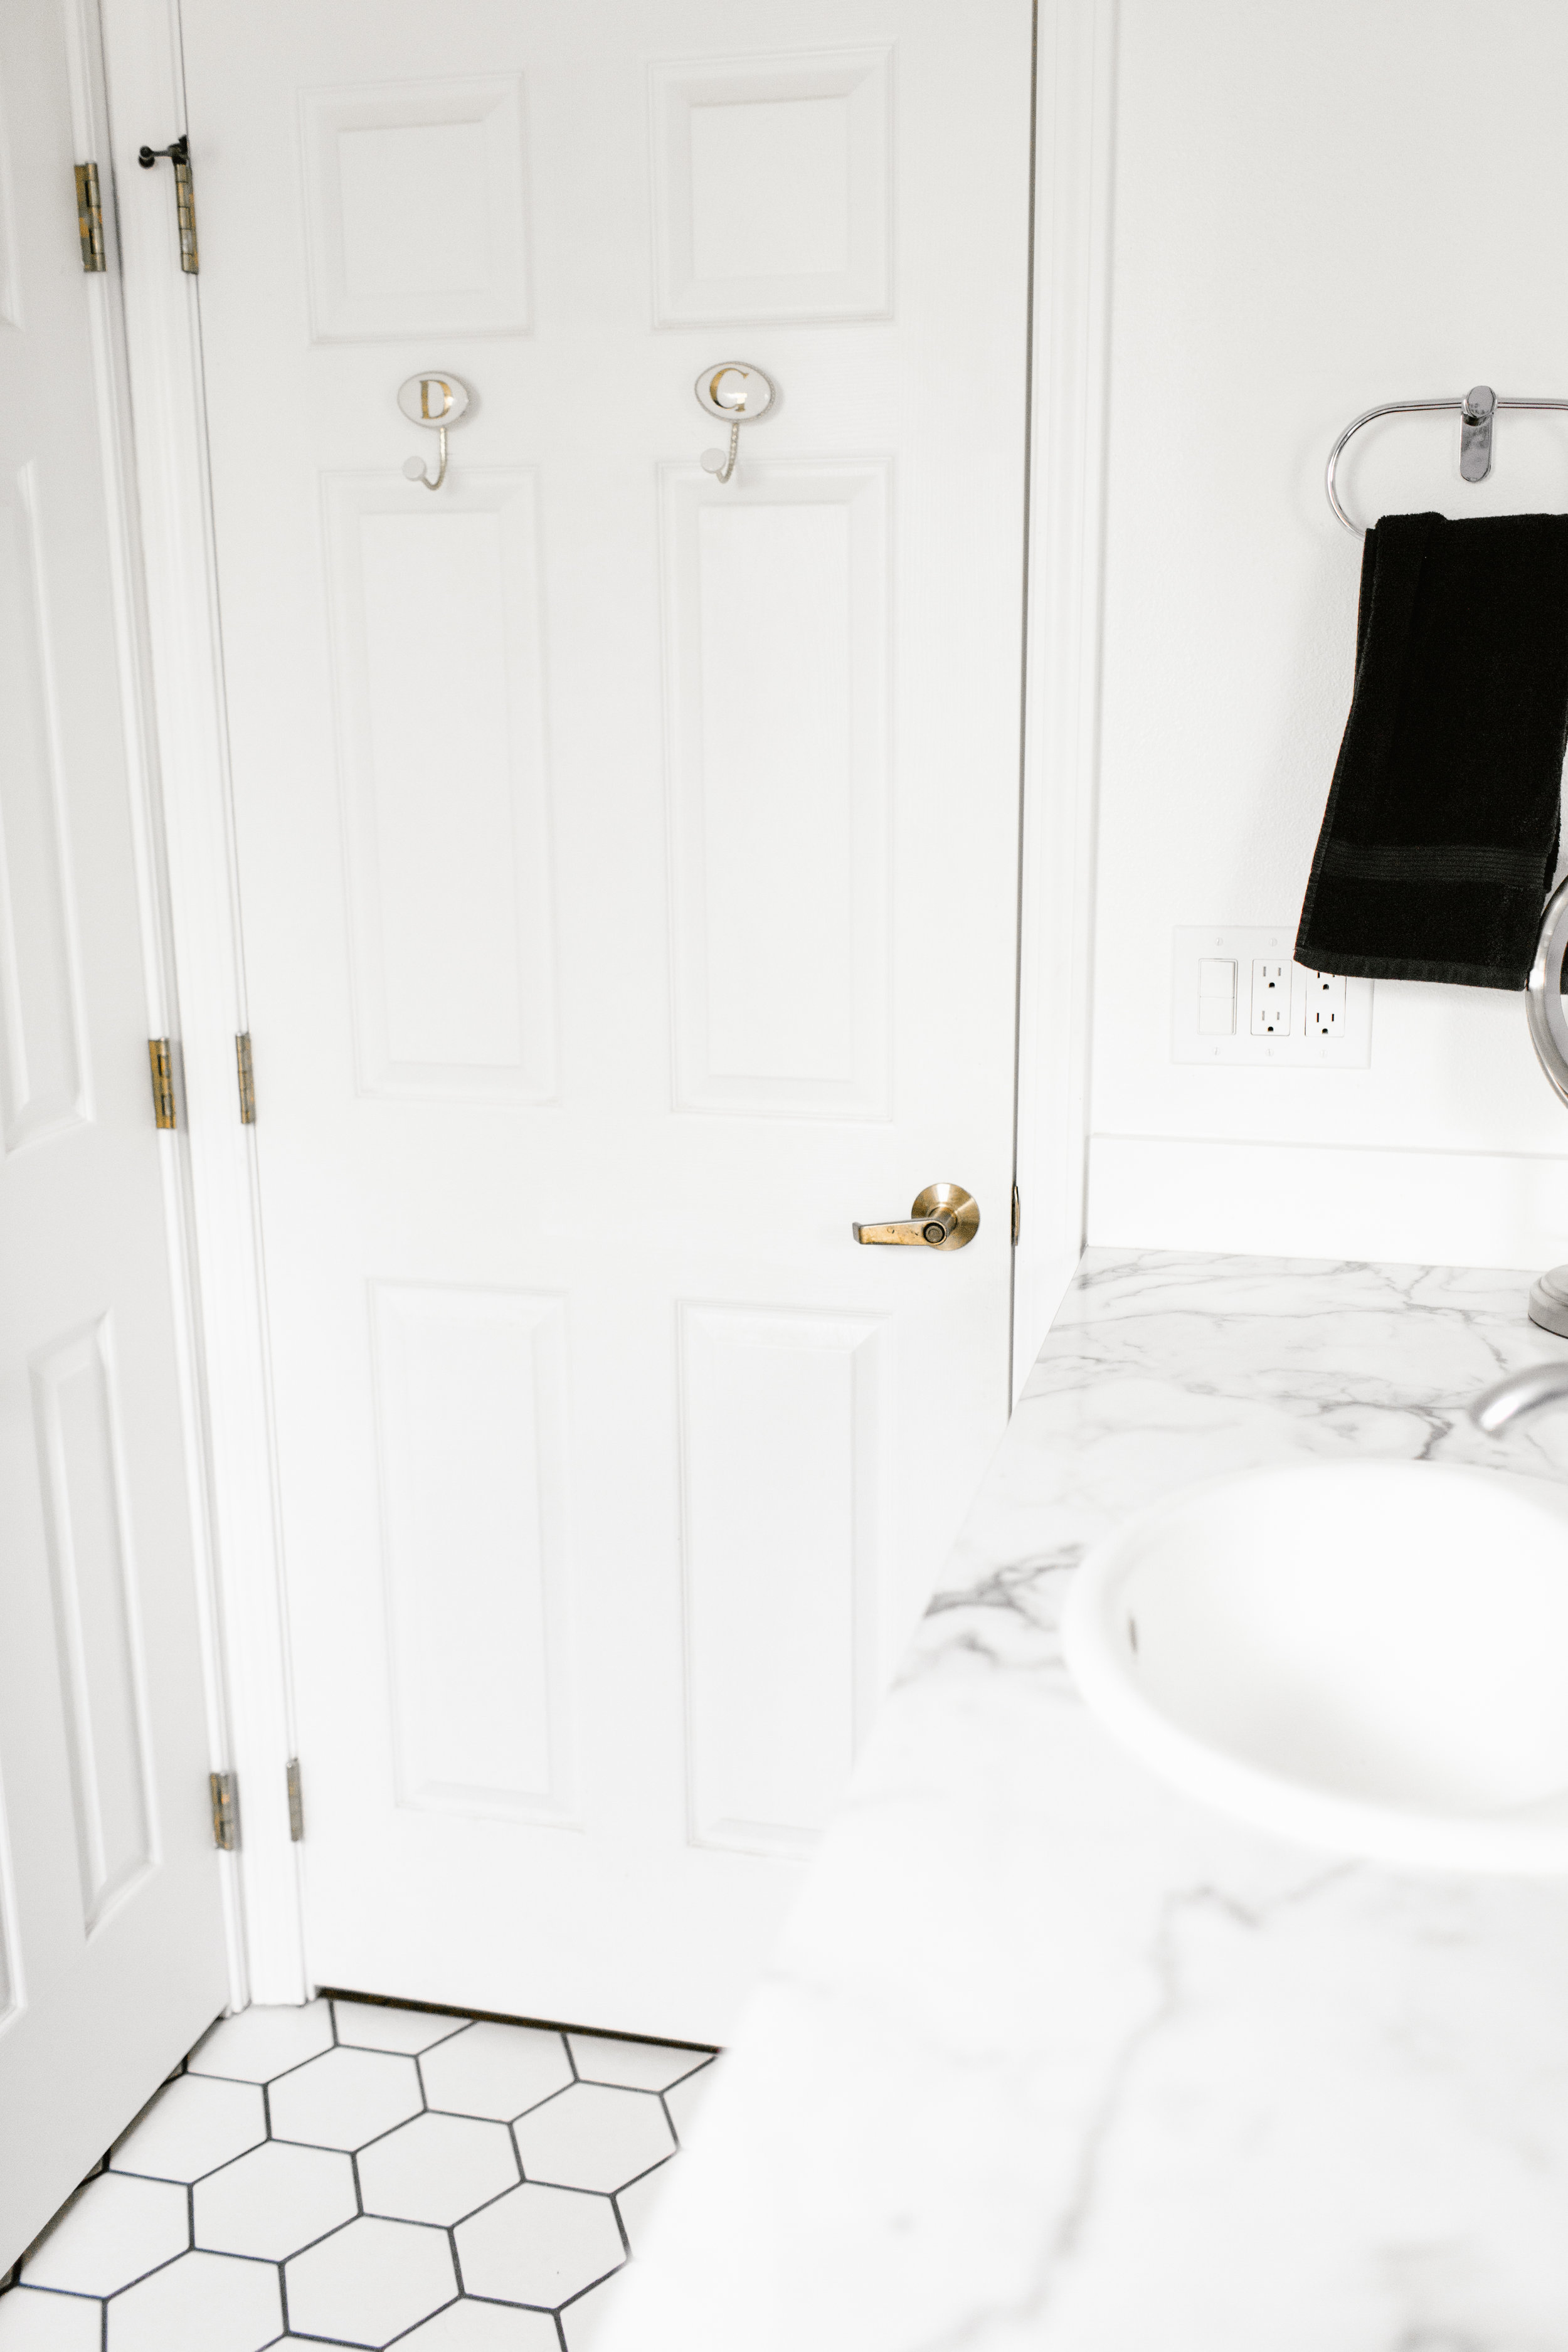
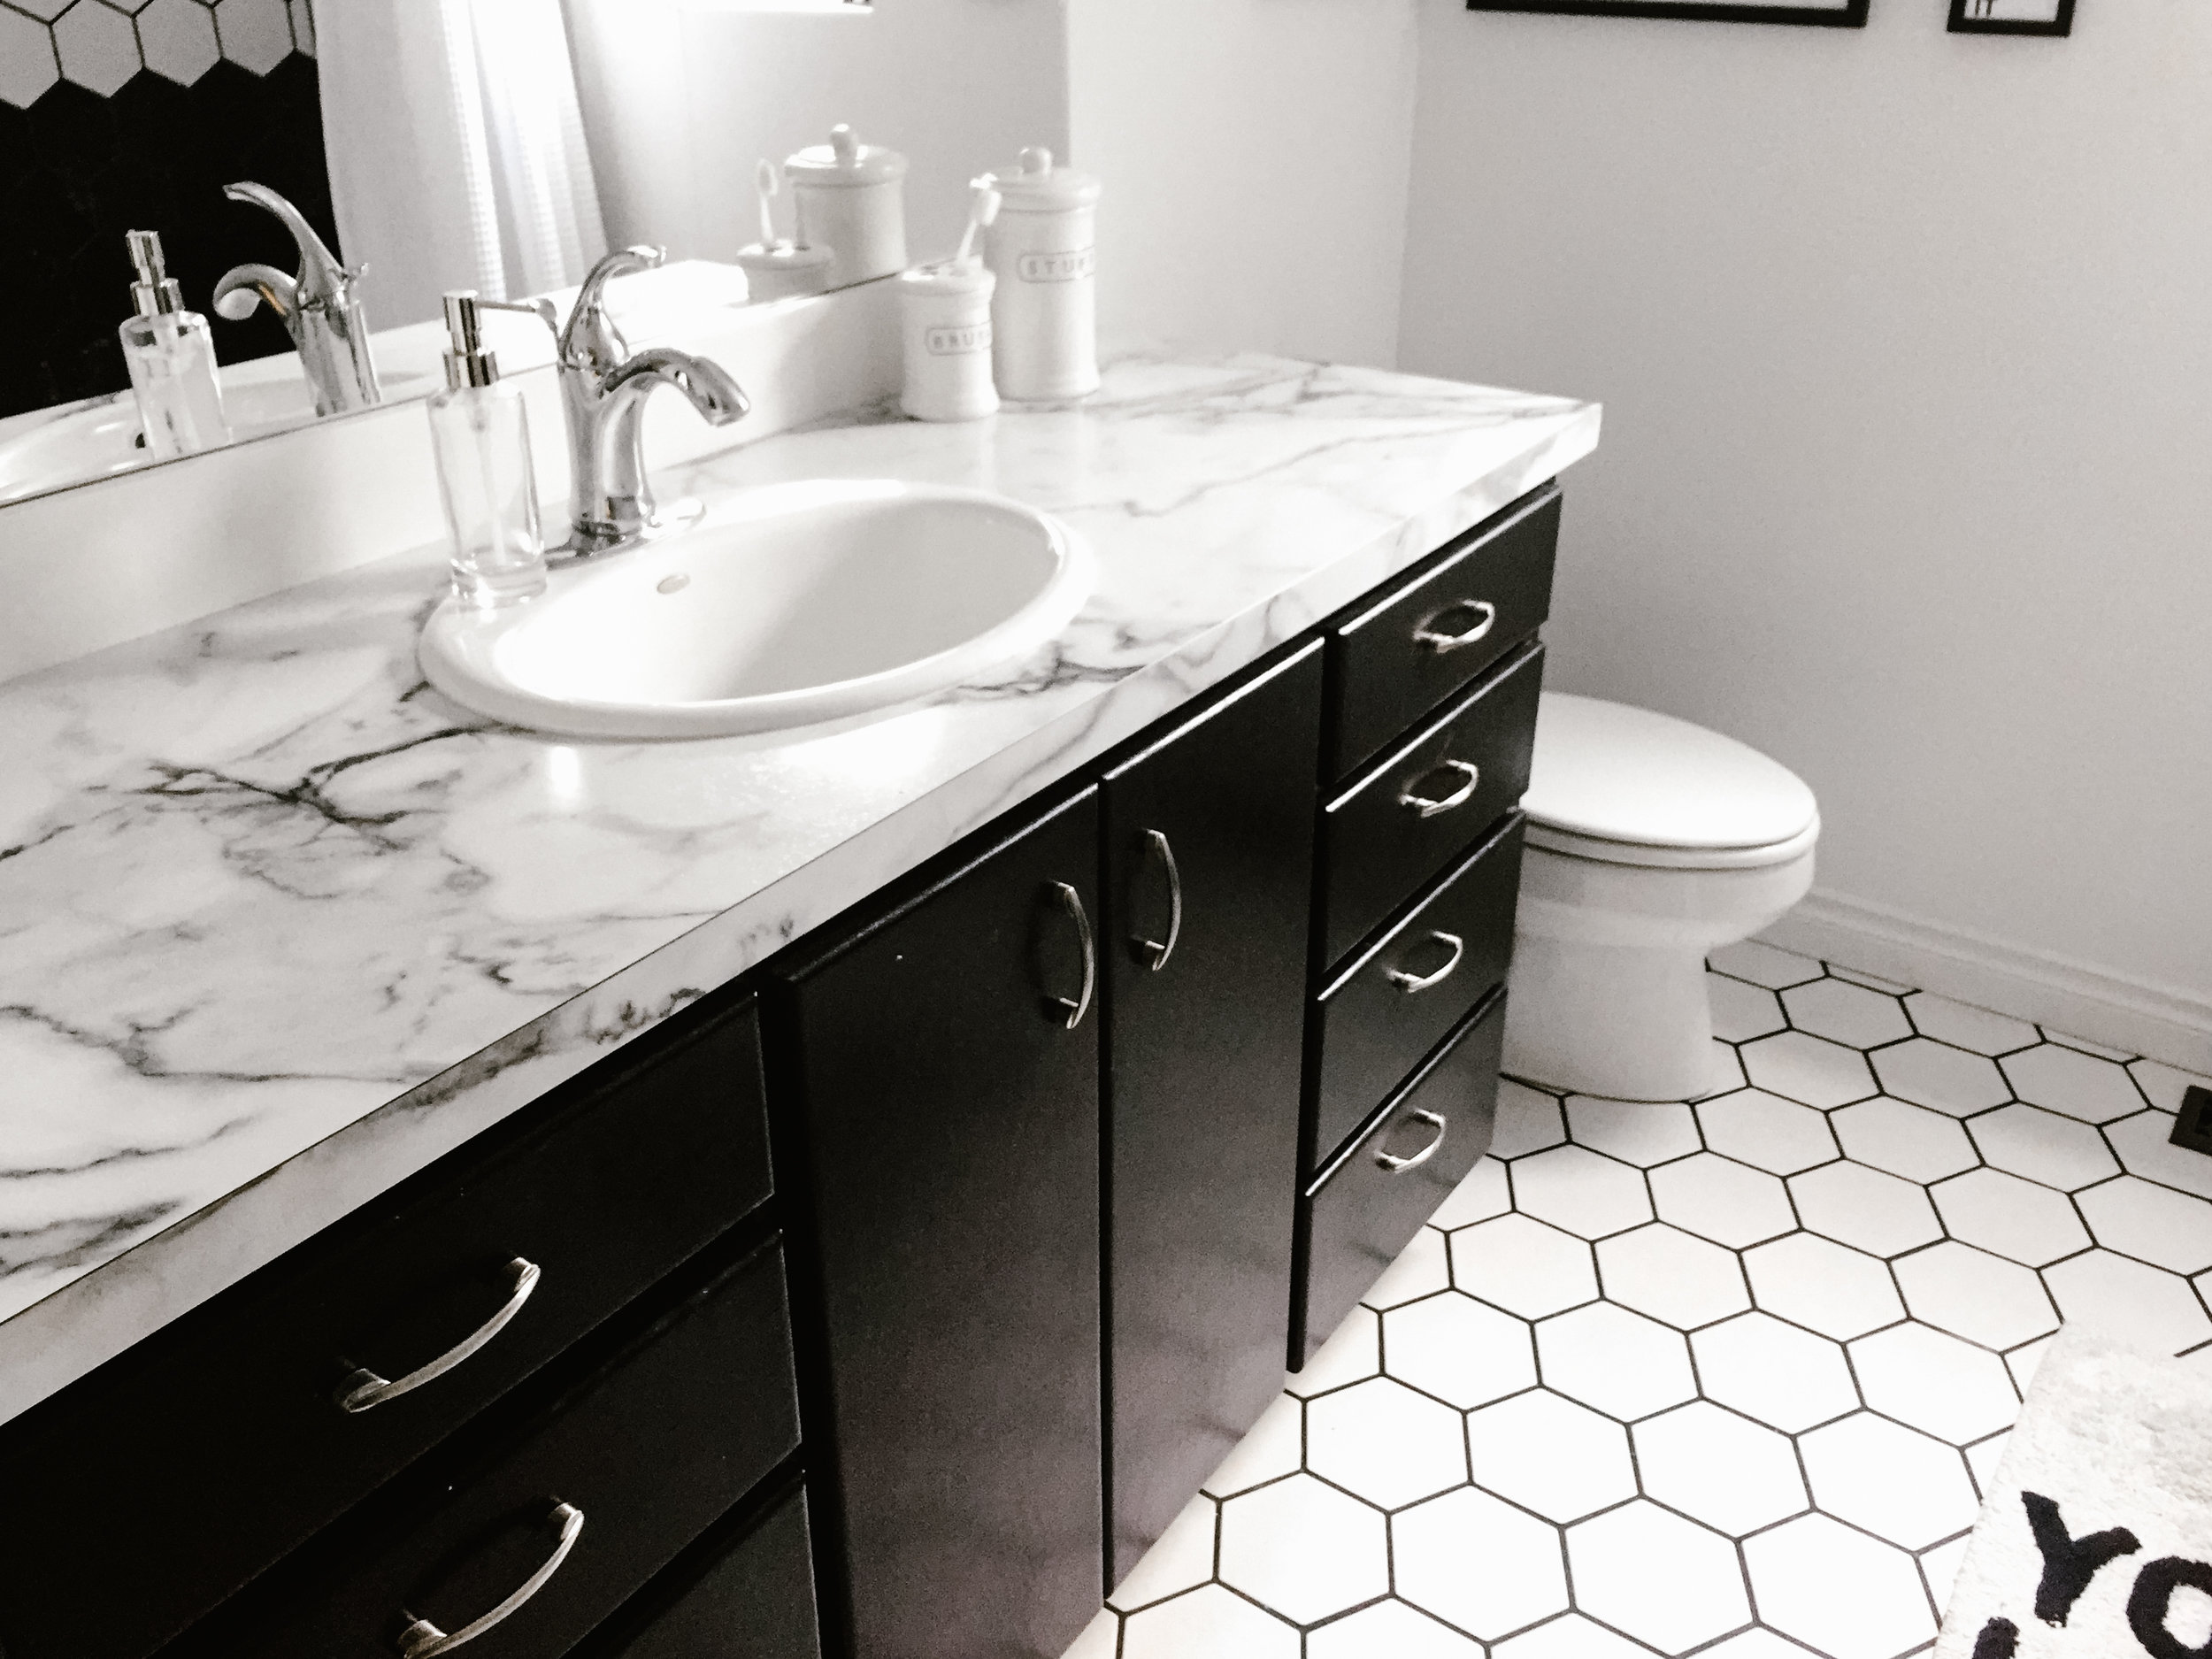
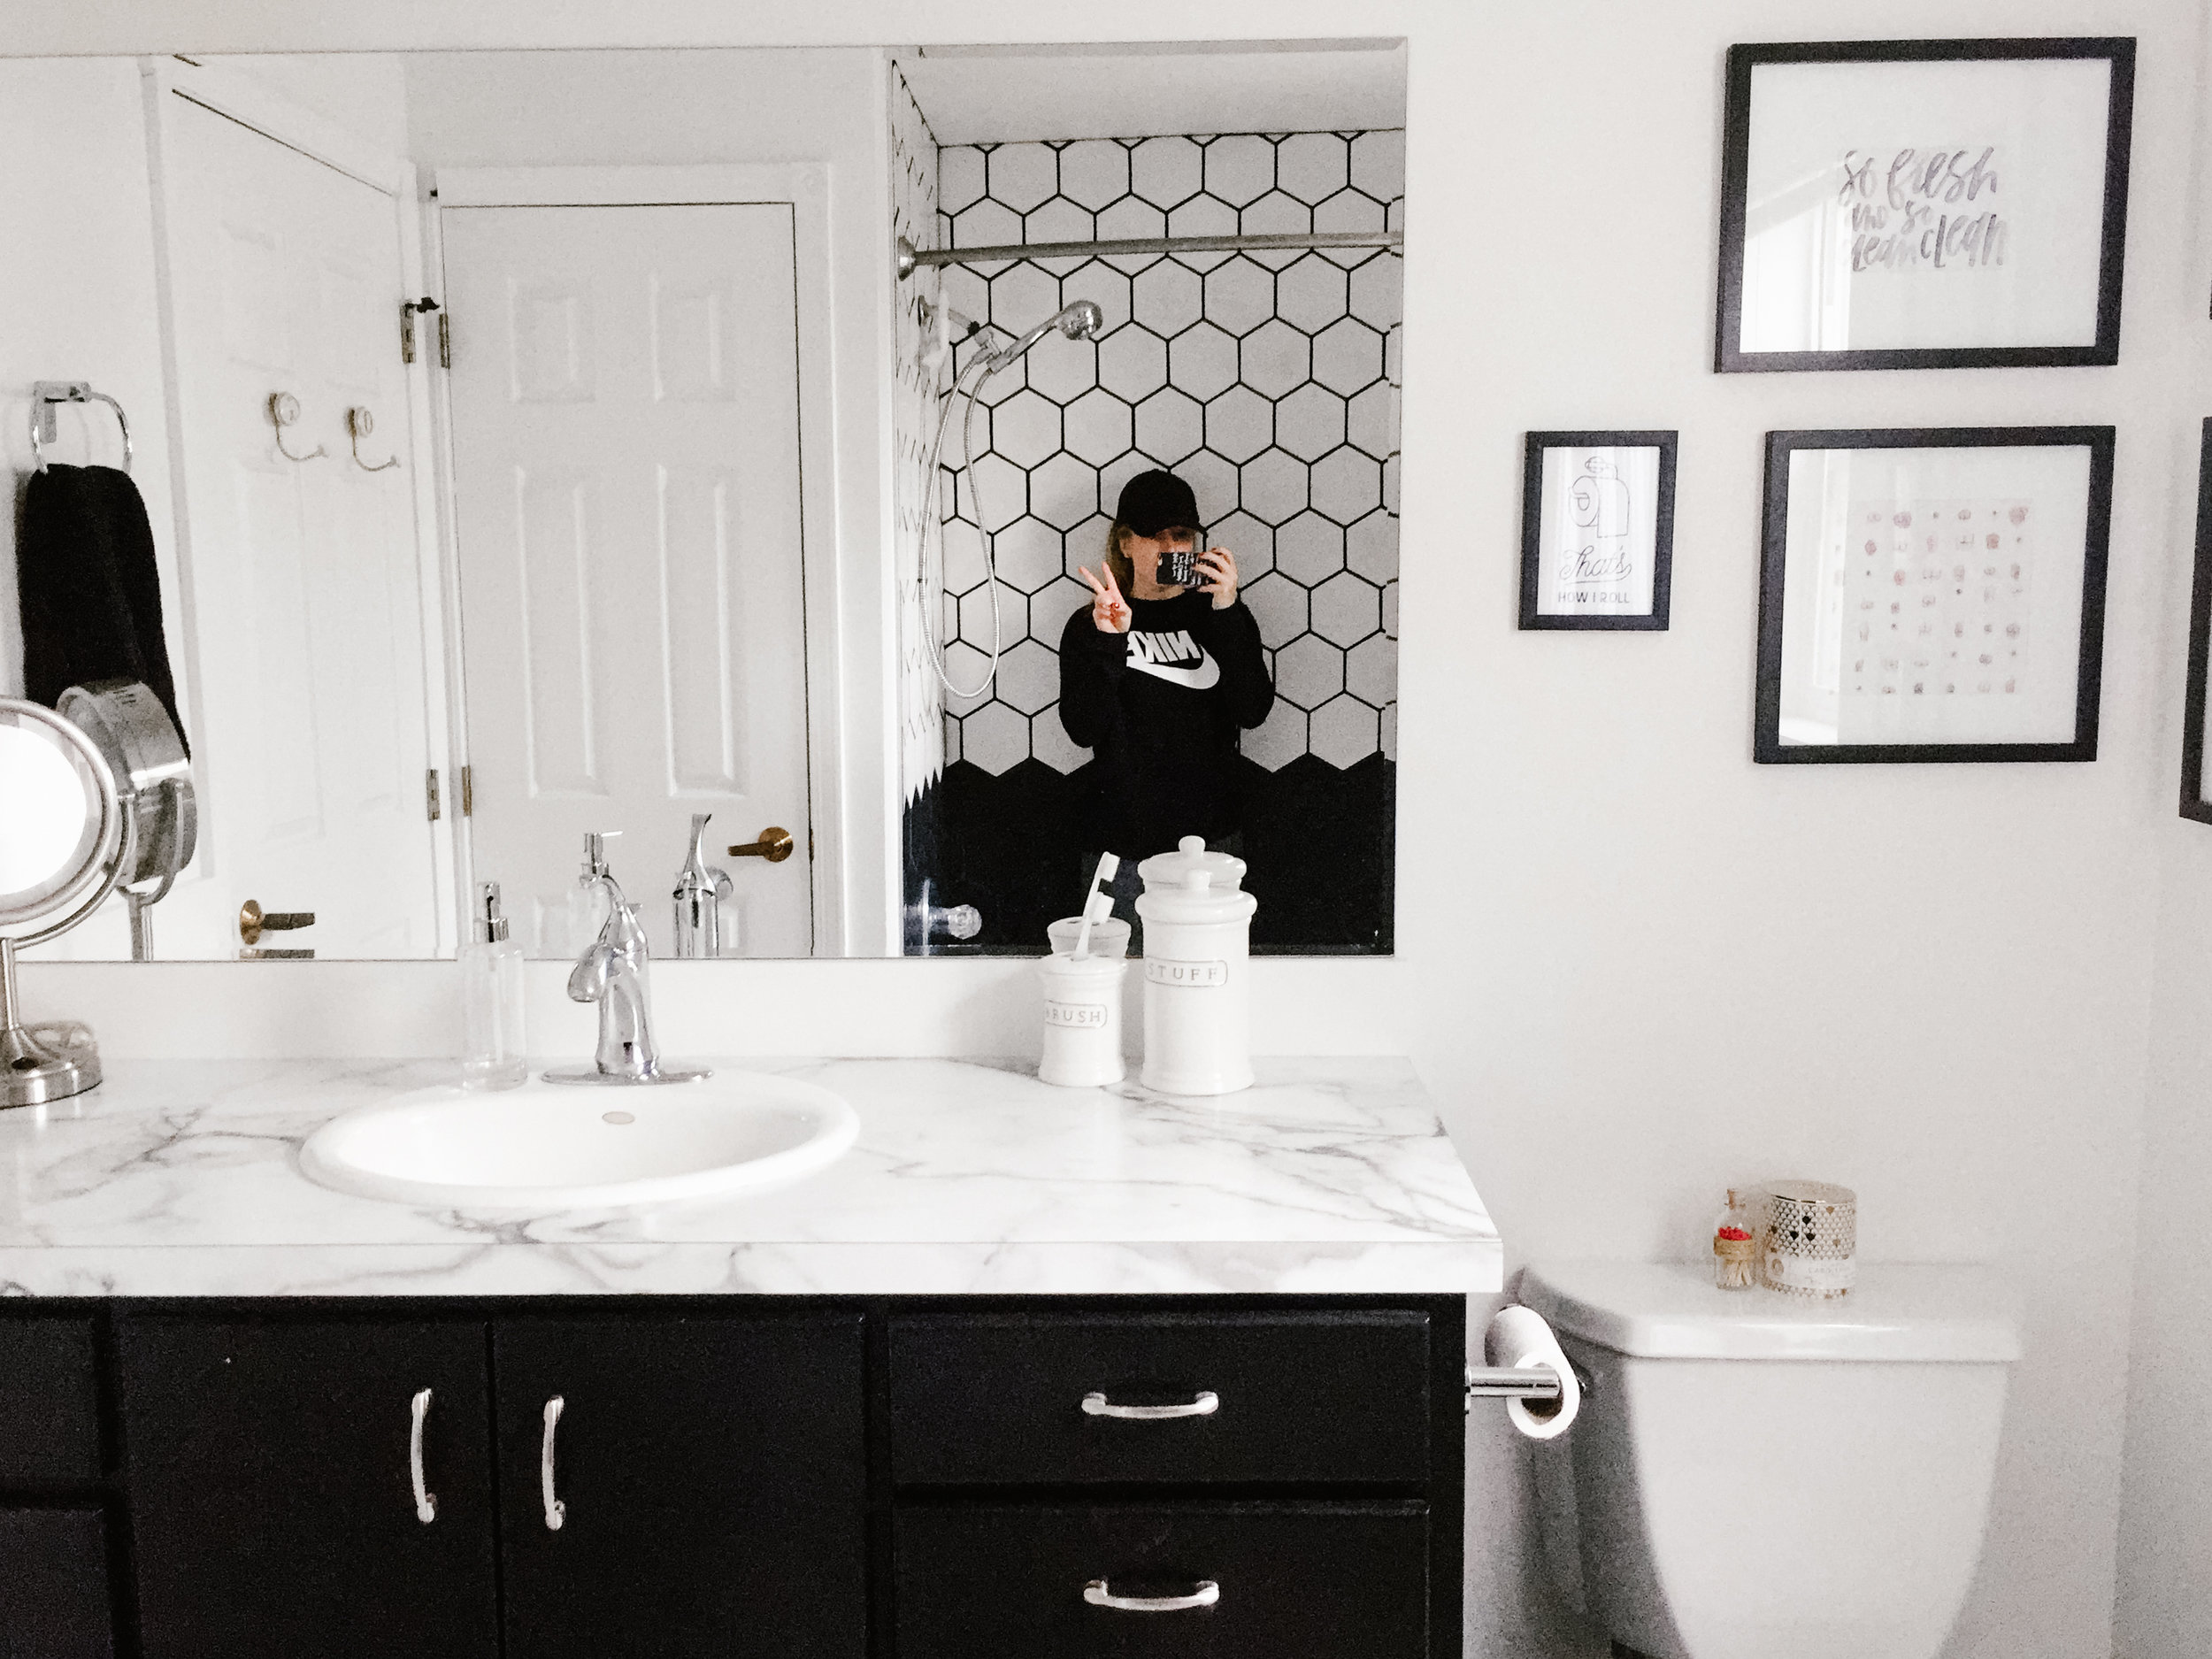
We started with painting everything WHITE. Pure white. Like the white that every shade of white starts with. The guy at Home Depot thought I was the most boring human alive. We pulled up all of the tile and had these super cute hexagon tiles installed and grouted. I contrasted the white floor by painting the cabinets black (my father-in-law did most of the painting here and he did a great job!) We replaced the pinkish formica with some granite looking formica, and upgraded our sink head. The shower was an issue but out of everything, my husband was VERY open to removing the pinkish shower walls. We looked into a lot of options here, buying a whole new shower would be the most expensive for us but would ultimately give us a ton of options. My contractor looked into a method of painting the current shower surround and that was an option for us as well but we also weren't 100% sure how it would turn out. We had some left over tile from the bathroom floors as well that we could maybe do something with. We didn't have enough to fully cover the shower in one color but between the two bathrooms we had enough tile in total to cover the walls. My initial thought was to alternate walls, with the two shorter walls in black and the back wall in white, but we weren't sure we had enough of the black to do that. So we used as much white as possible to keep it light and airy in there, and did a few rows along the bottom in black to finish it off. It turned out incredibly awesome! Our poor contractor though mentioned how hard it was to have to cut the tiles exactly and lay them in place like that, then let them dry without falling off- he had his hands full on that project.
So here we are now almost a year later, and I LOVE being in our bathroom. It seems silly that it's the first room of our house that I'm sharing but it just am beyond happy with how it turned out. I'll work on getting more house update photos for you guys but in the meantime, hopefully this can inspire some of you looking to reno a room or do some upgrades! Thanks for reading!
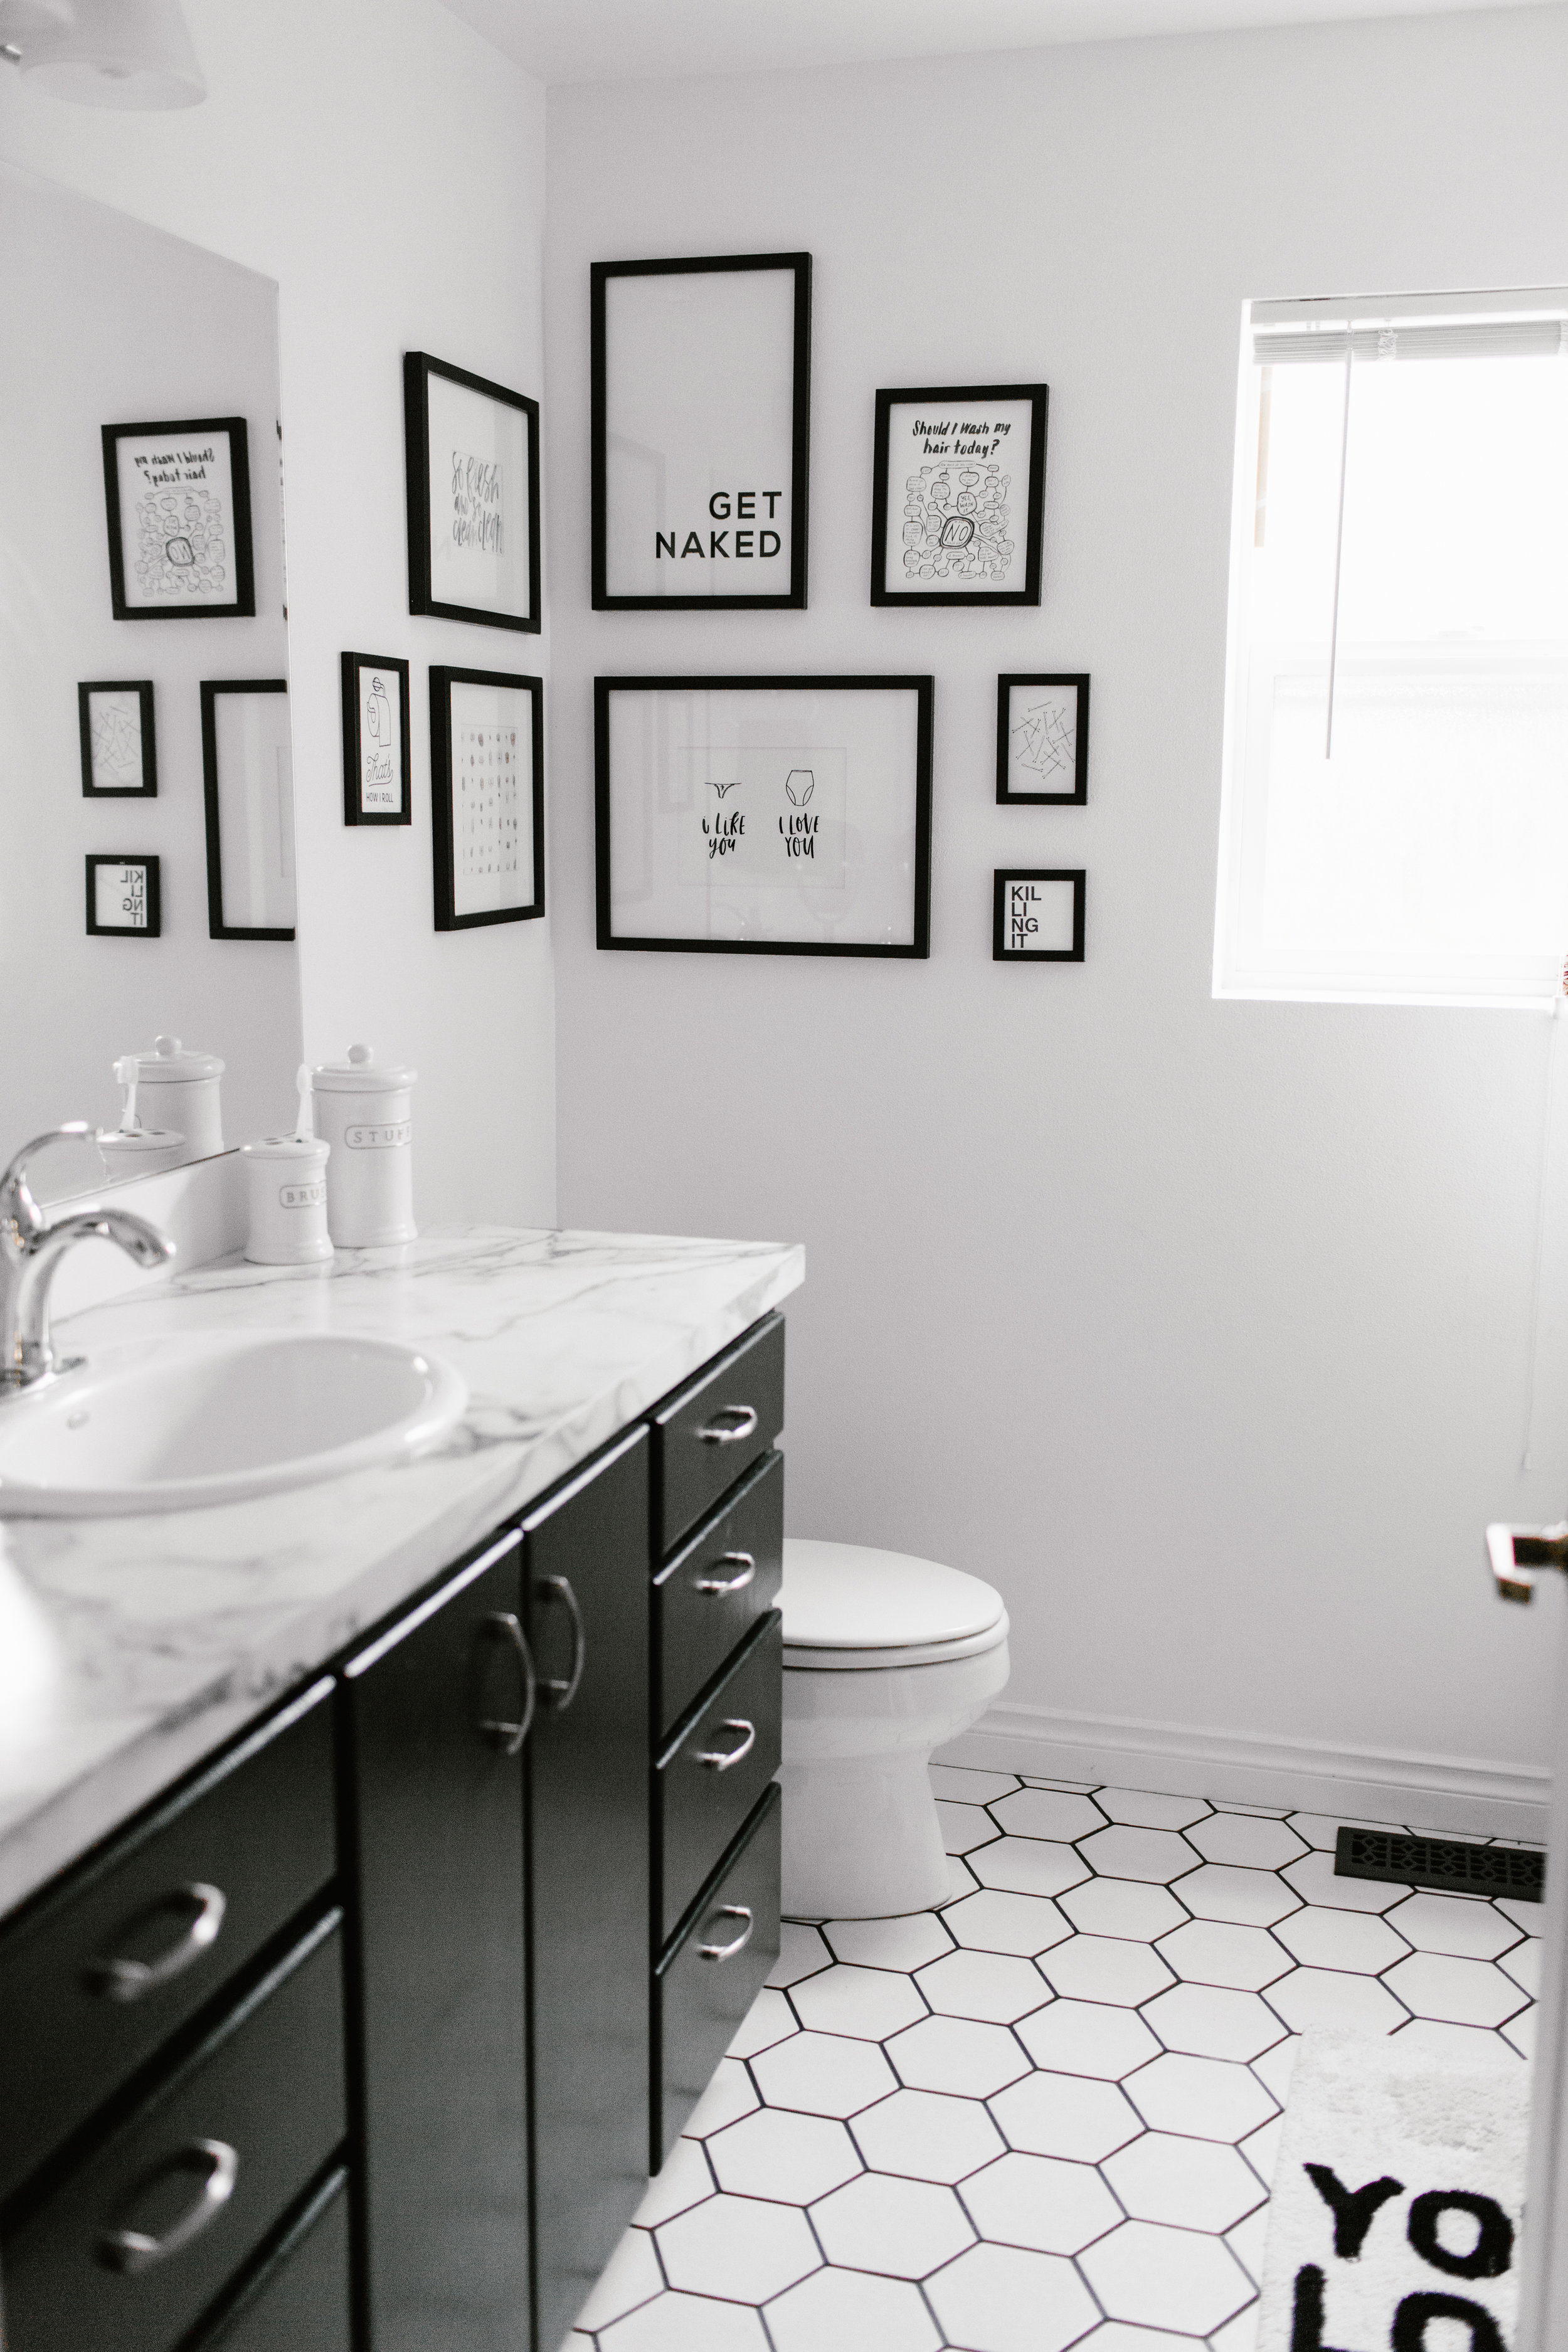
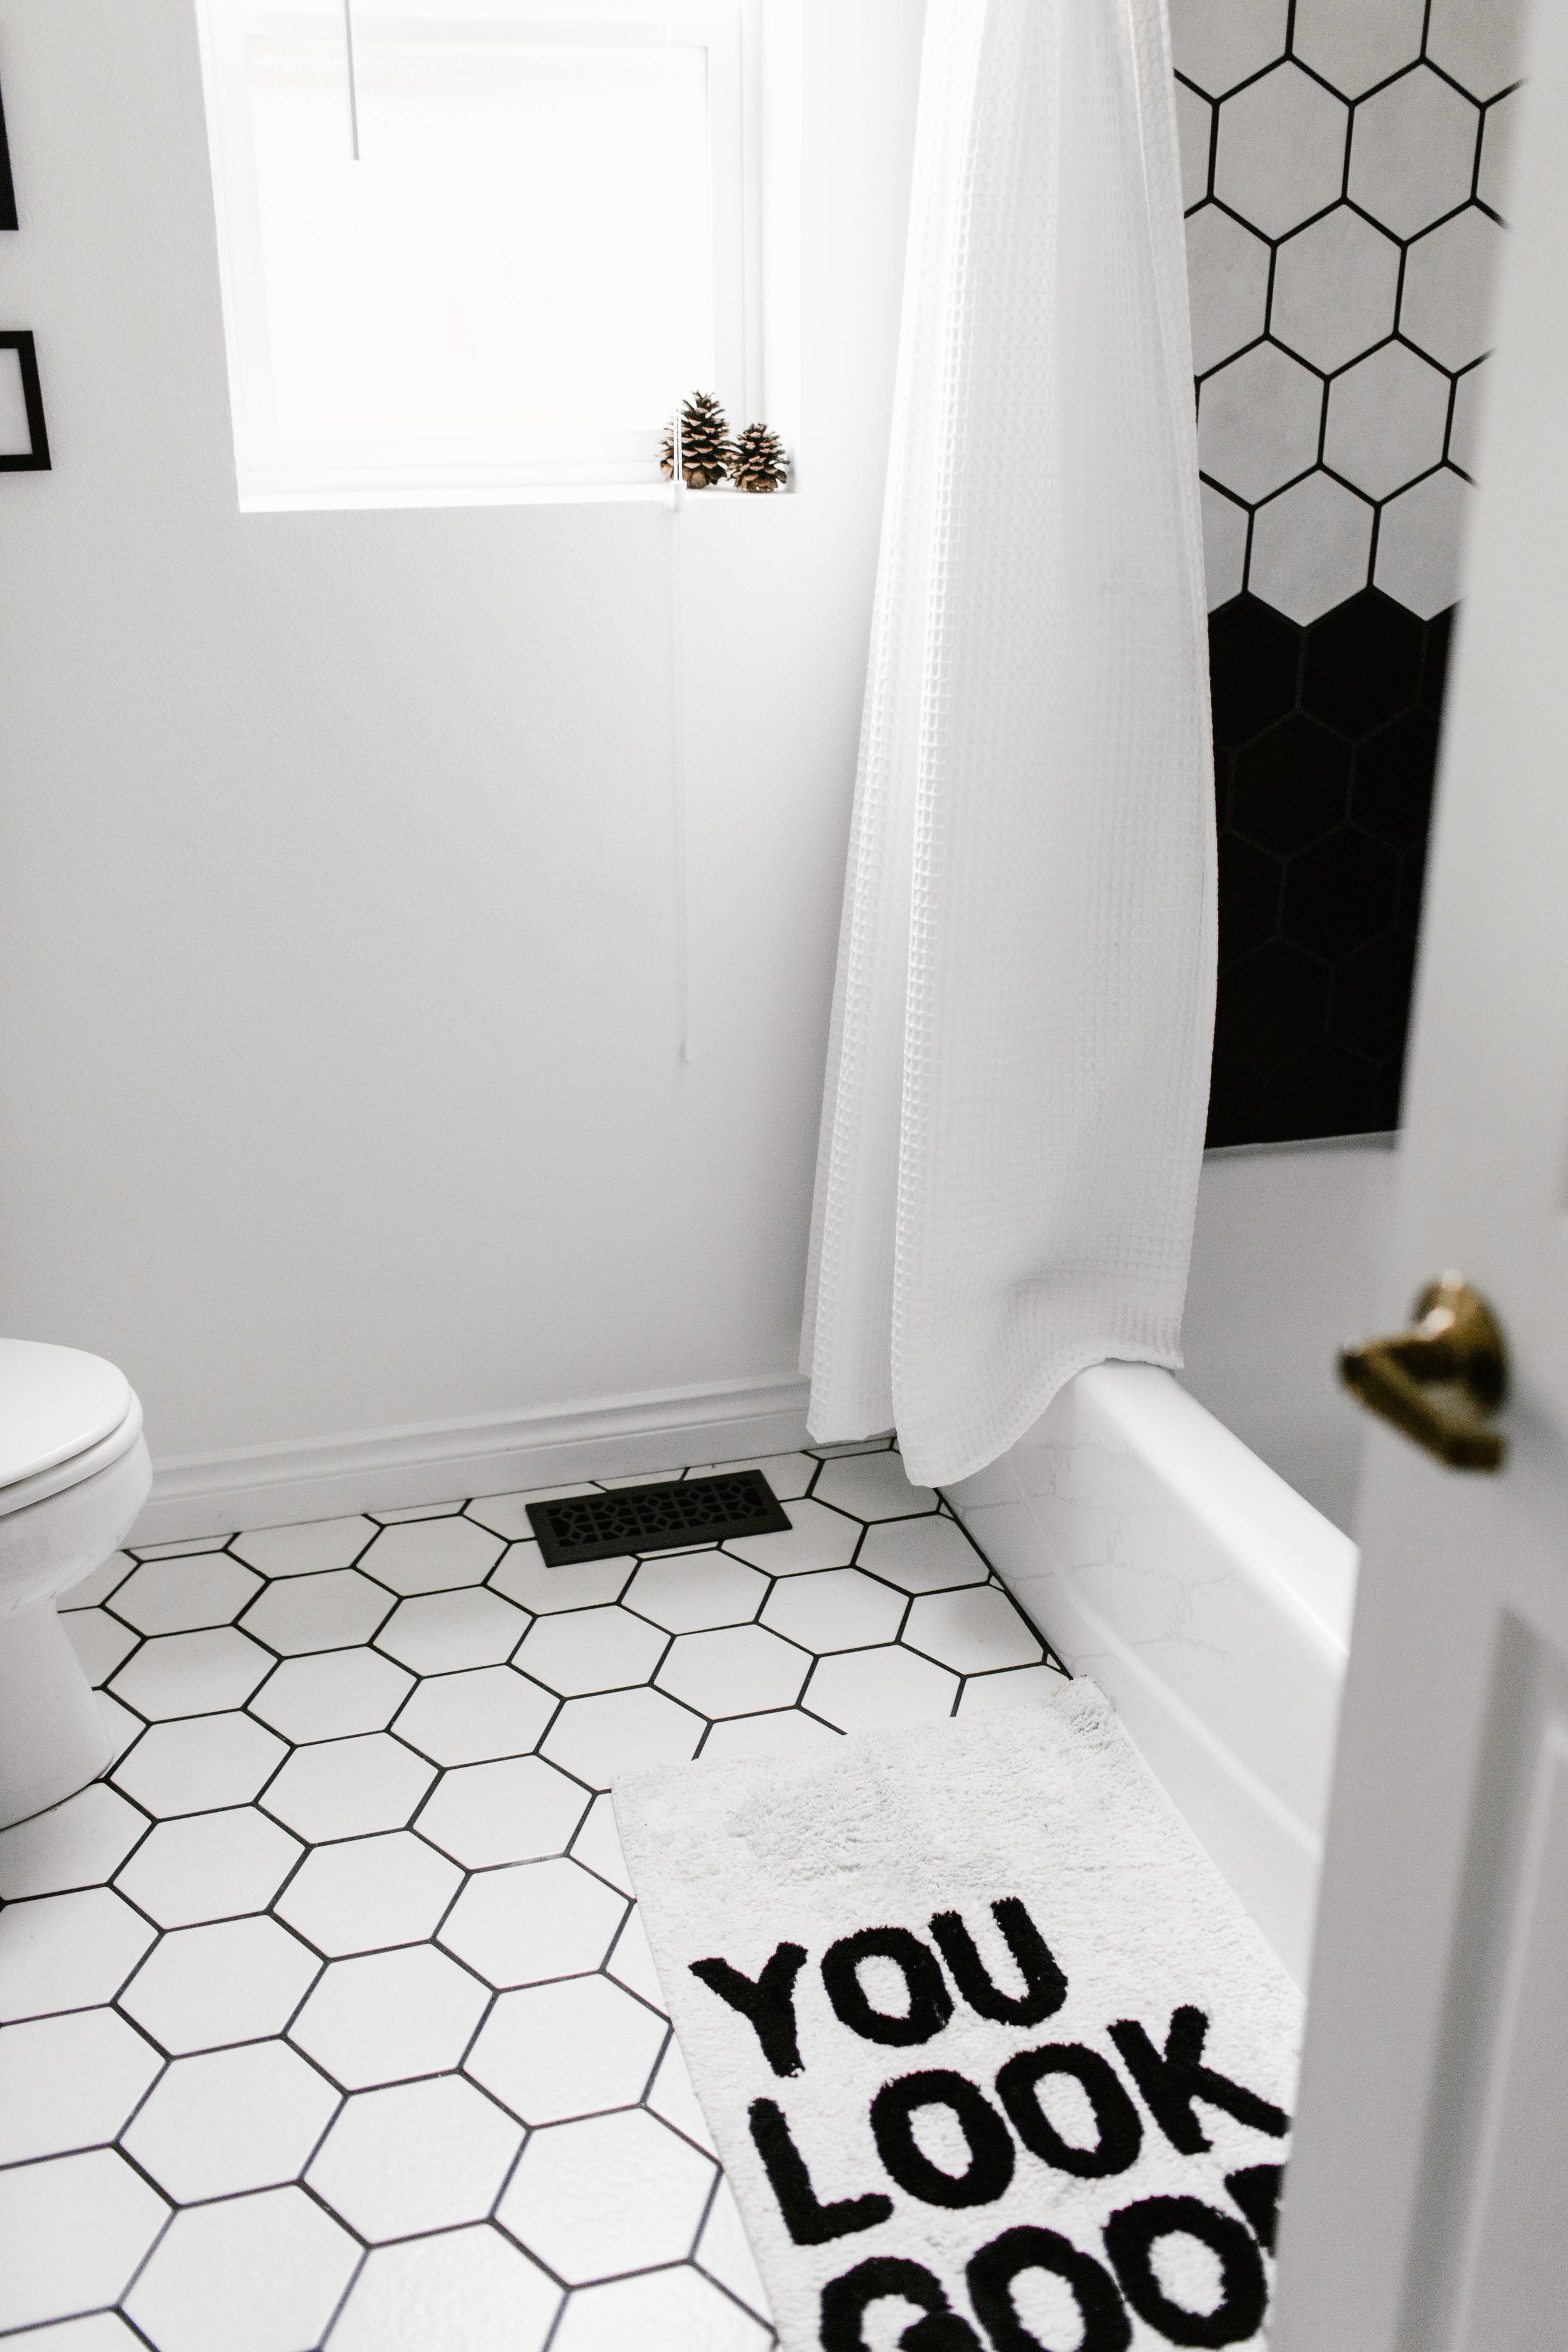
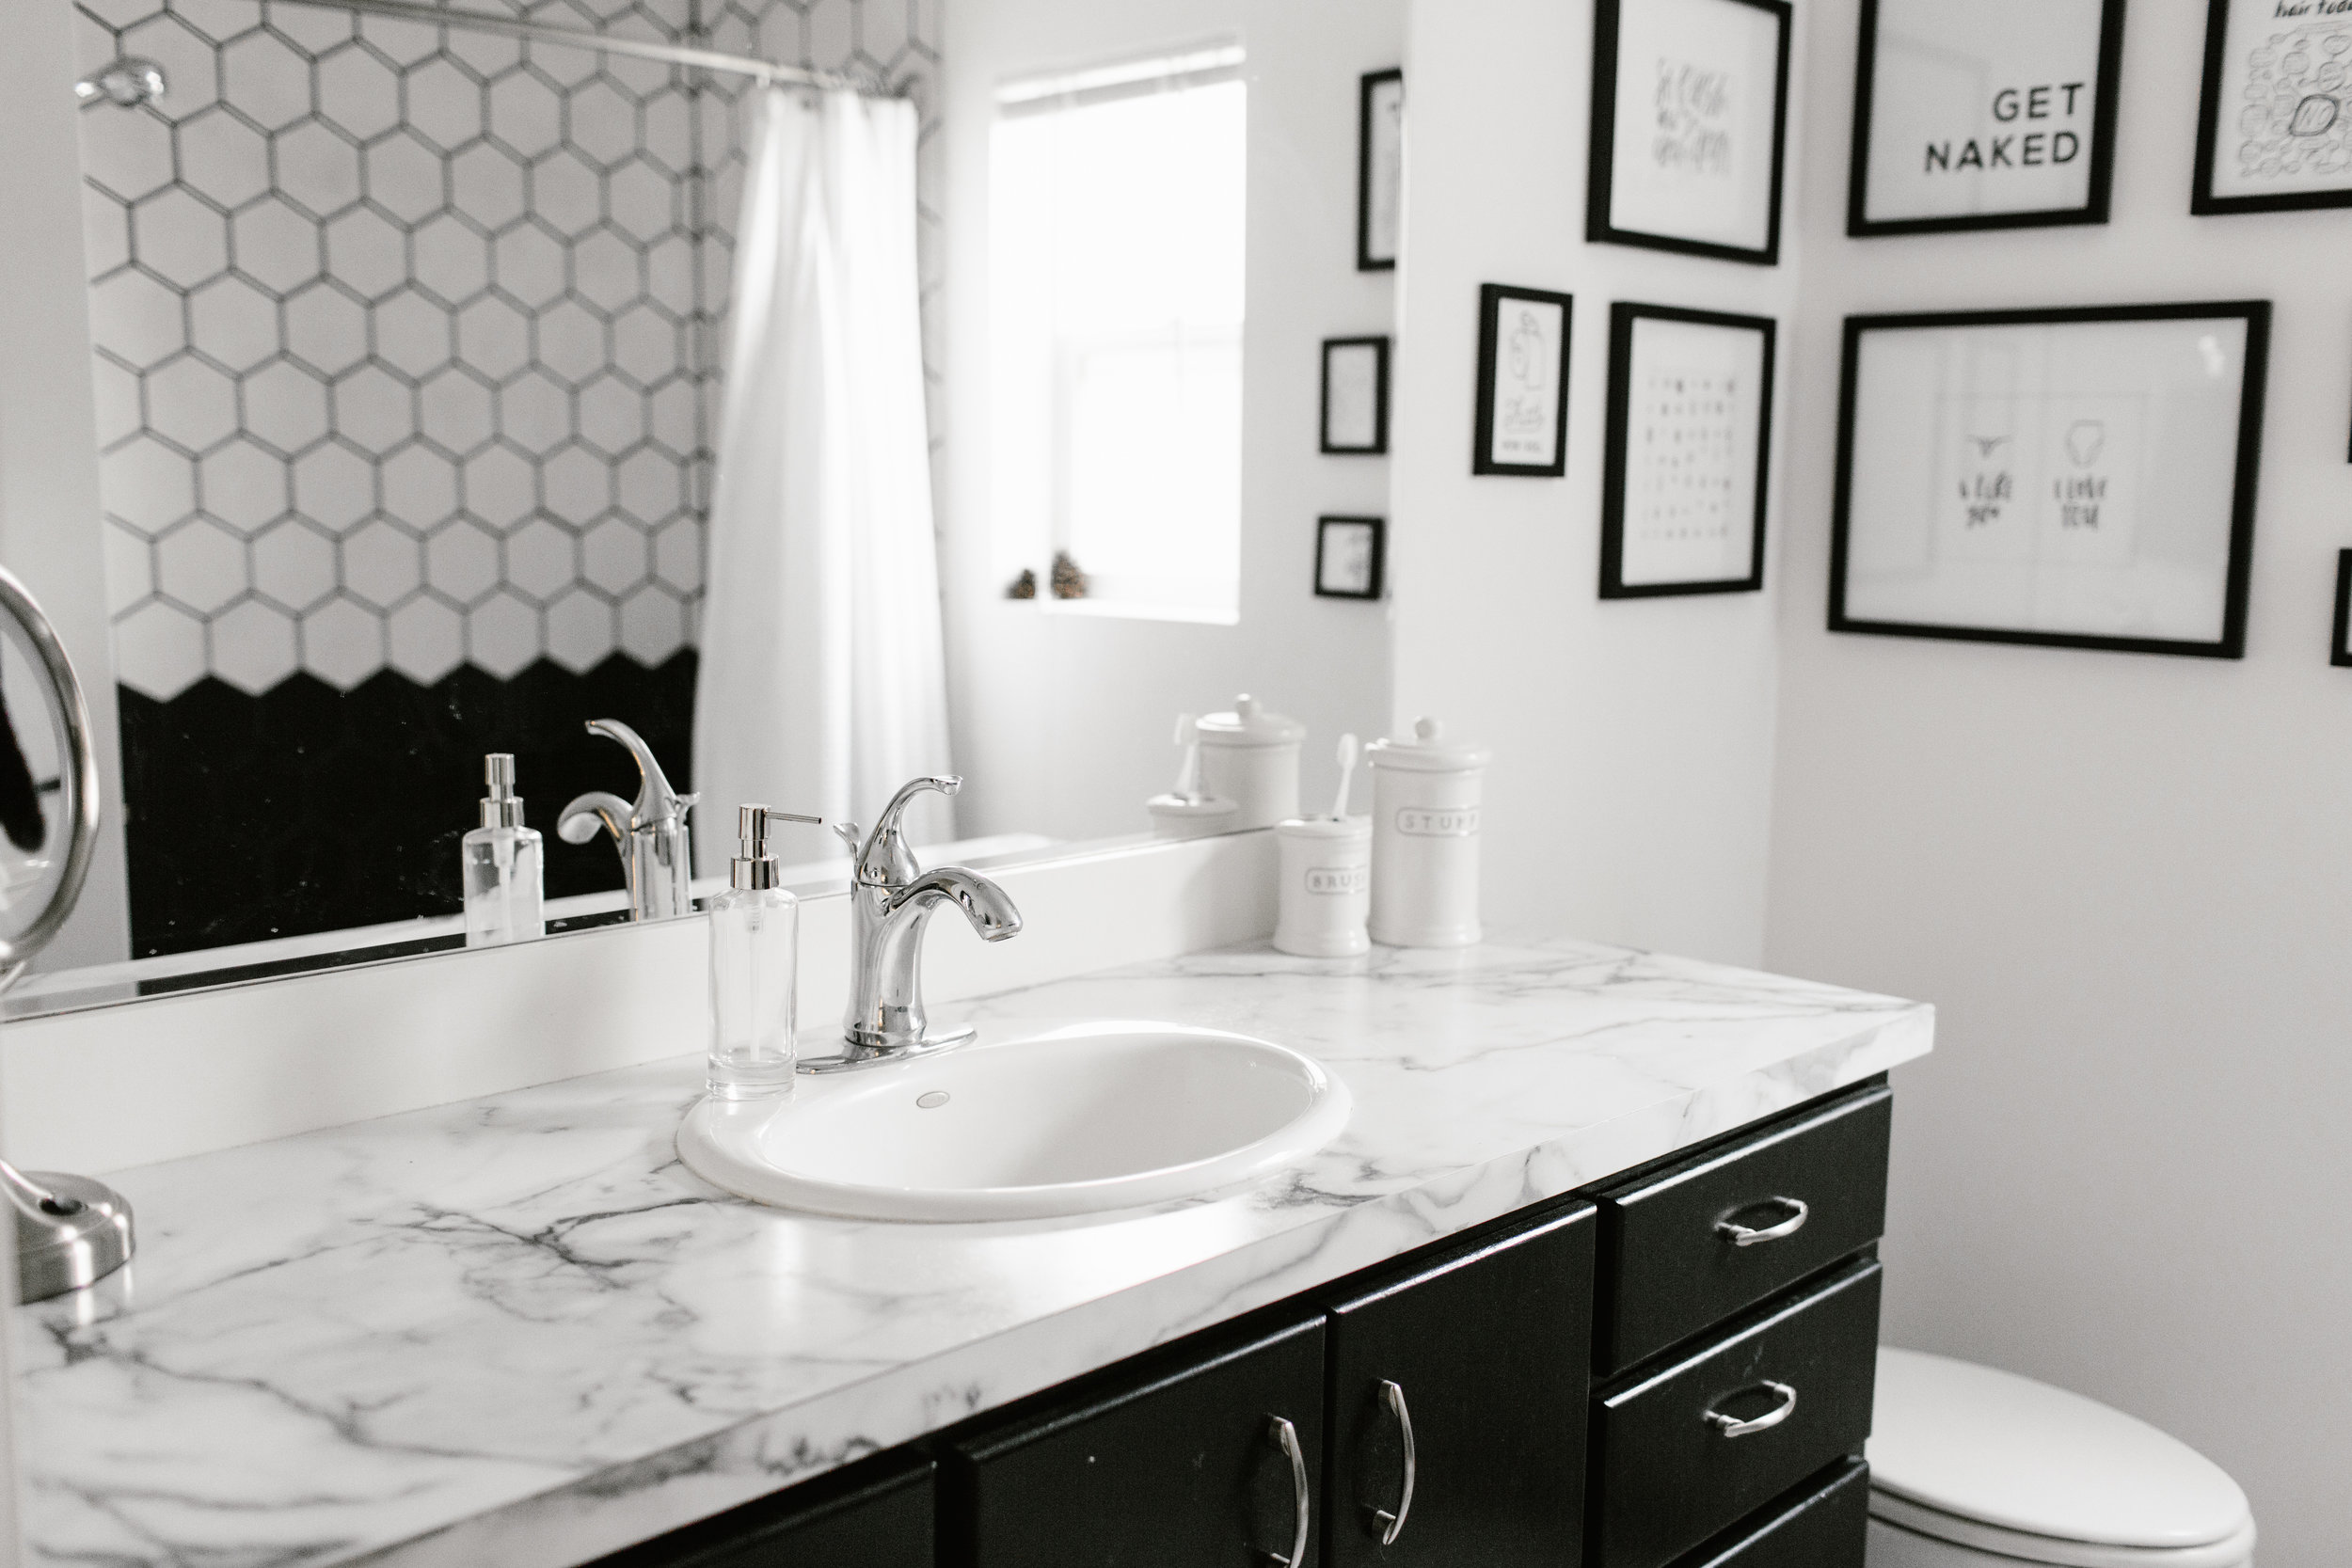
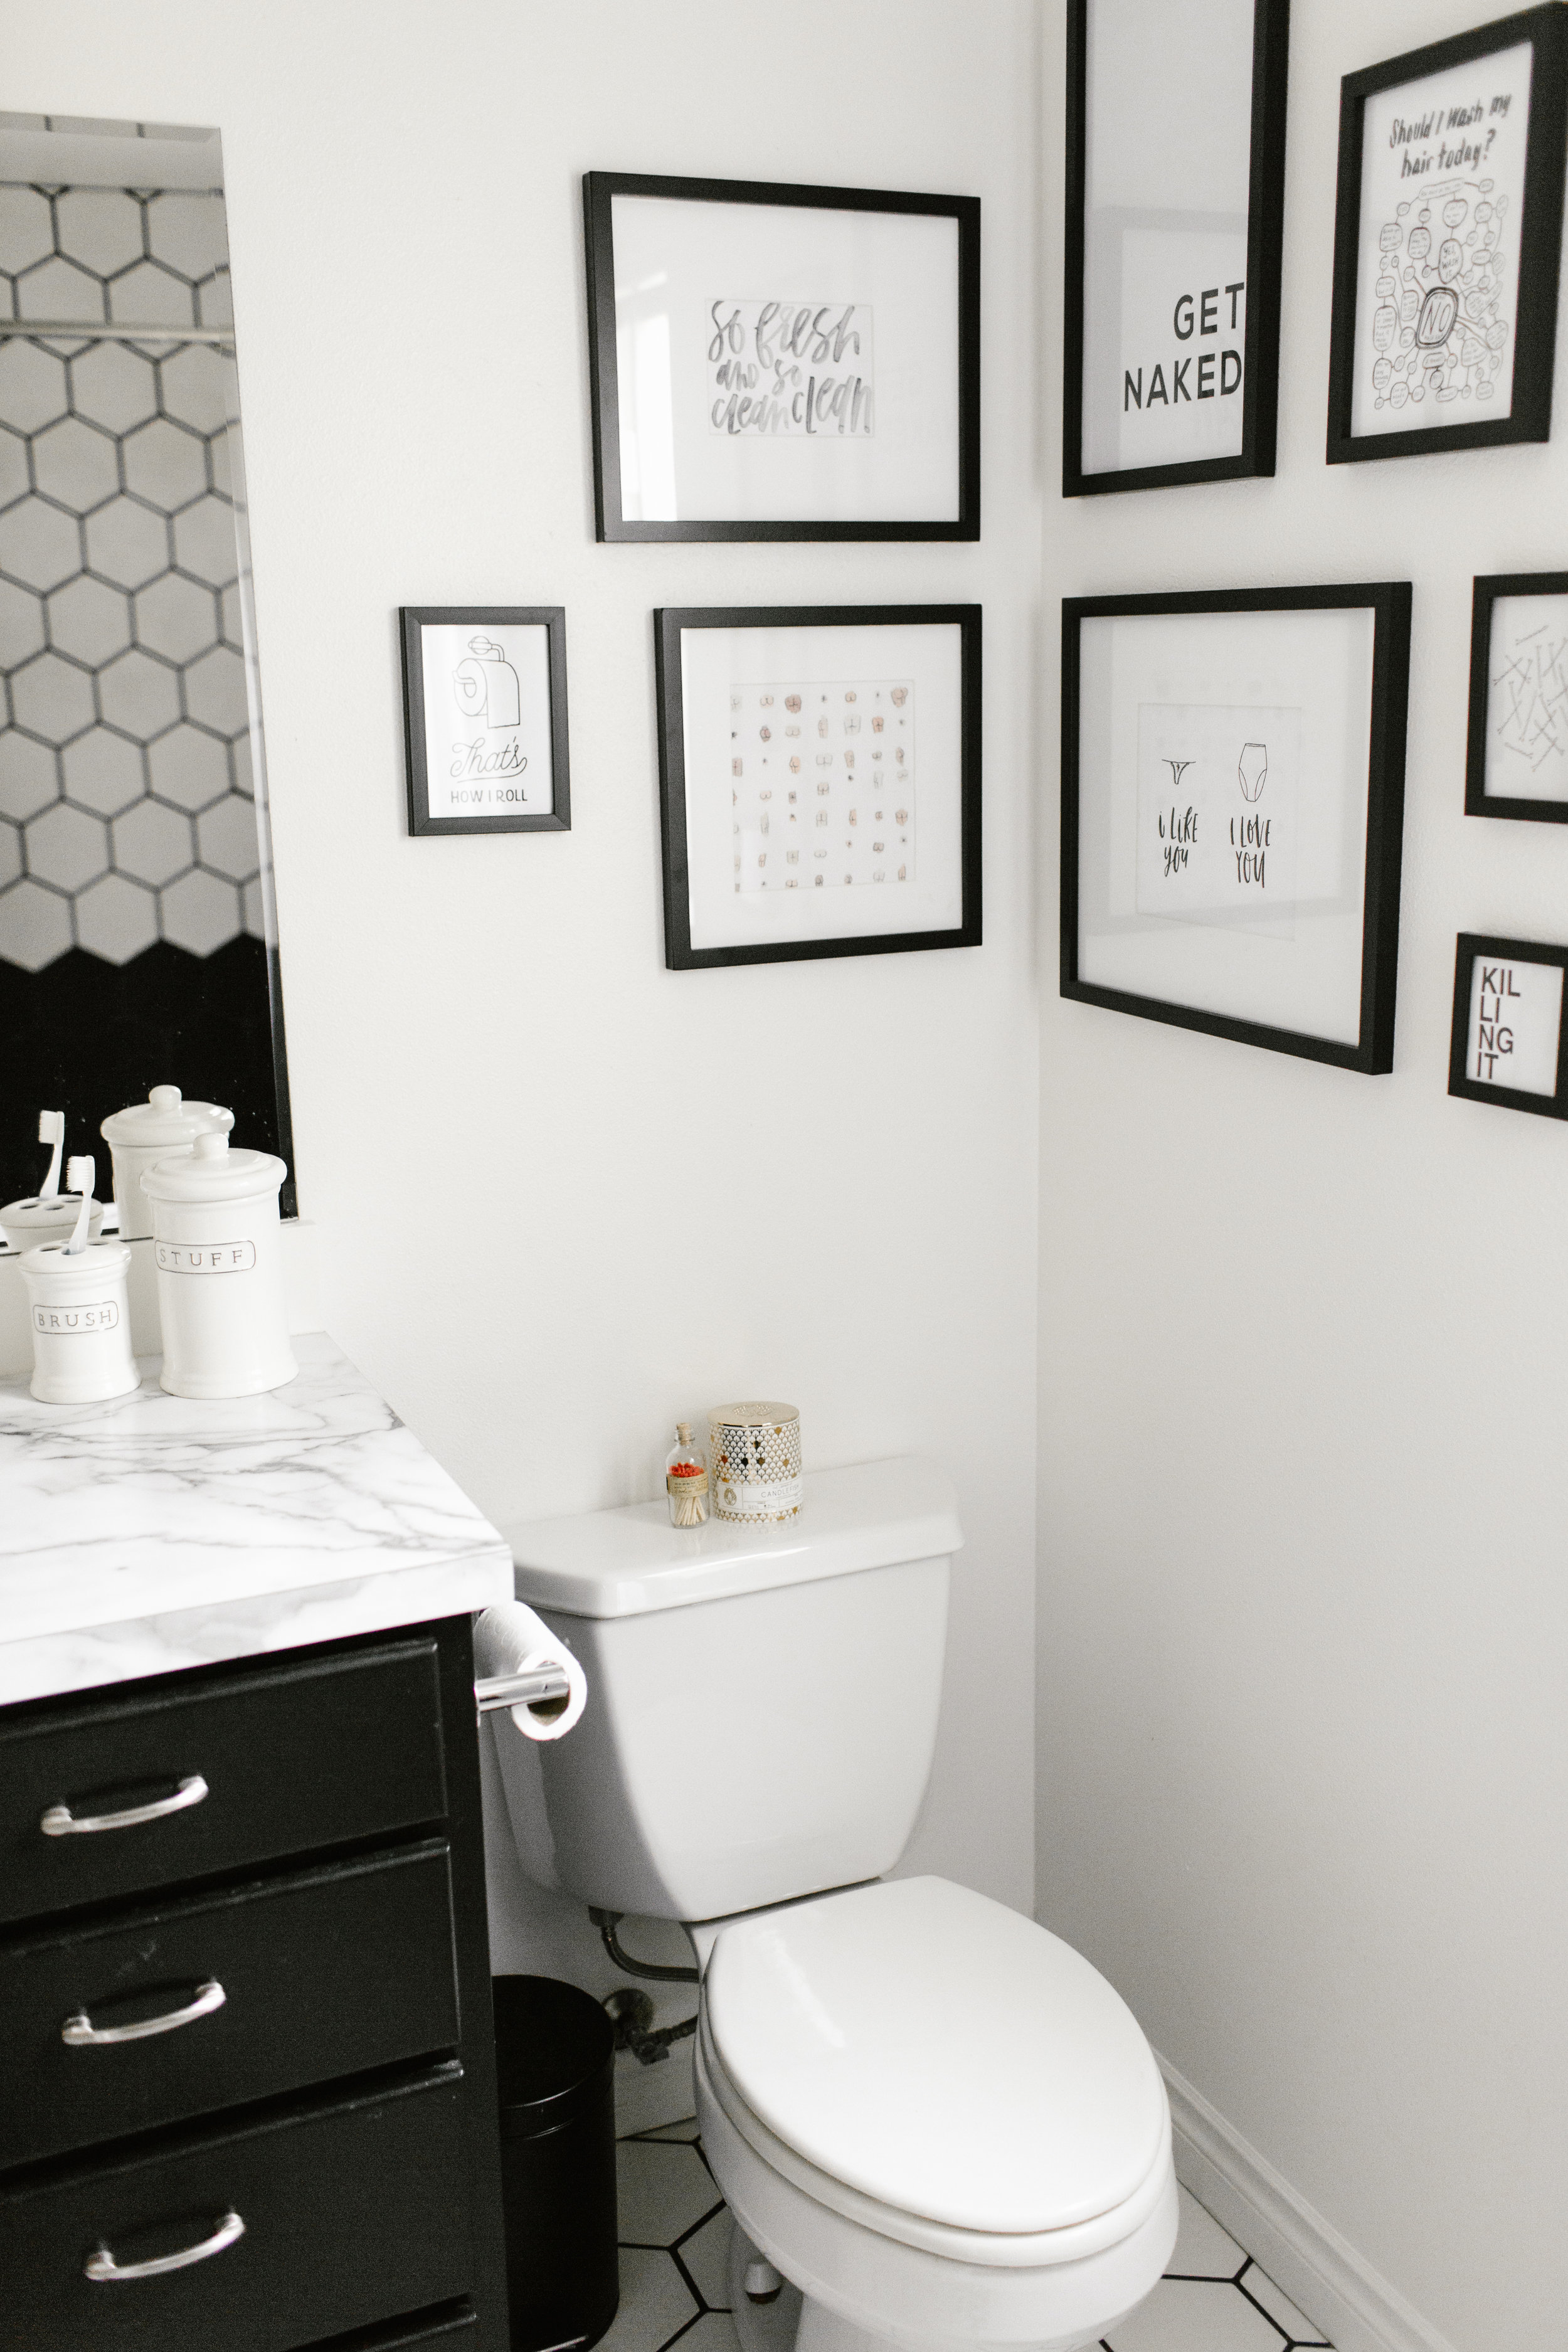
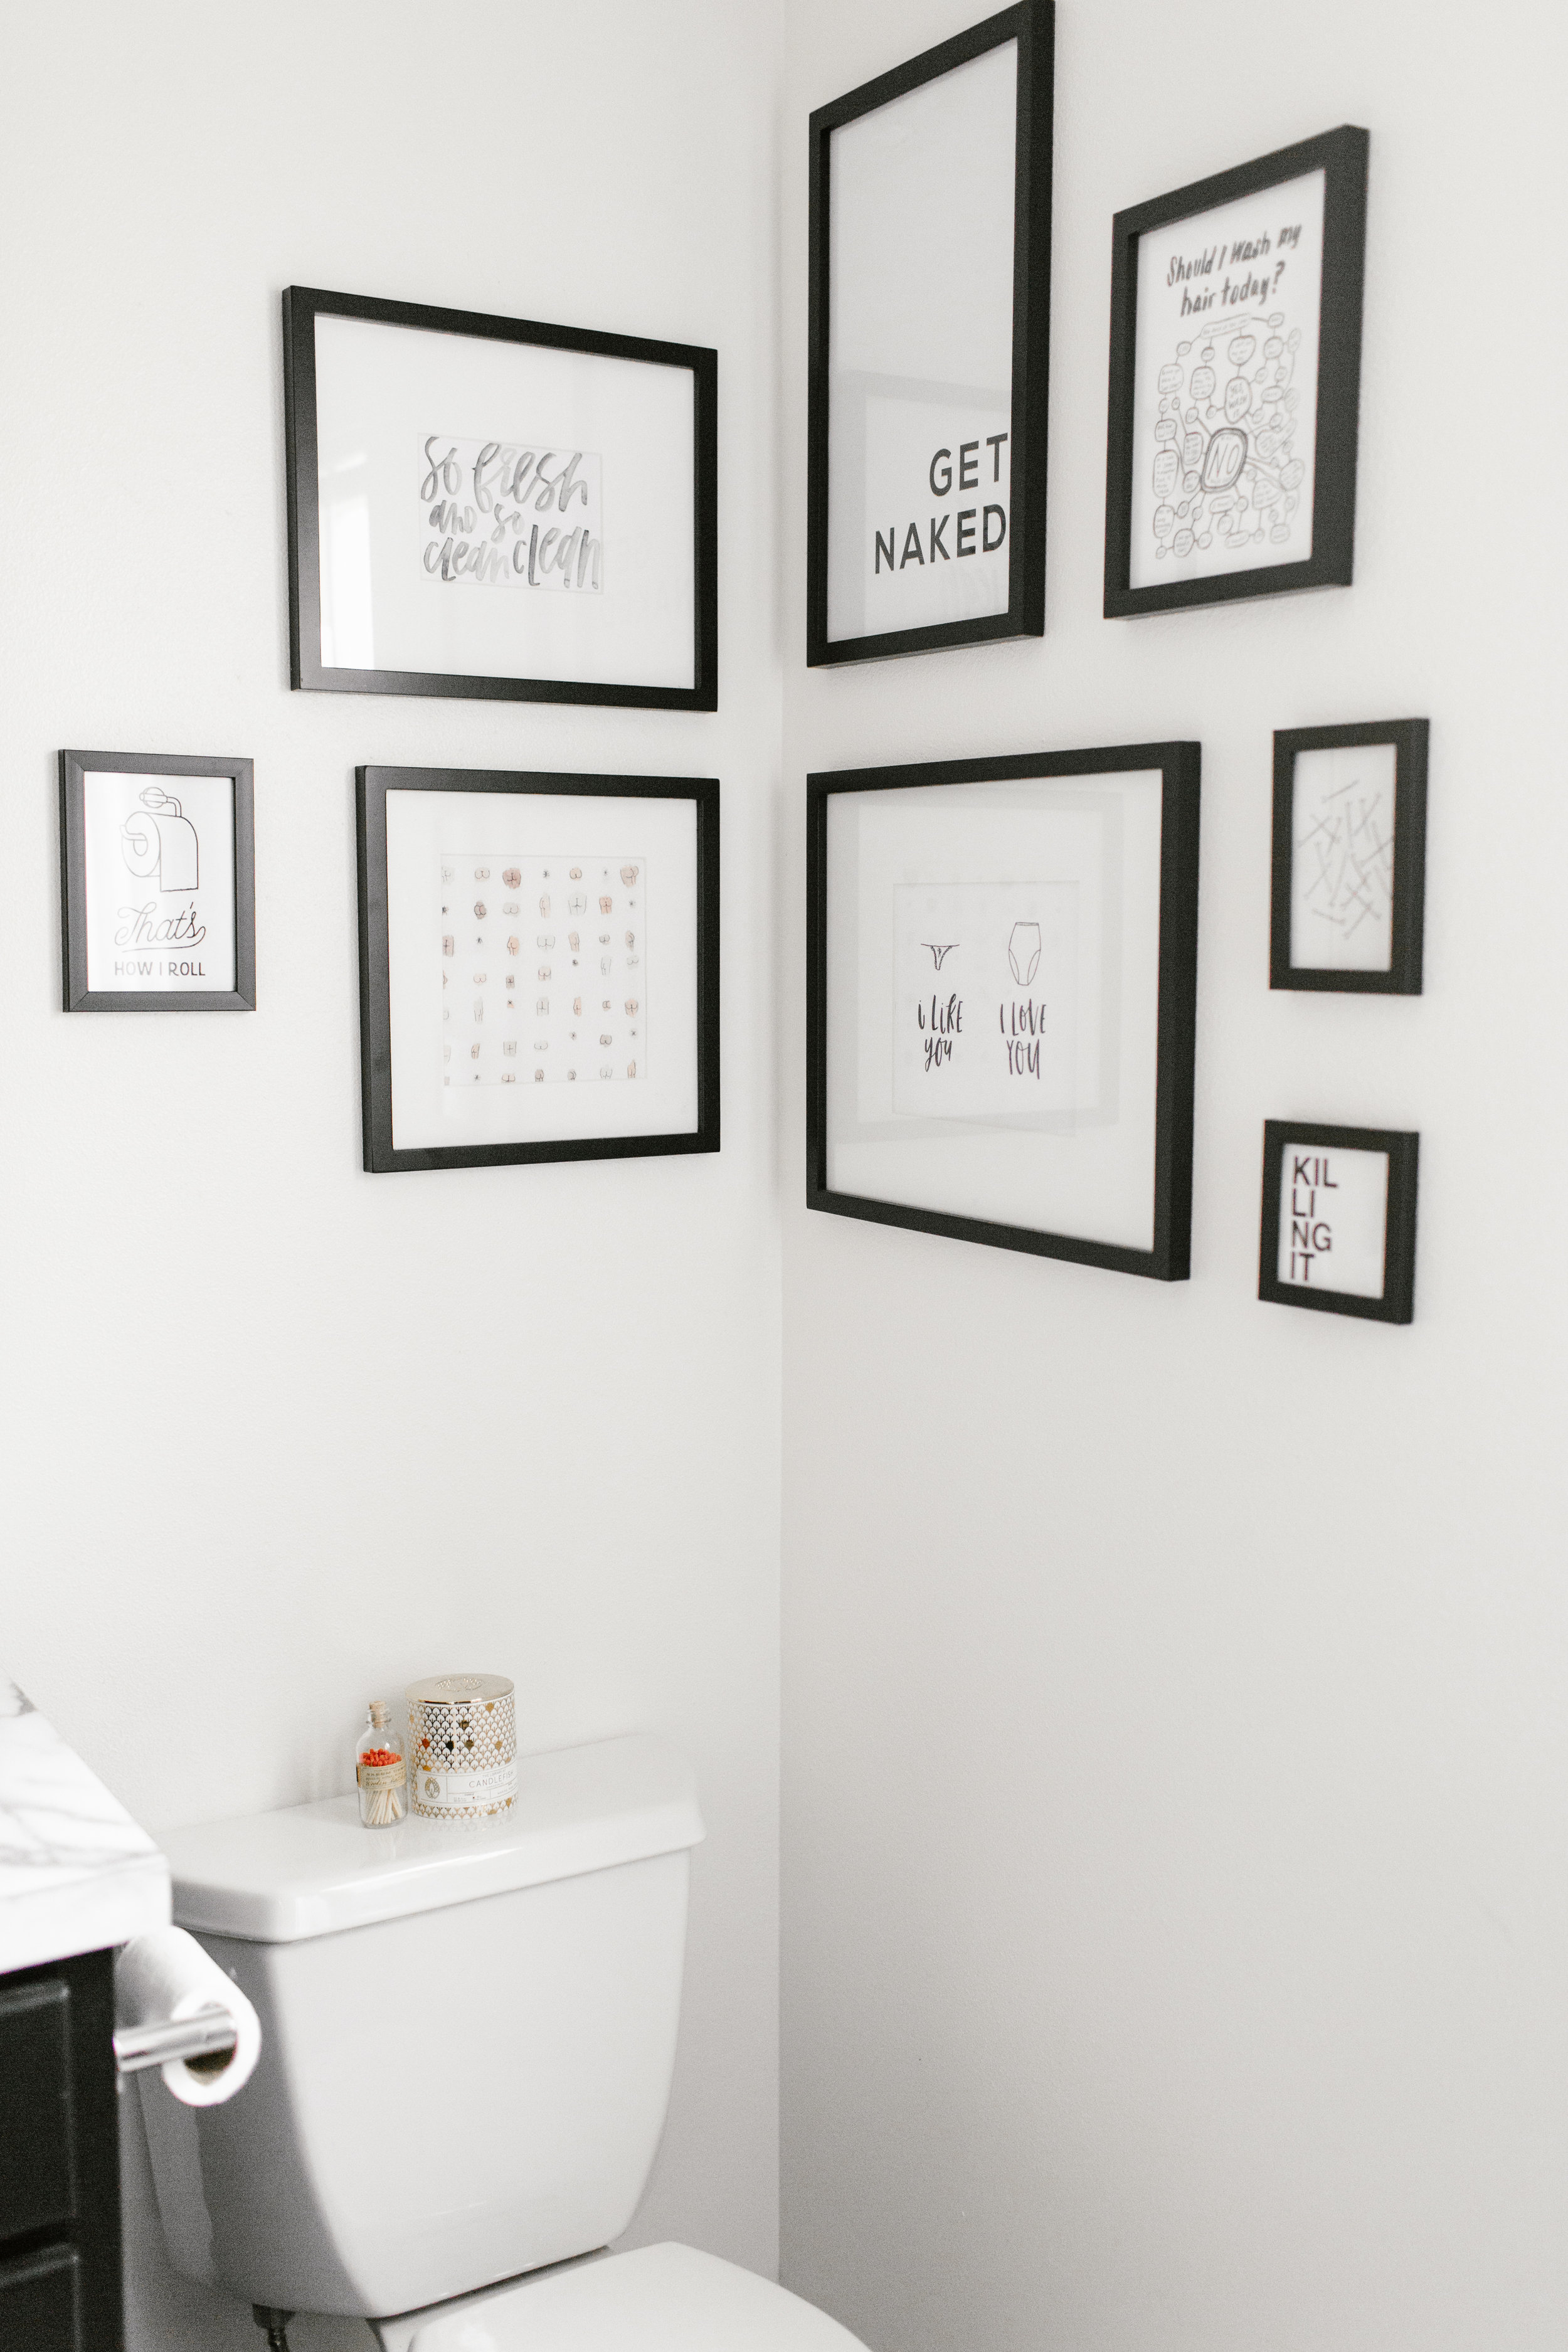
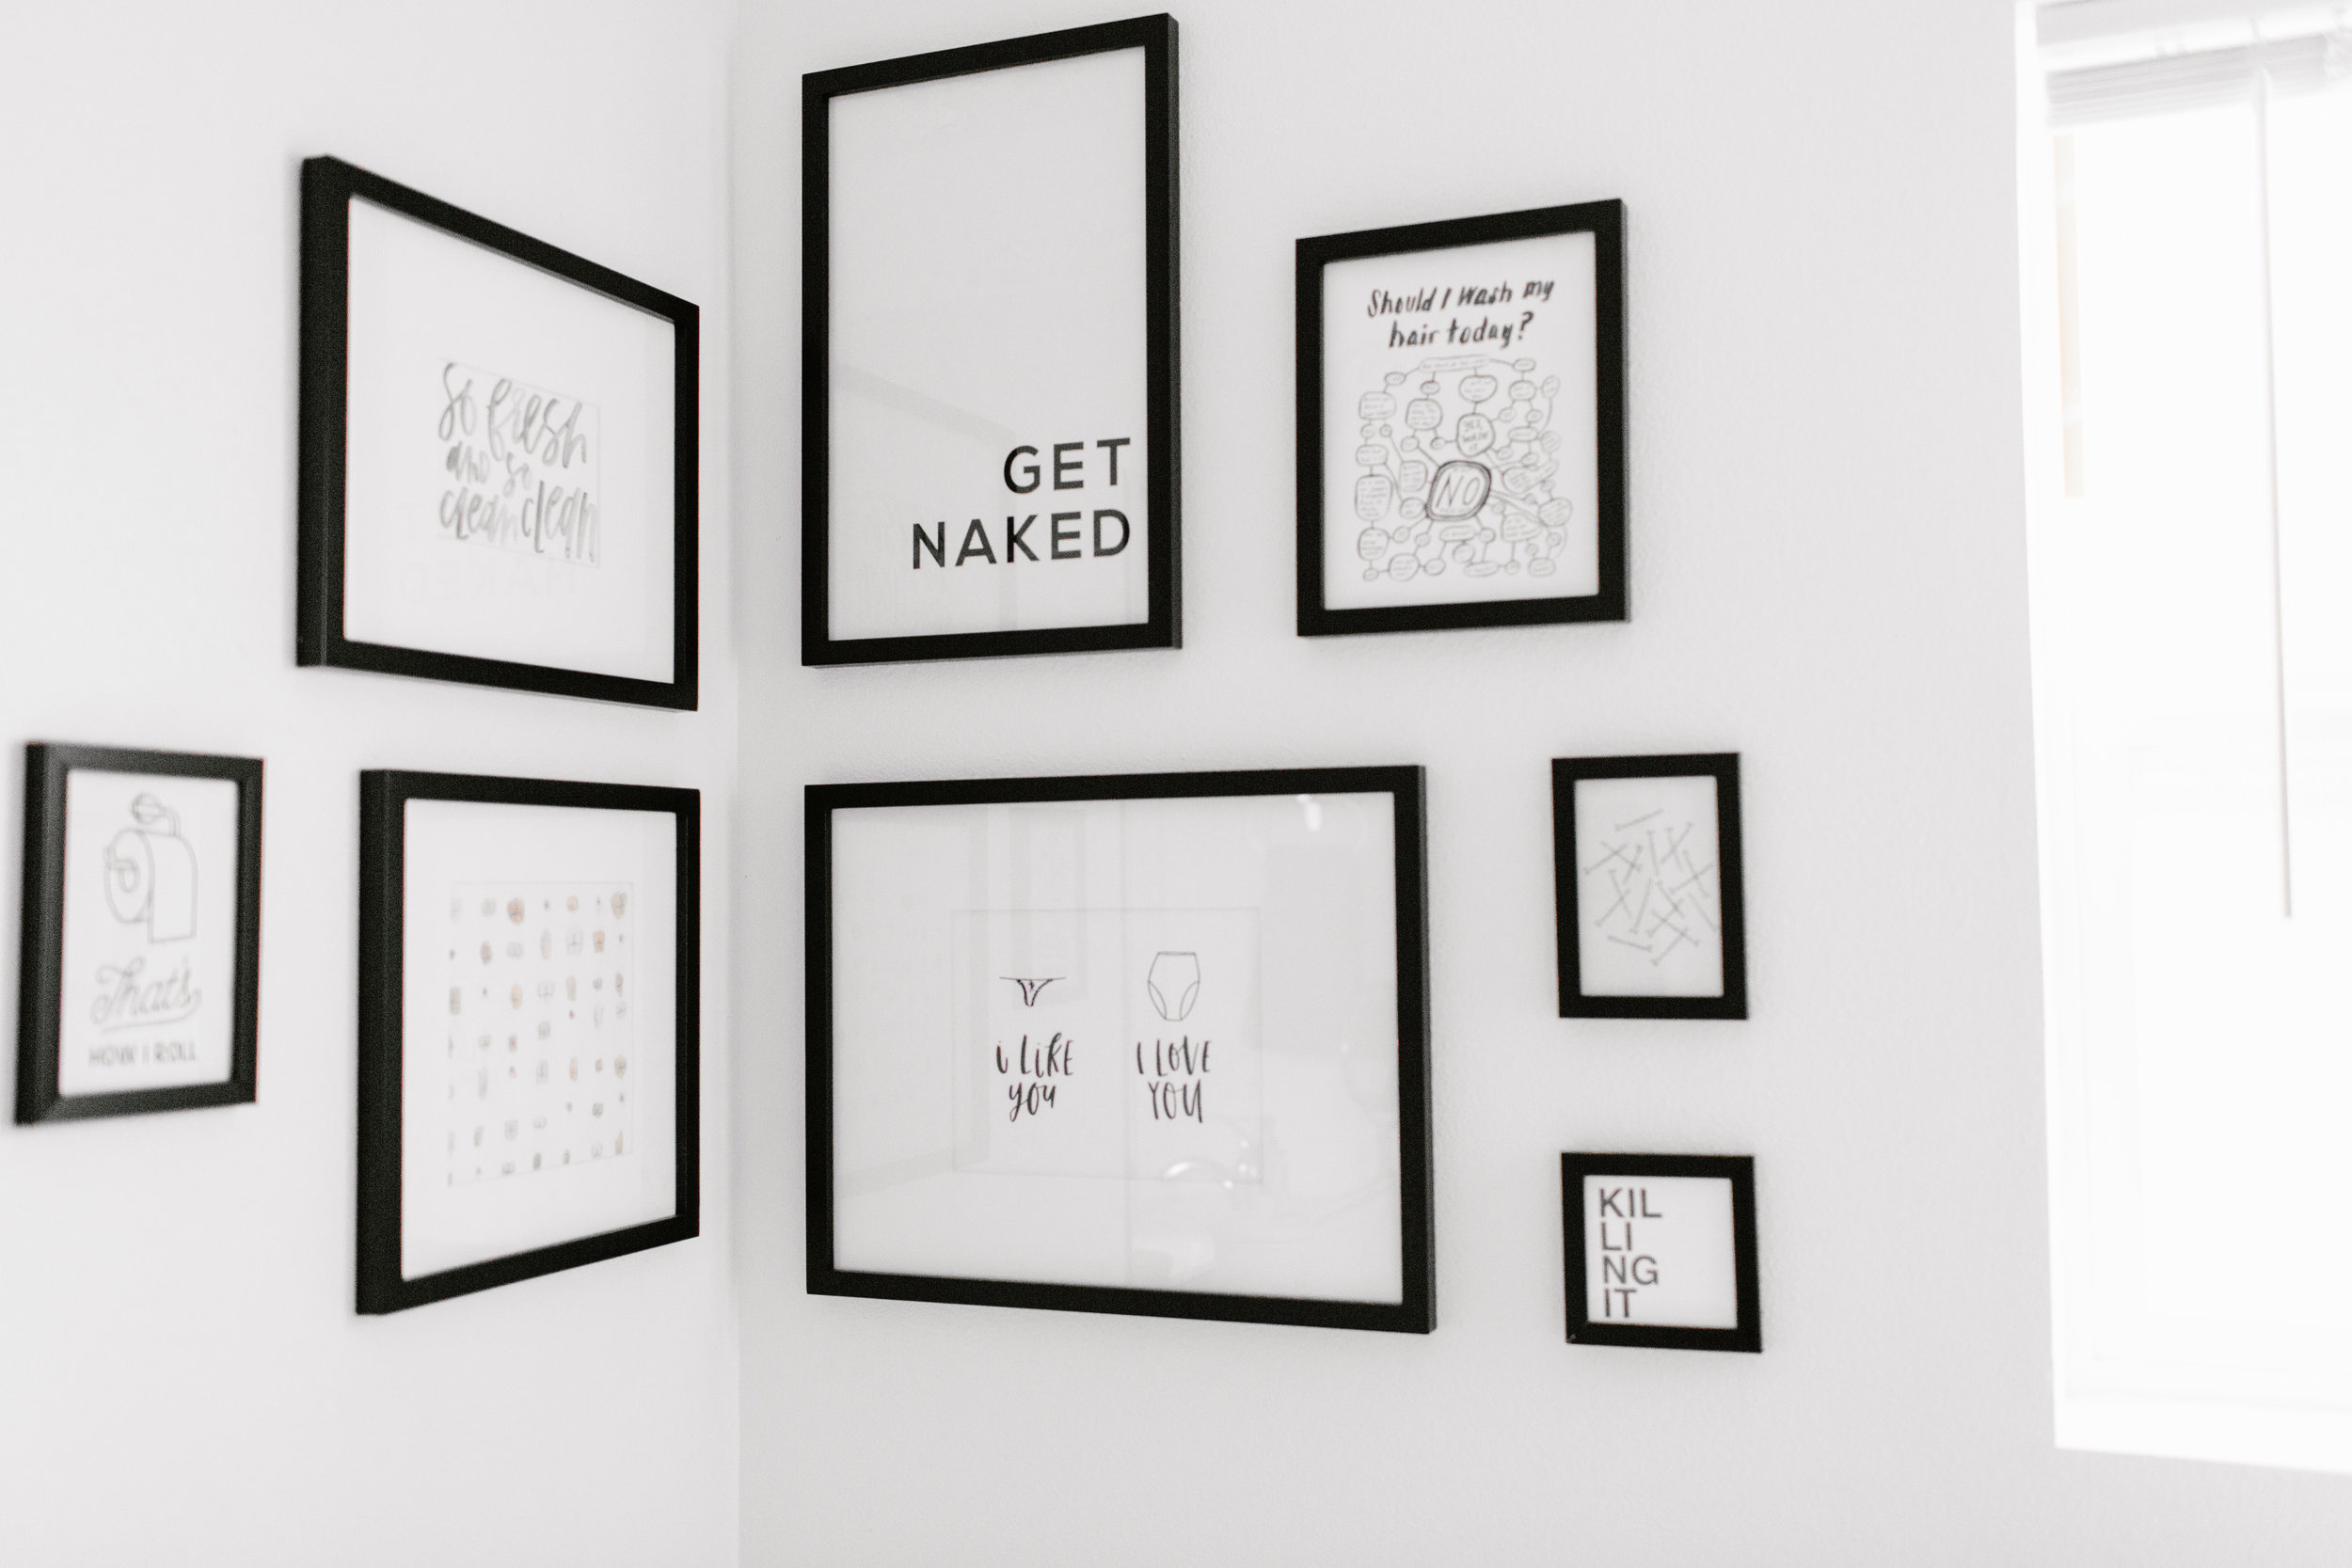
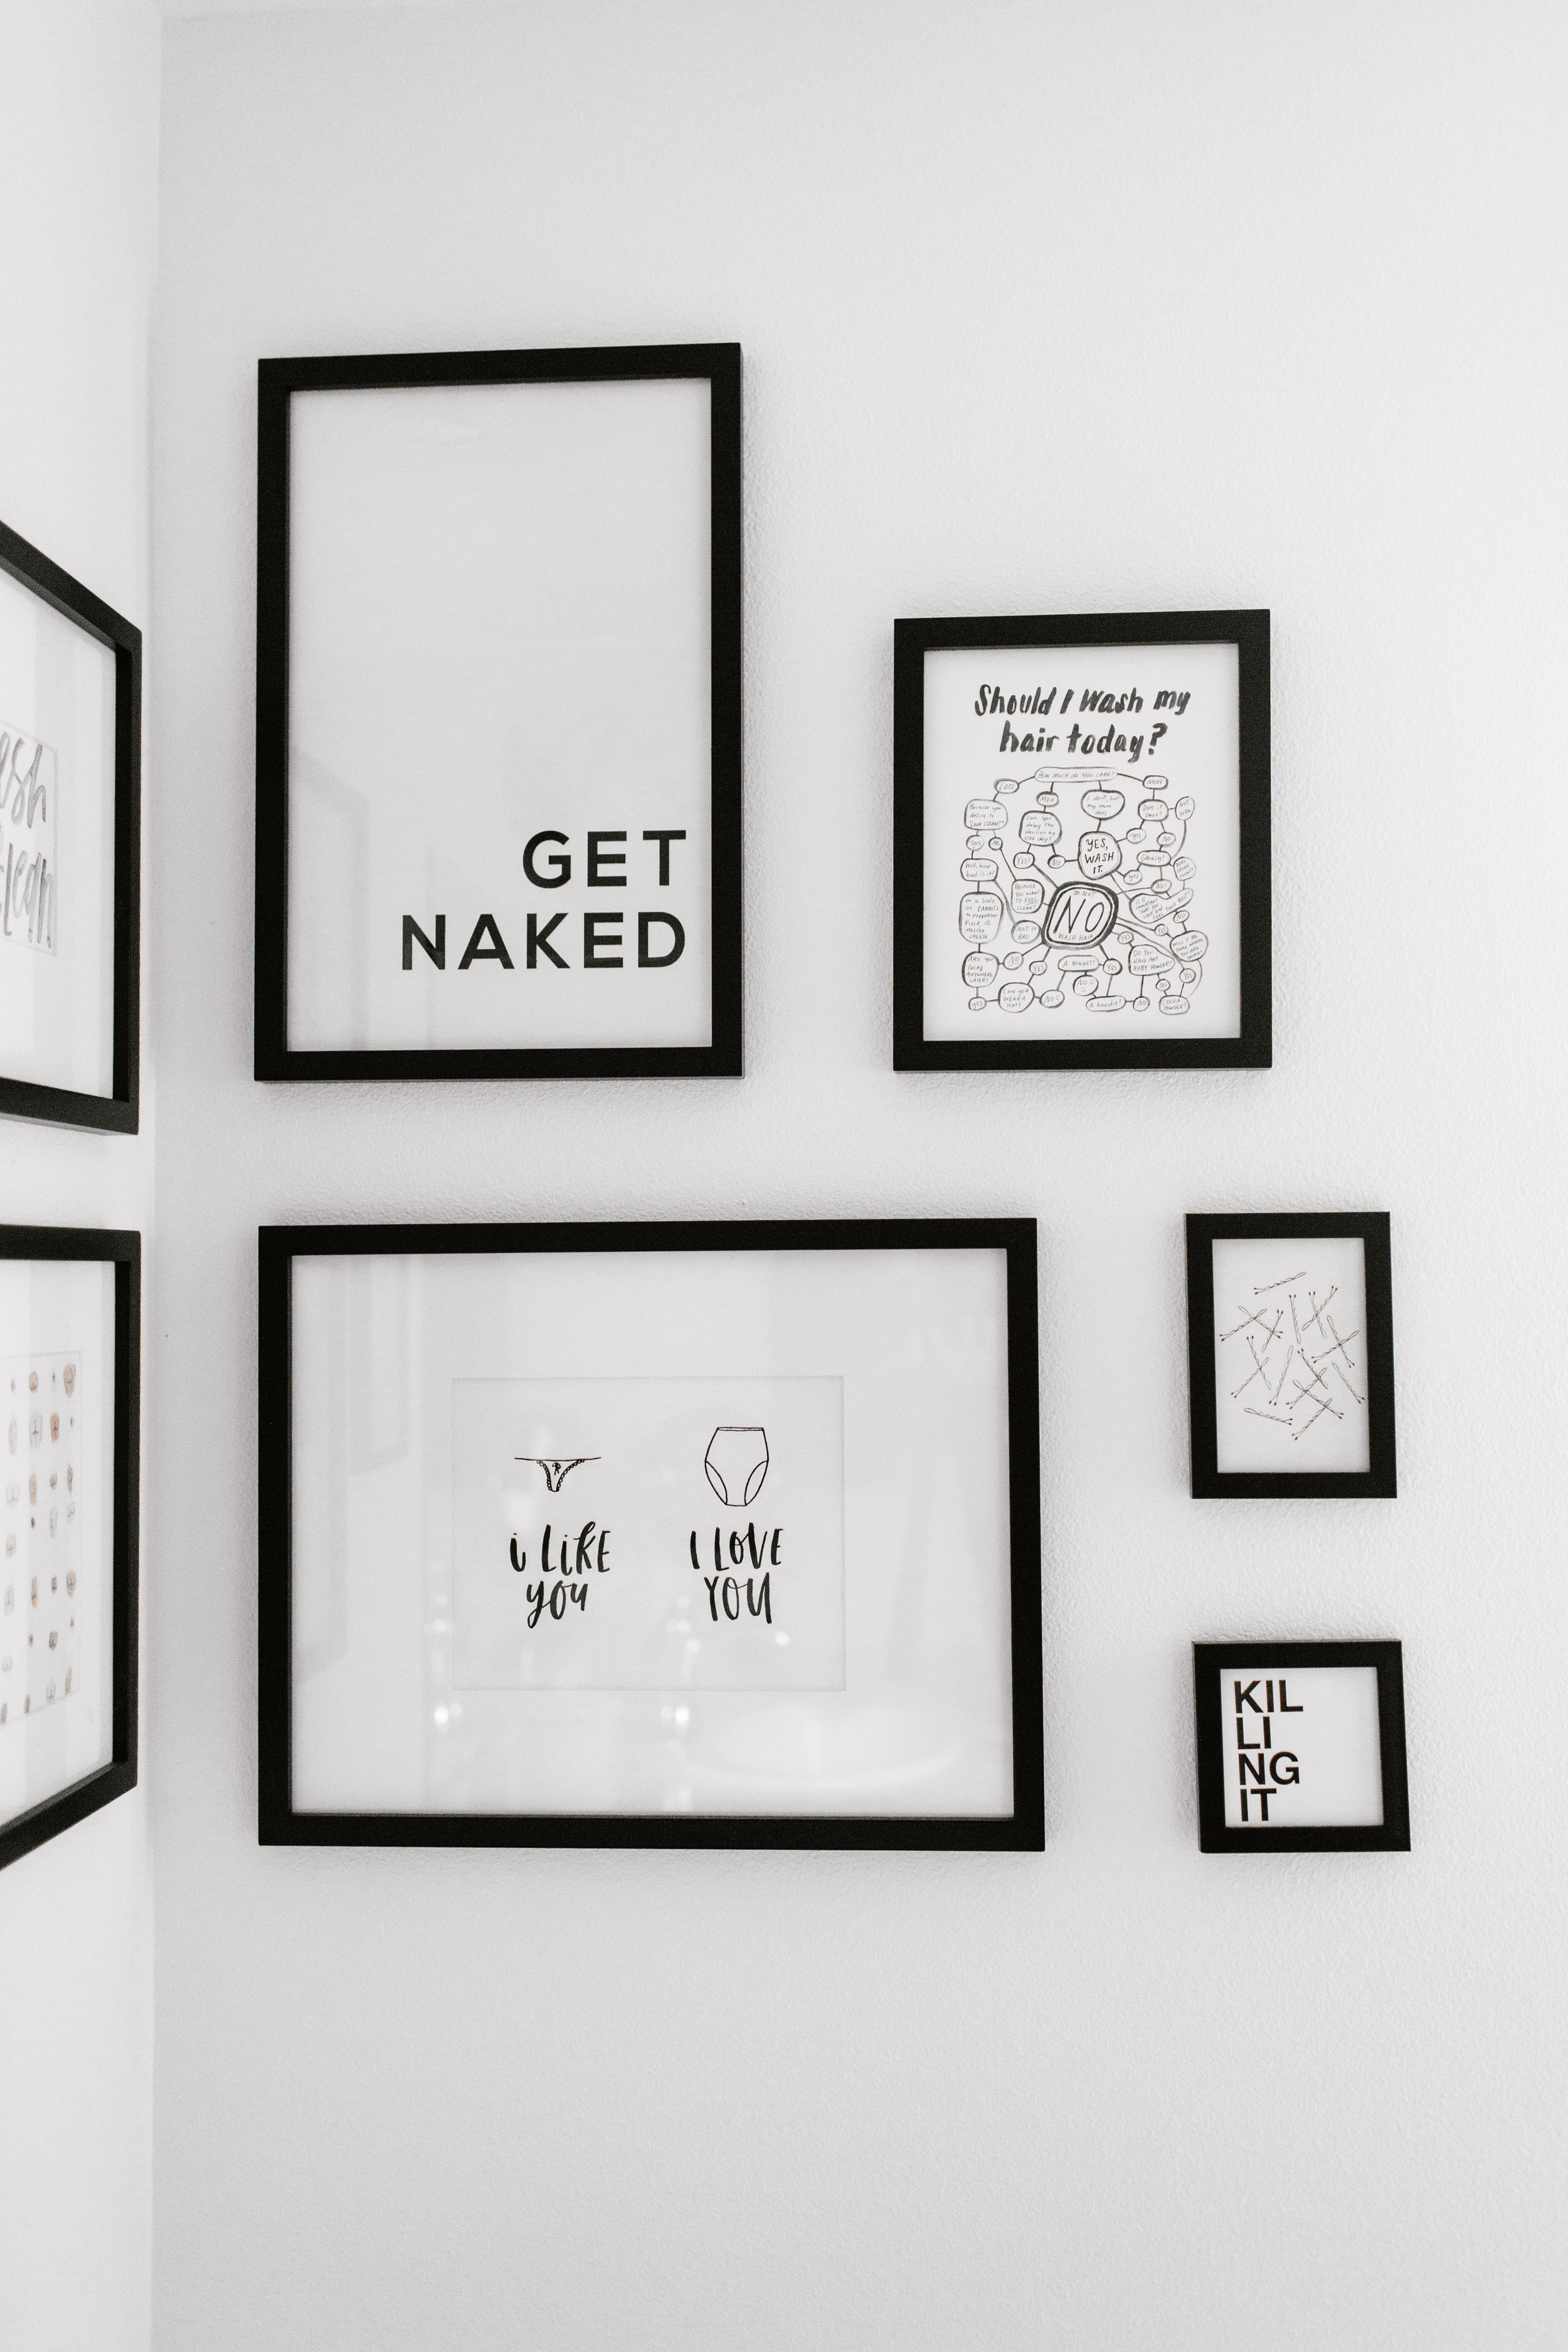
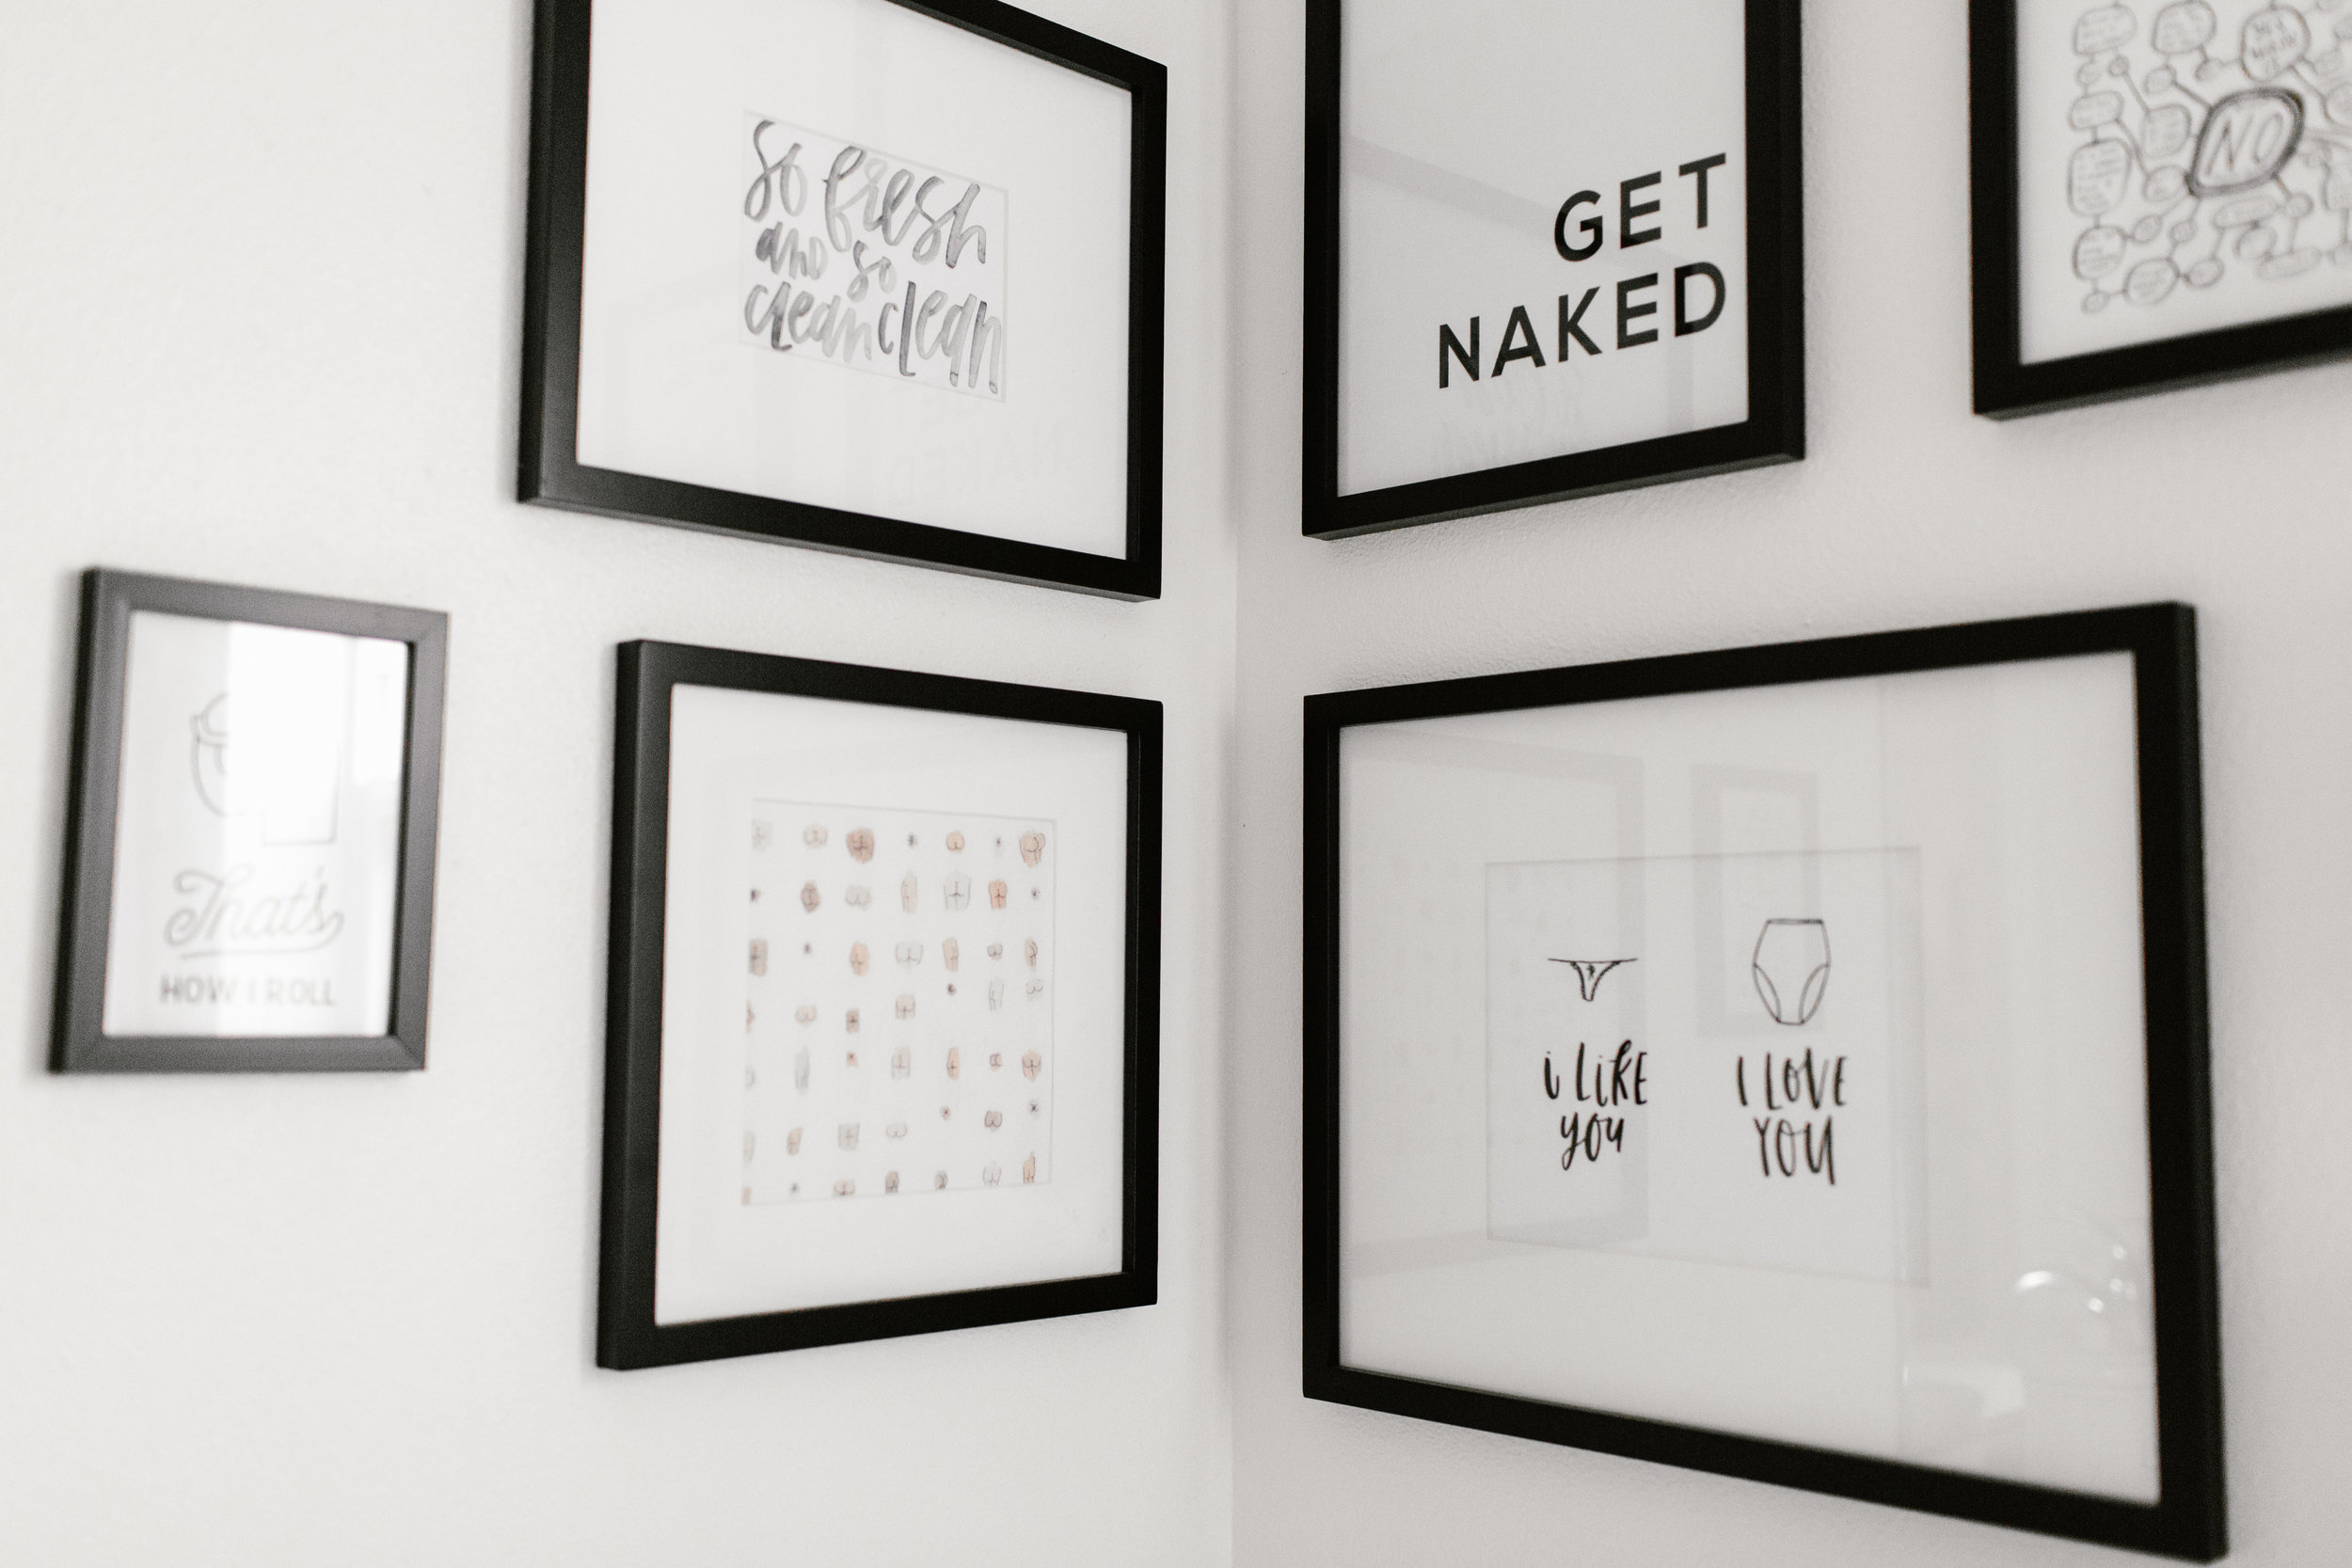
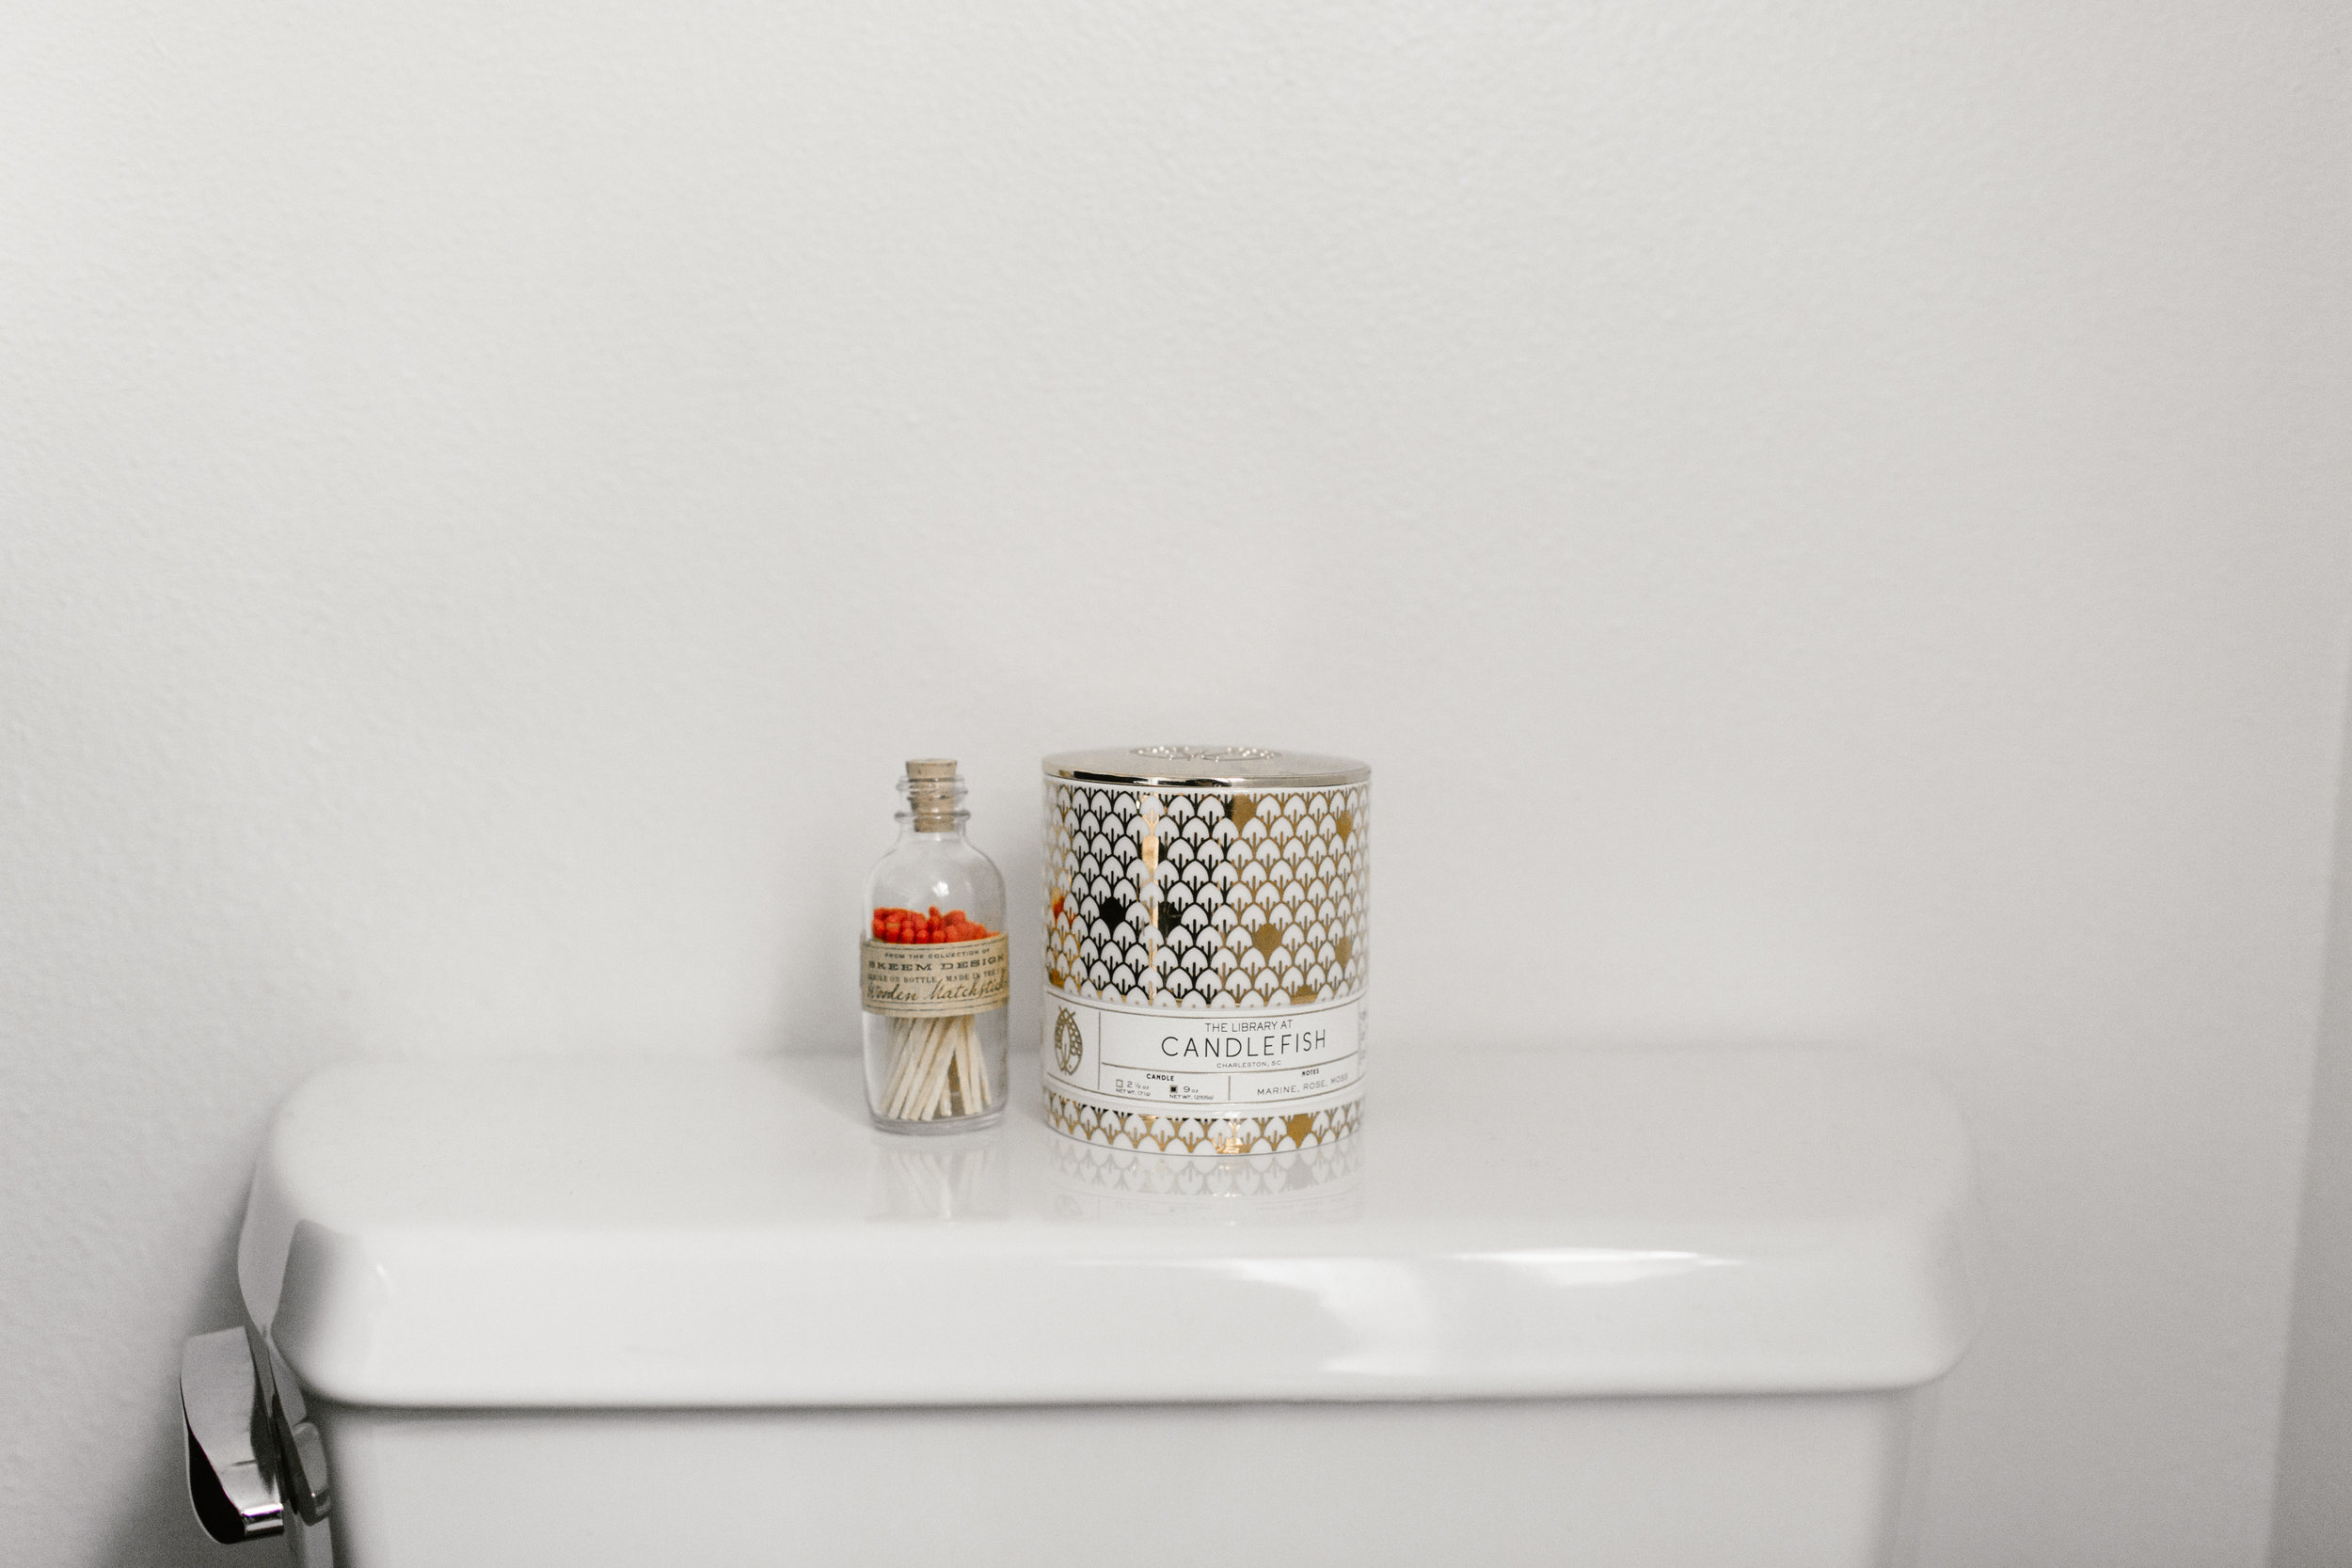
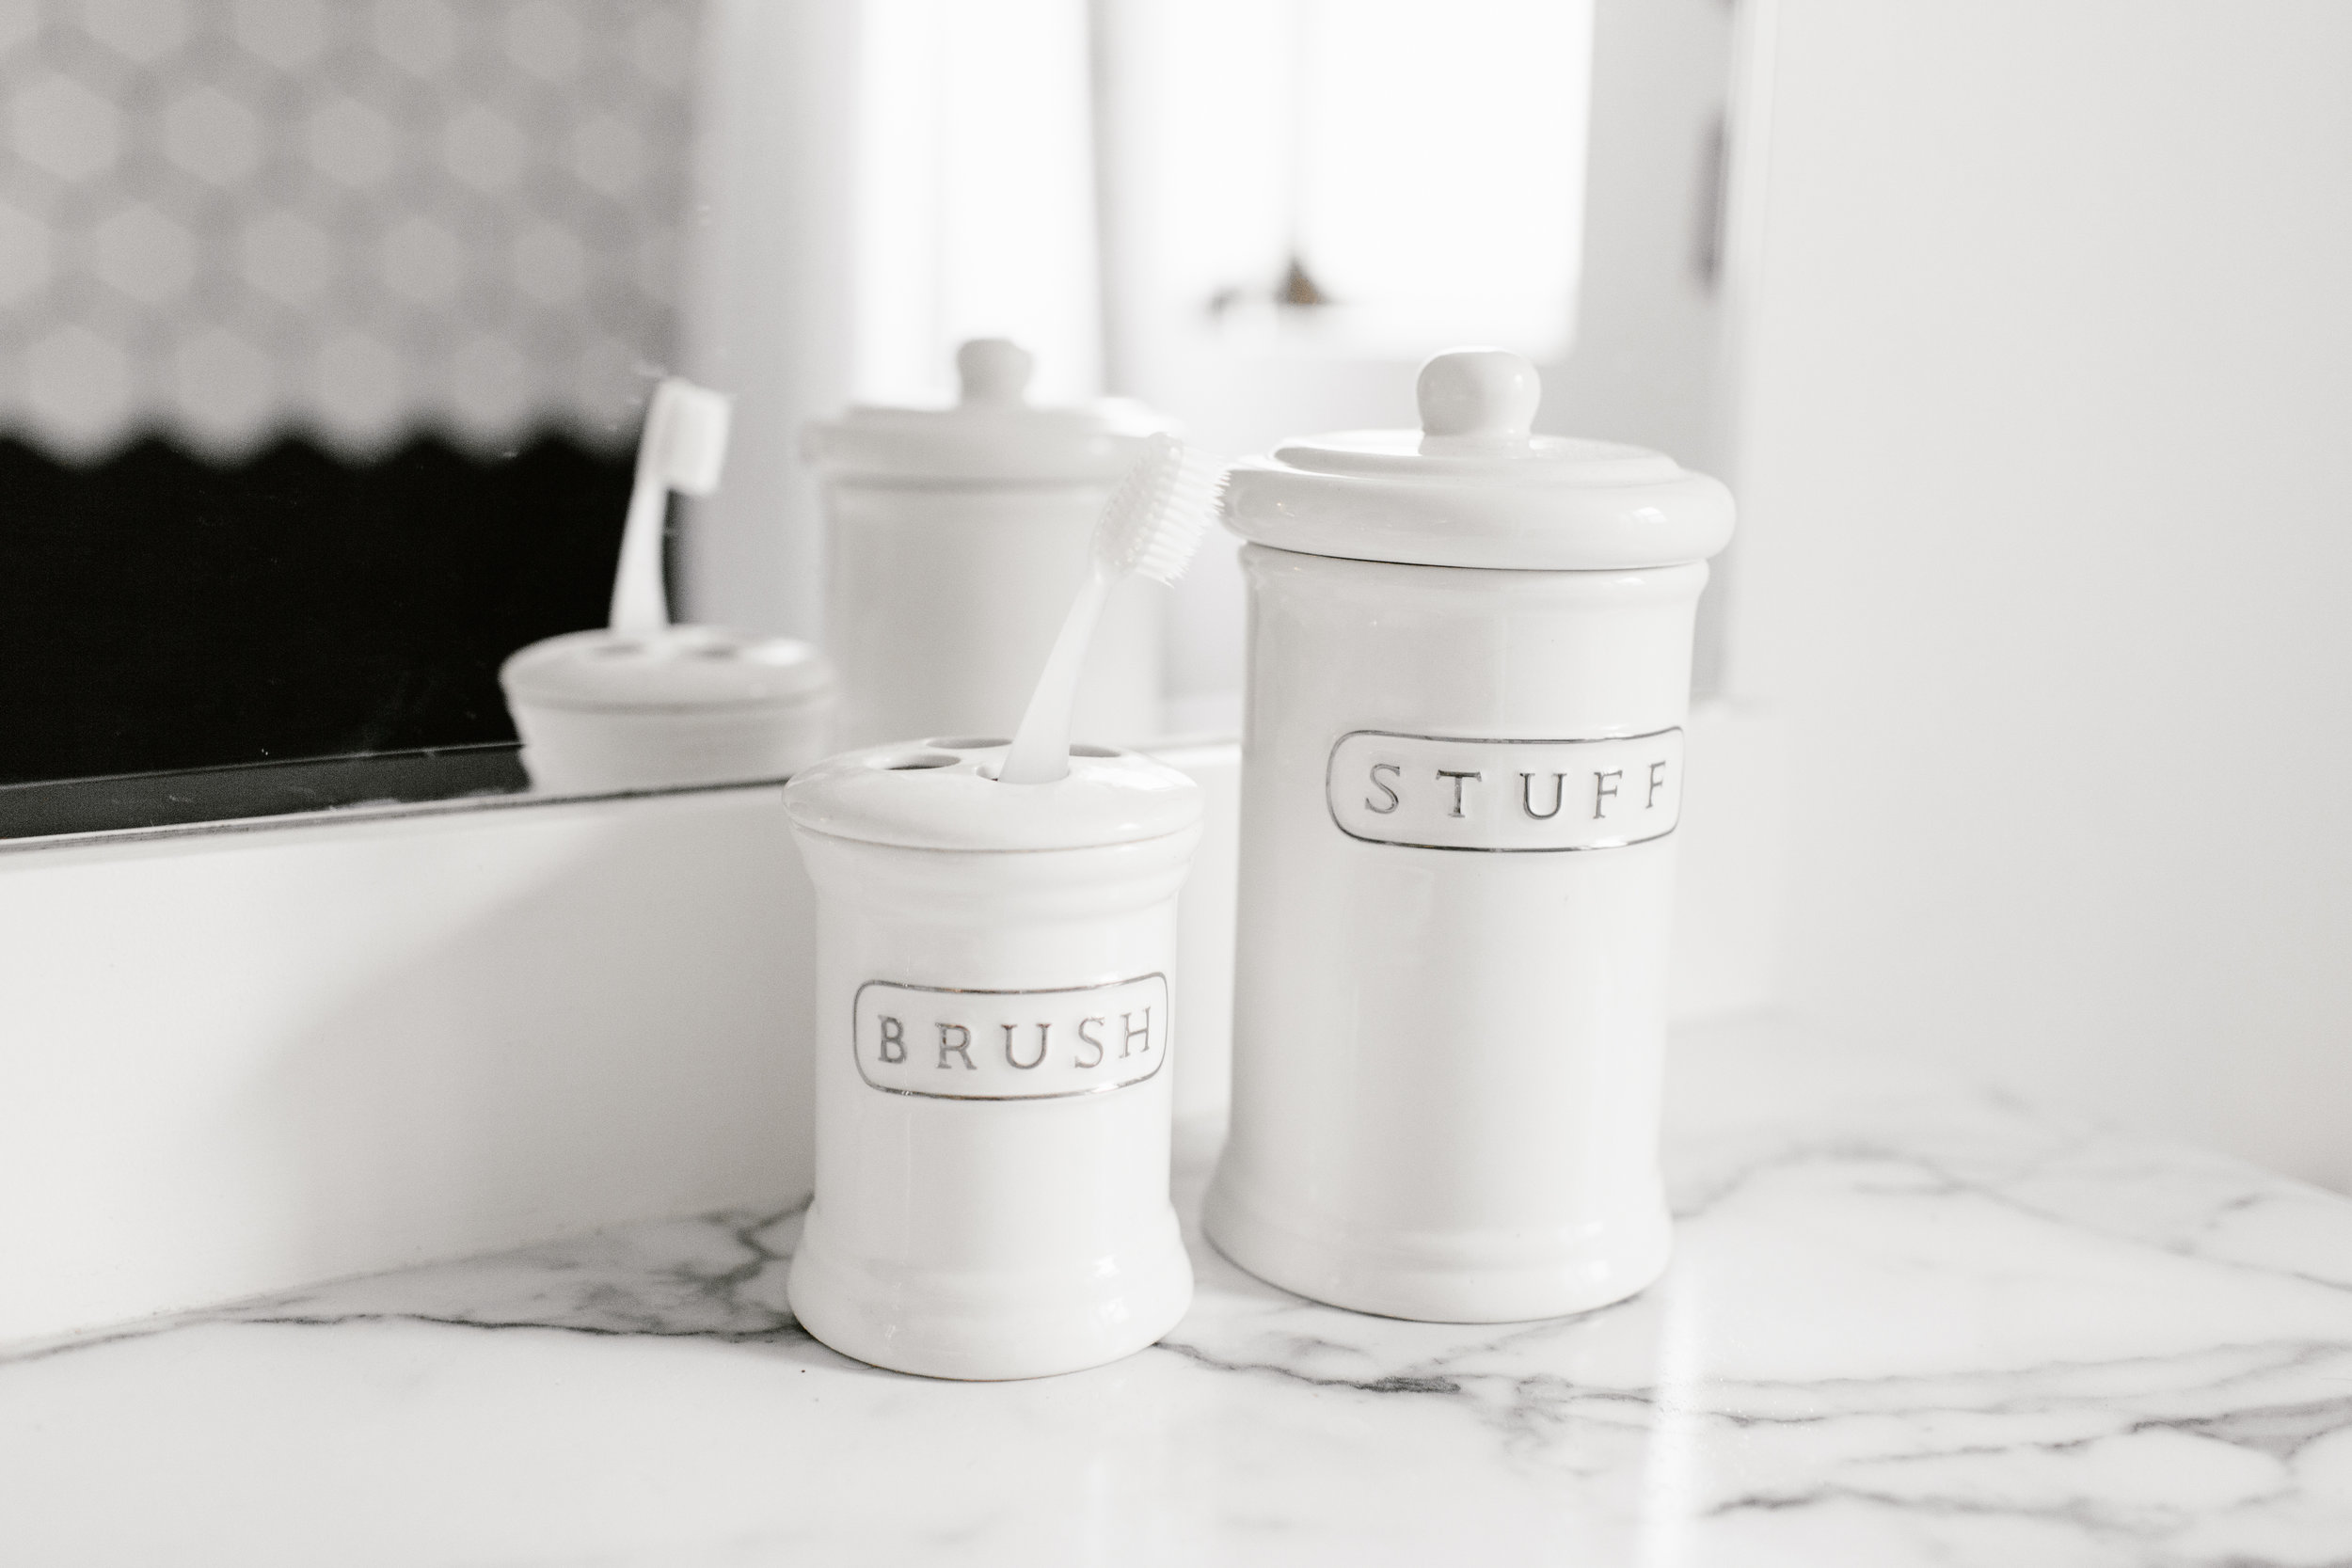
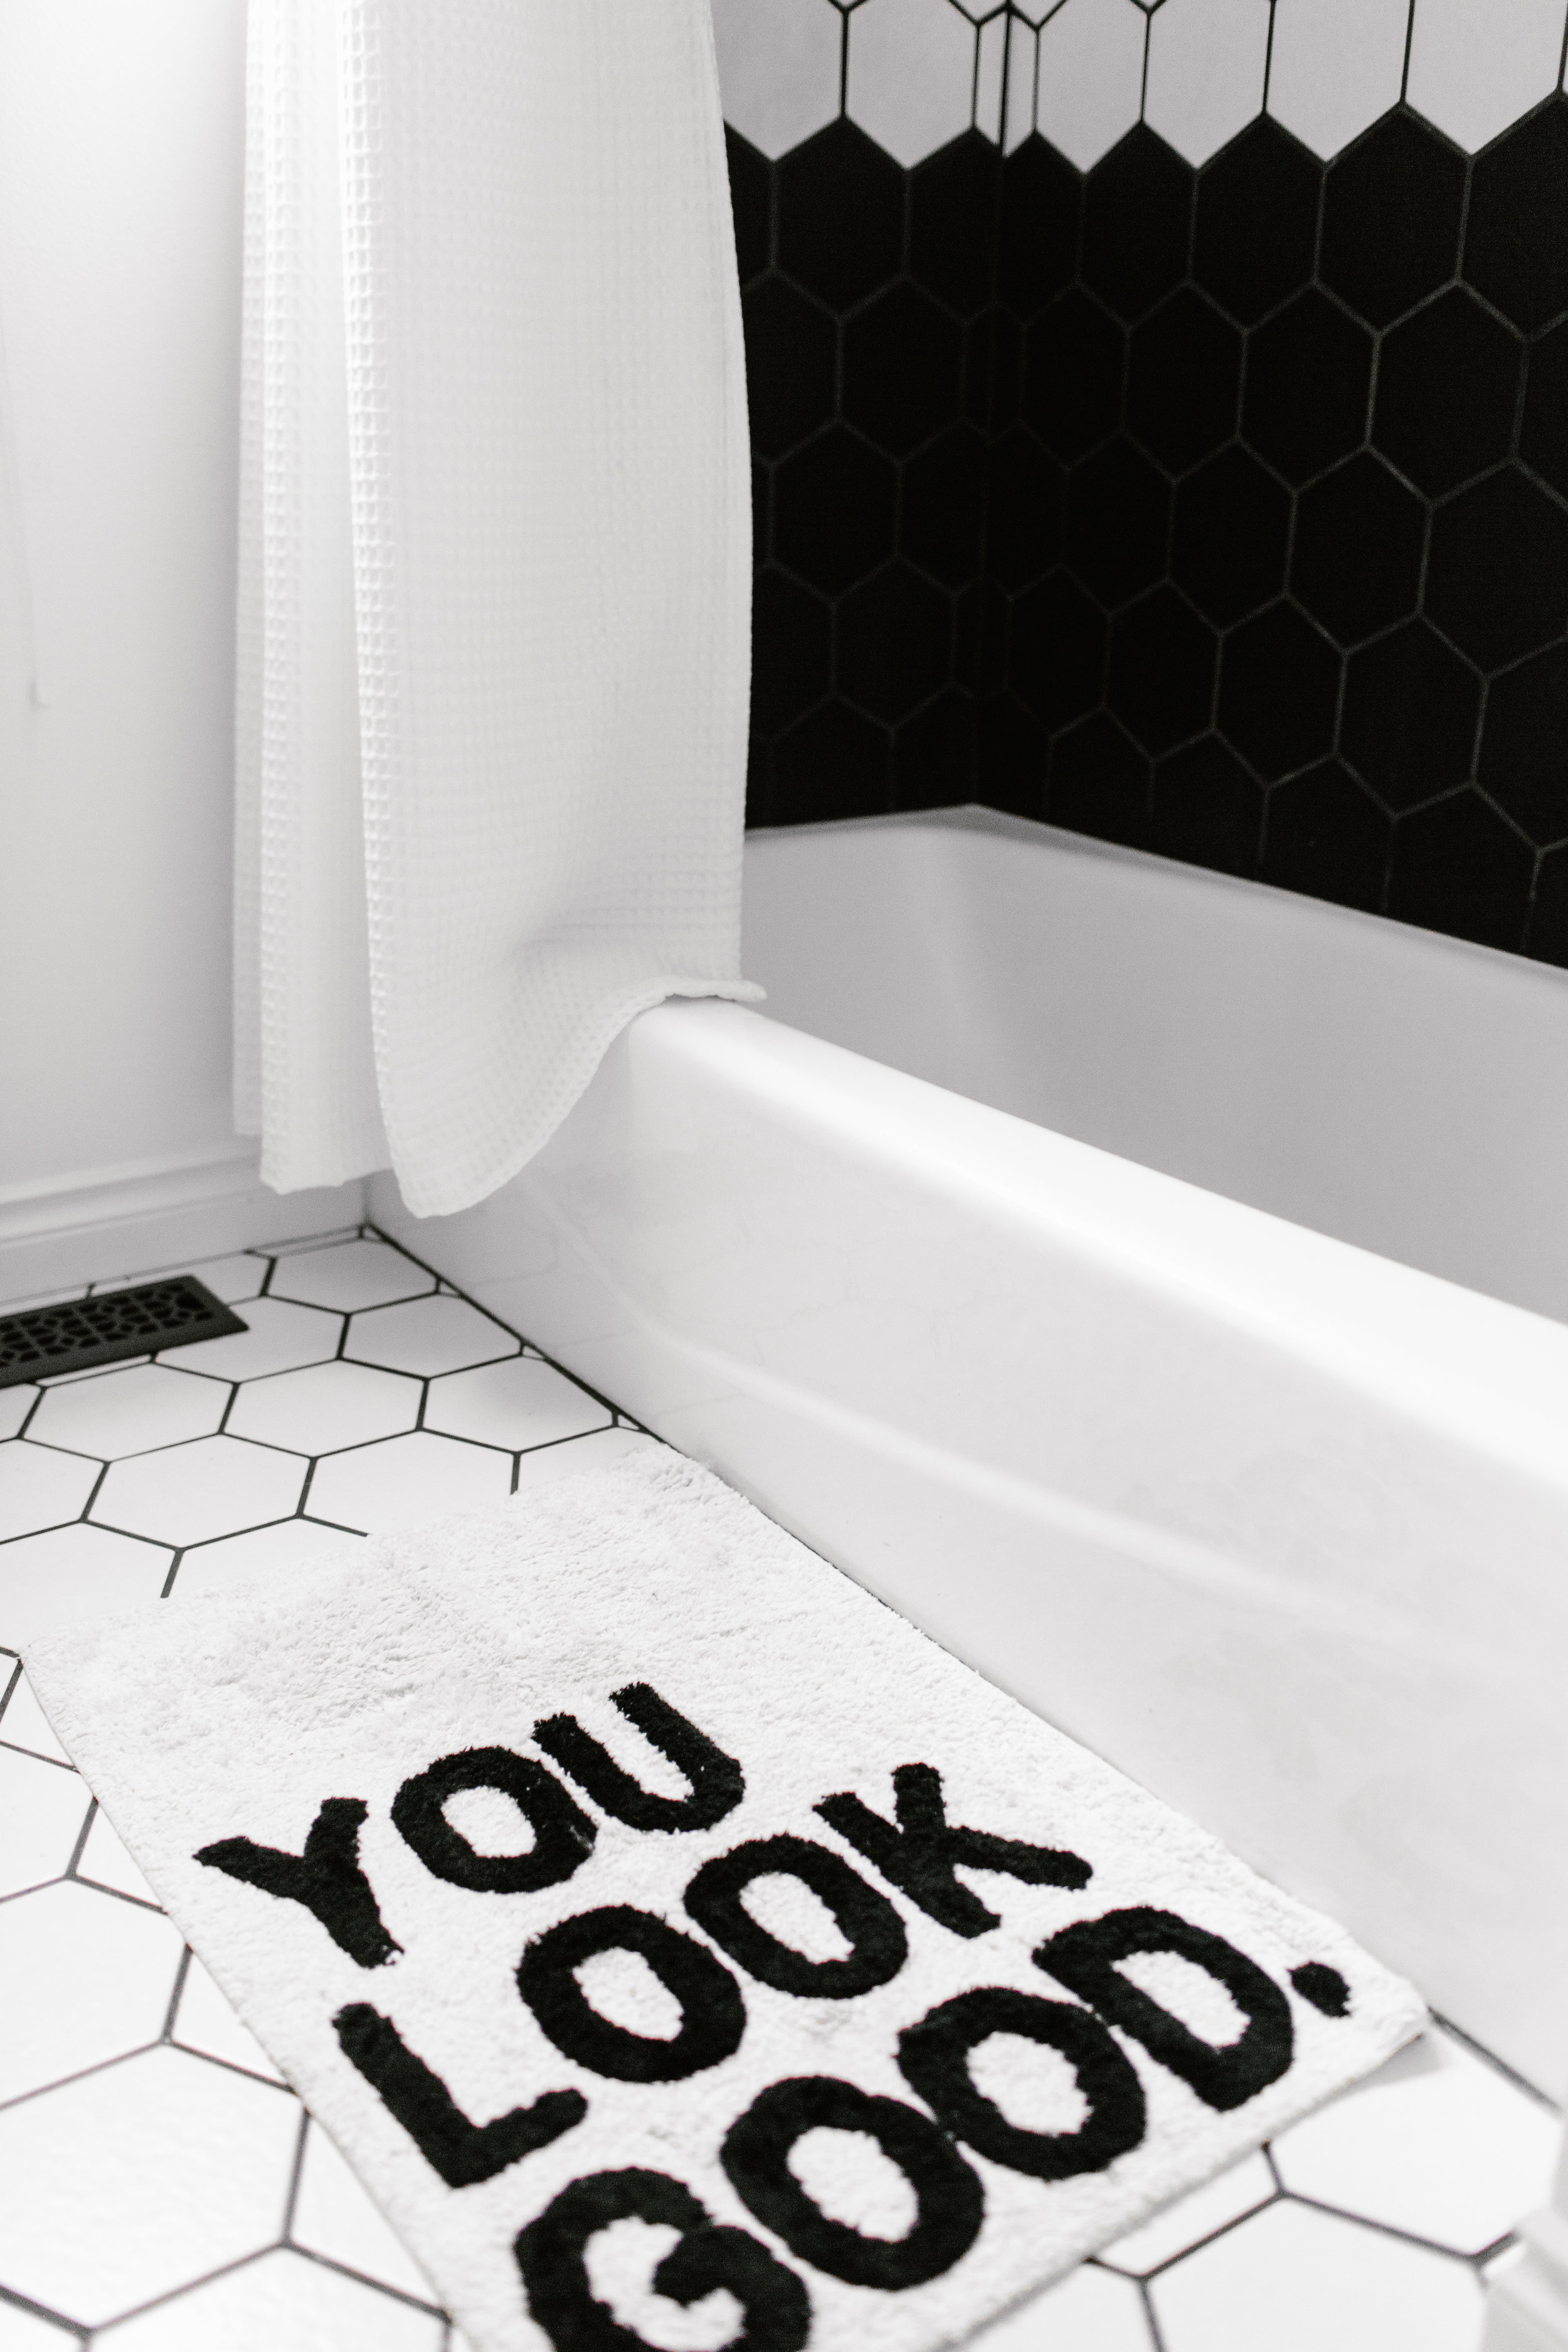
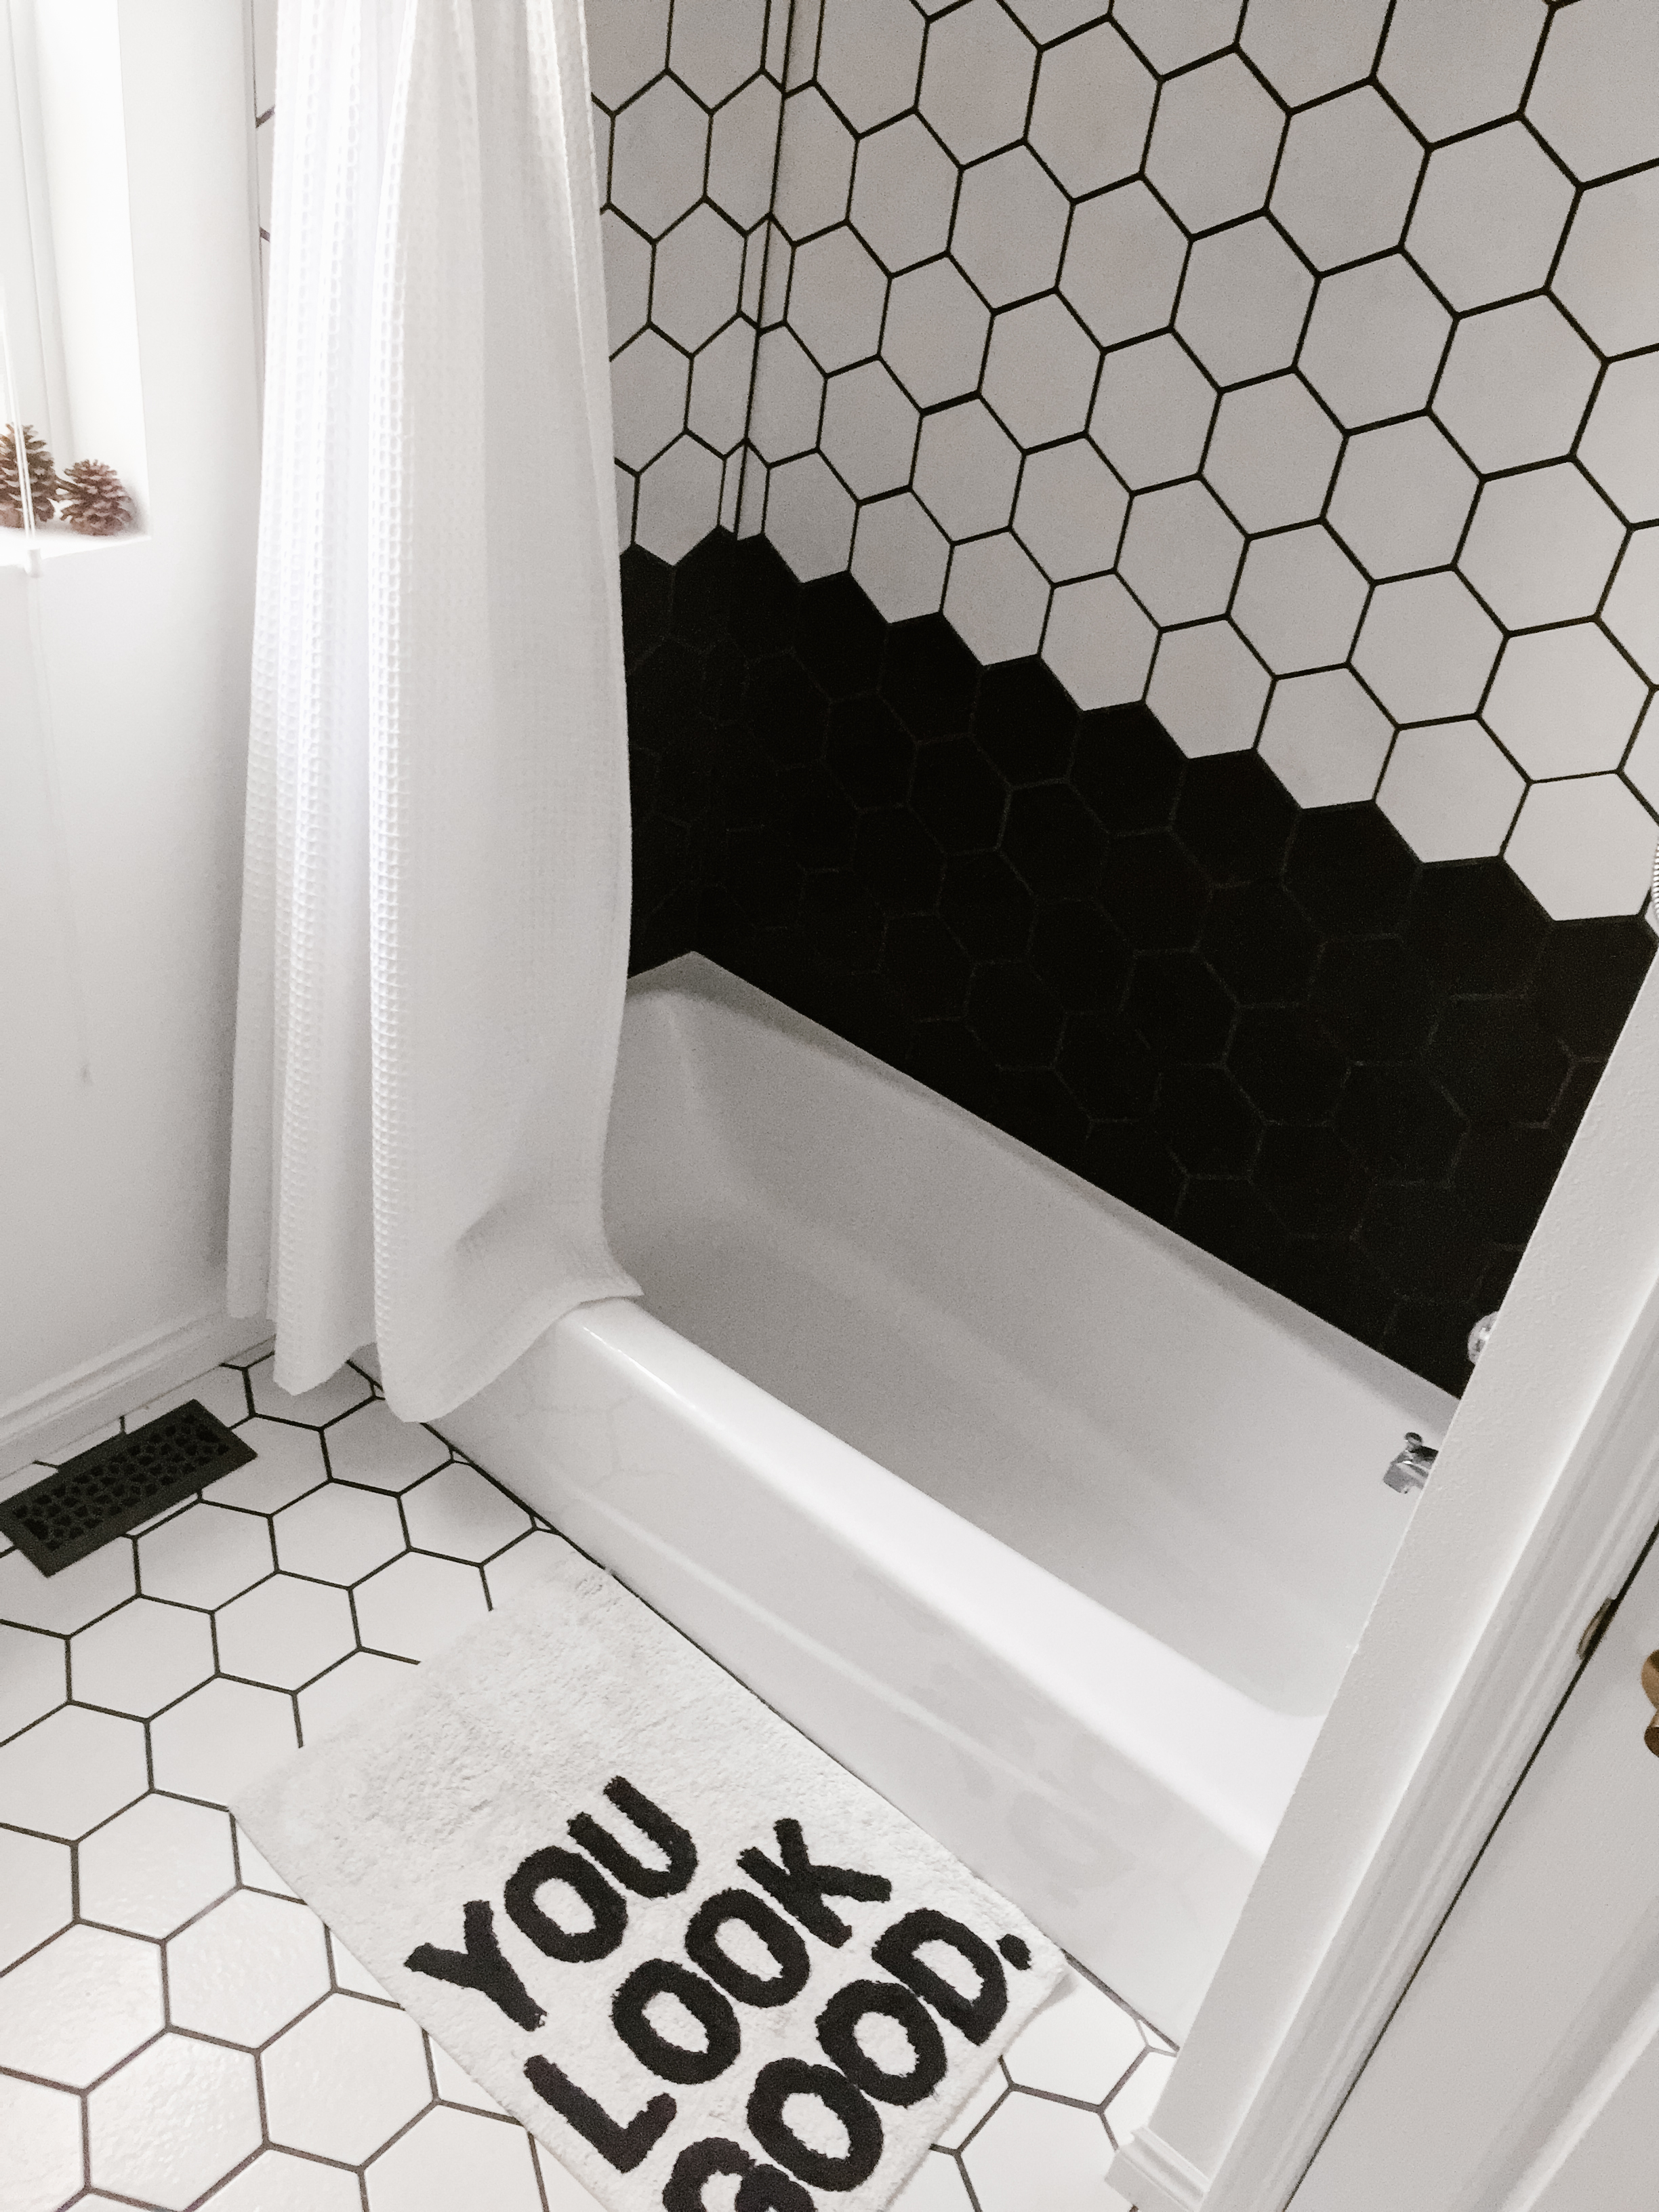
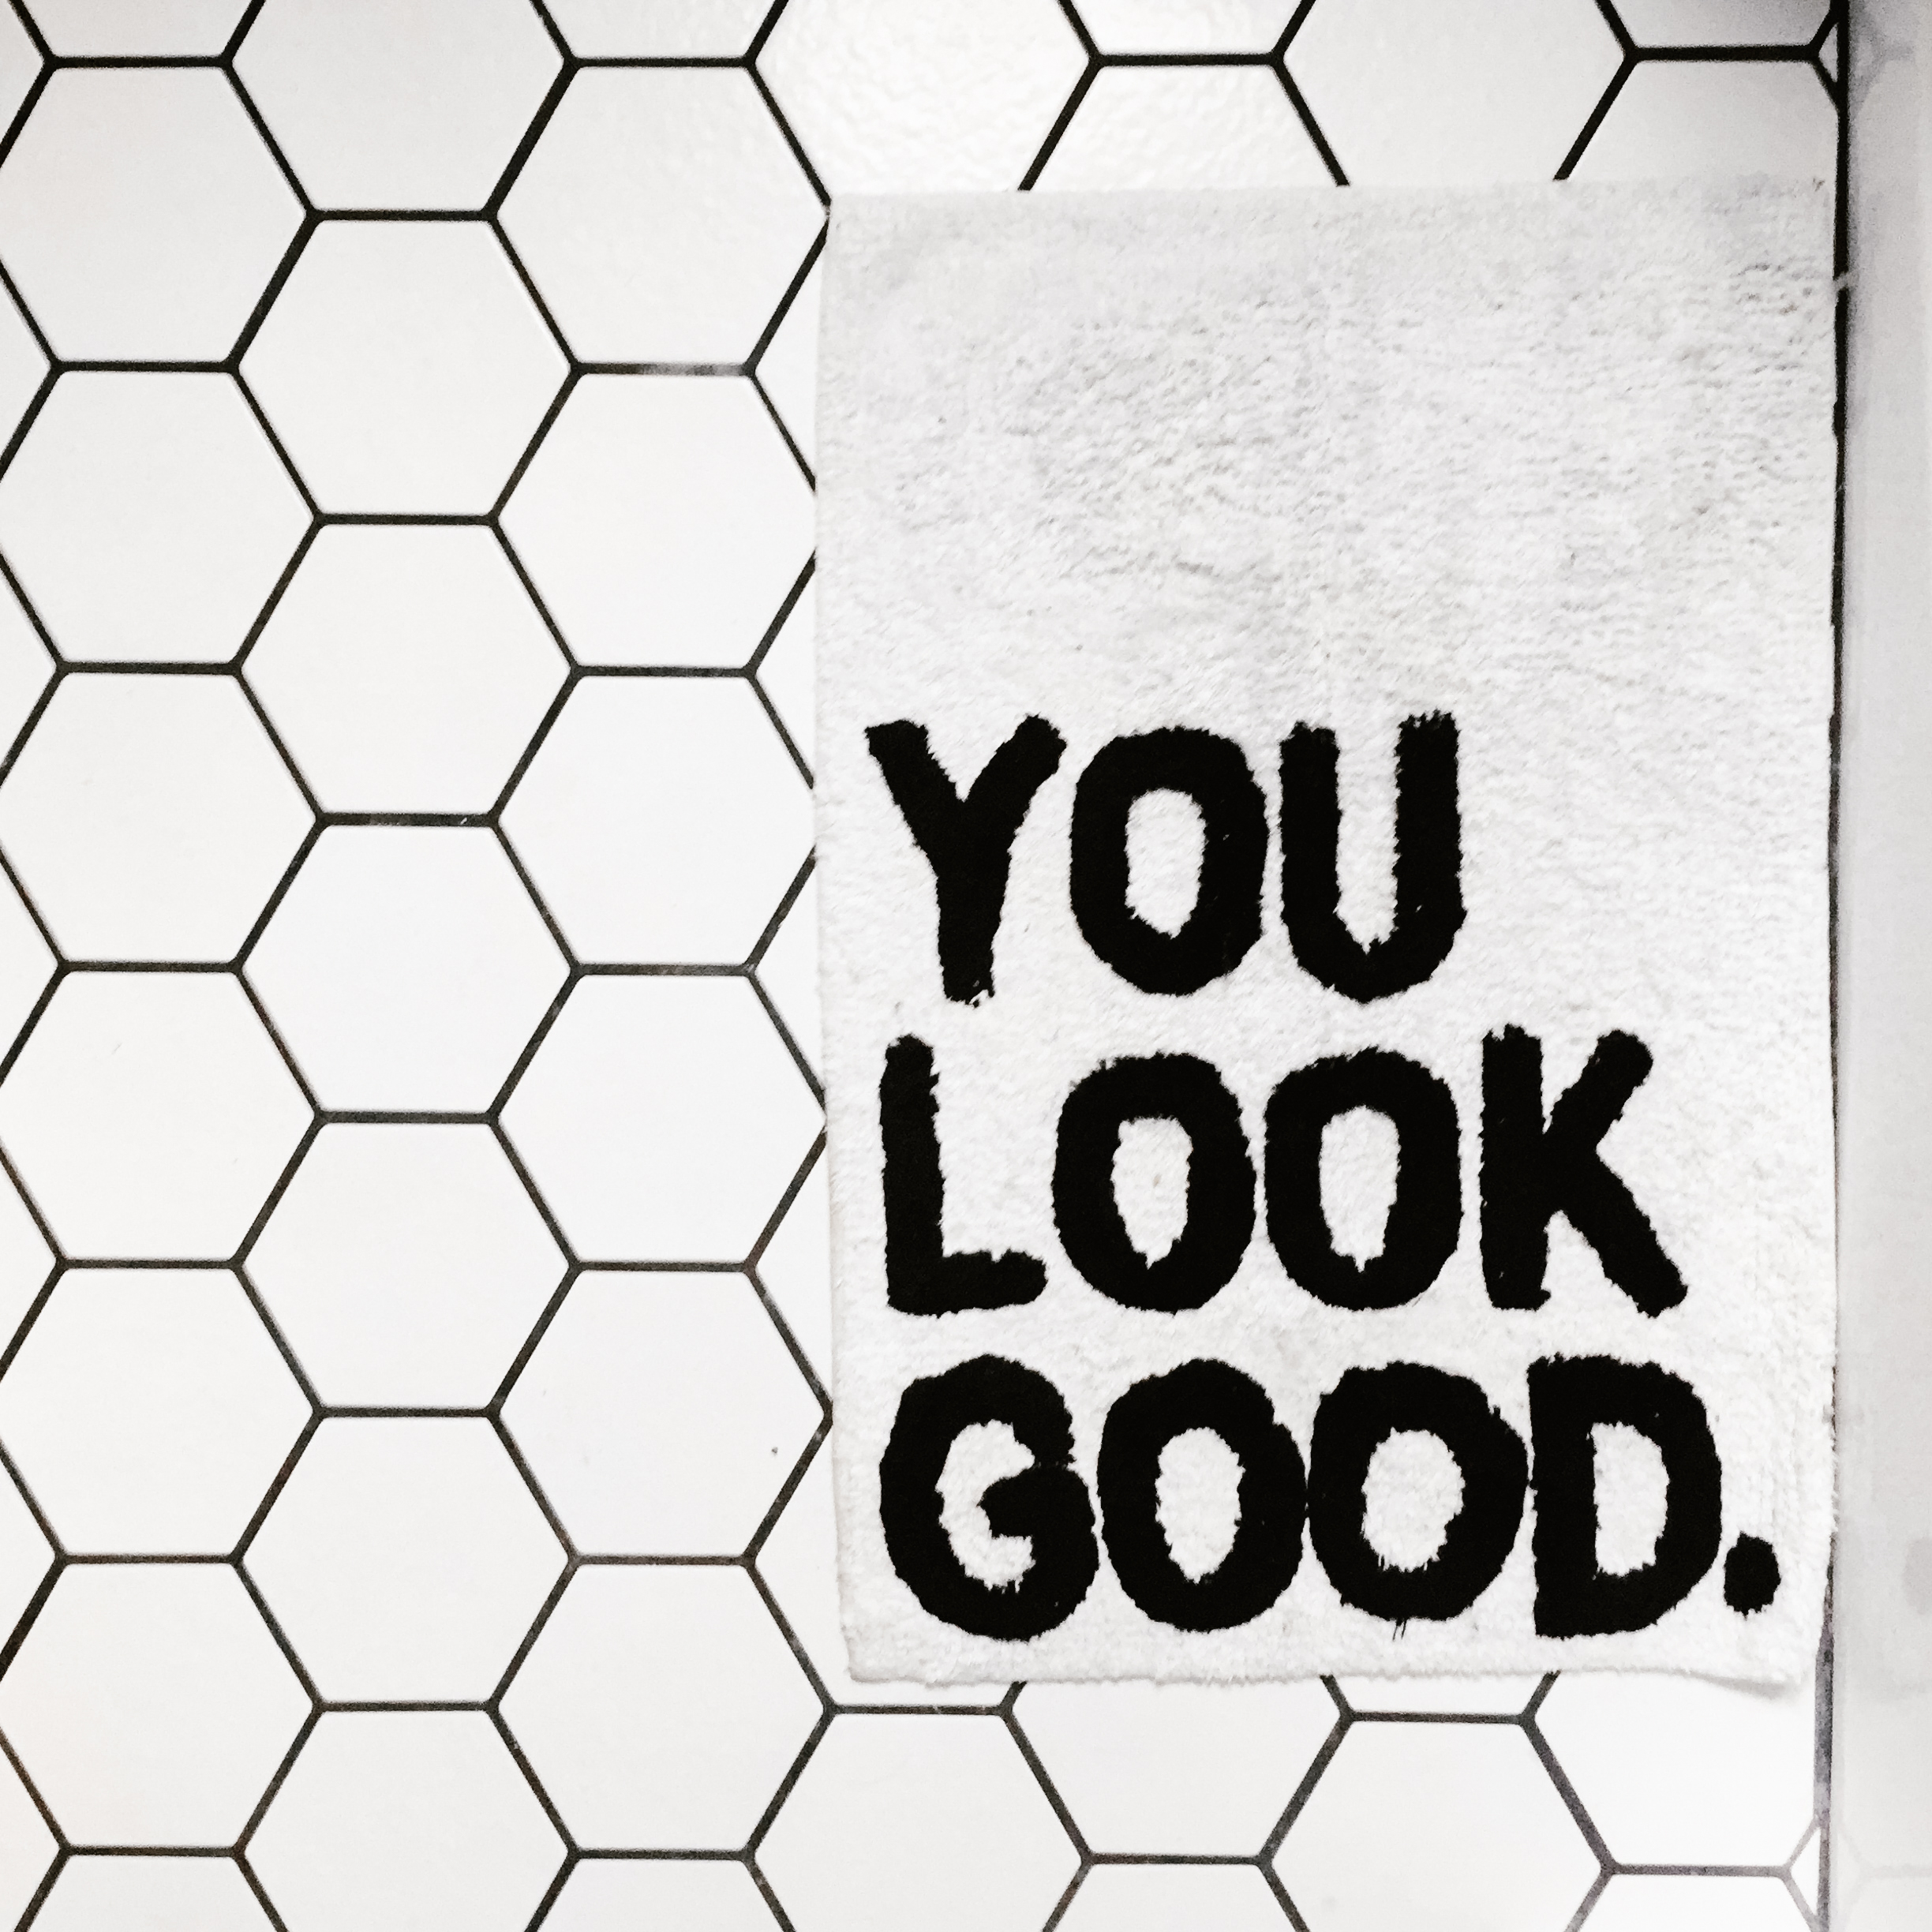
Paint: Sherman Wiliams Bathmat: Urban Outfitters Candle + Matches: Anthropologie (thanks, em!) Toothbrush Holders: Pottery Barn Shower Curtain: Macys Hotel Collection WALL ART: Watercolor Butts: Society 6 Should I Wash My Hair Flow Chart: Chipper Things So Fresh and So Clean: Eleven and West I Like You I Love You: Eleven and West